


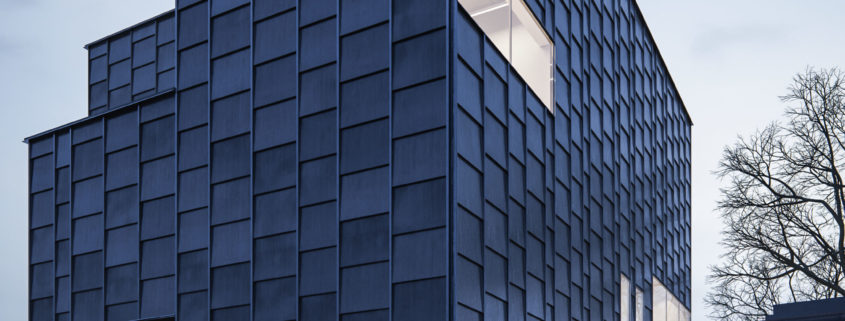
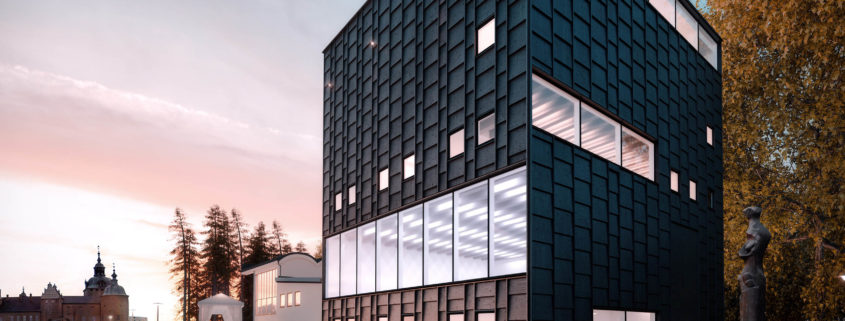
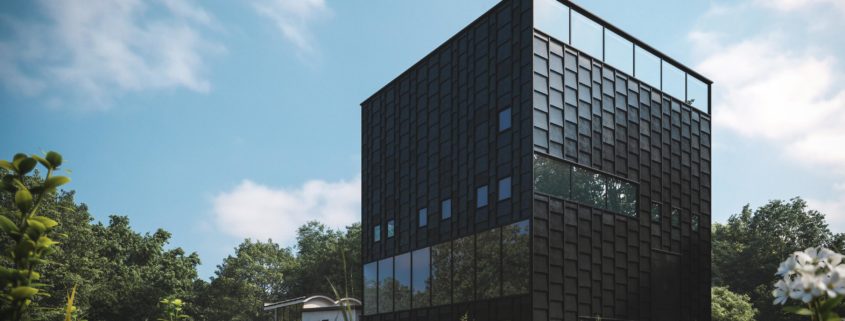
Kalmar Museum of Art
Finally its done. Such a great opportunity to join this challenge my final entry uploaded. Good luck everyone. Cheers…
Access the Best Articles about Architectural Visualization. Learn about all aspects of crafting images that tell stories.
Making Of's Case Studies WorkflowsShare your work and get immediate appreciation through discussion, feedback, and a possible nomination for the…
![]()
A weekly experiment, exploring the creative minds in Architectural Visualization and more. Find out what makes us all tick and push the limits.
Listen Now! Subscribe on iTunesOut with the old and in with the new! In Converted, I’m asking you to take an in-depth look at existing architecture near you or one you love worldwide and introduce something new.
See Entries & Join! About ConvertedFinally its done. Such a great opportunity to join this challenge my final entry uploaded. Good luck everyone. Cheers…
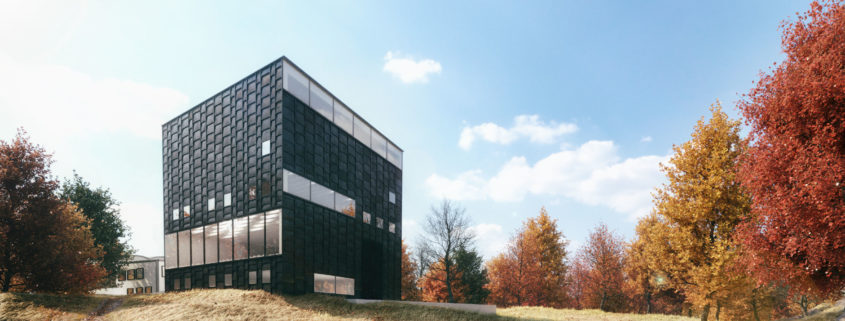
Alright so time for some more in depth info on the project as I’ve been keeping it short.
from the start, I wanted to attempt to use only corona with 0 models, etc. so every single detail, including the textures were hand made. somewhere hand shot by me with my cell phone while others were assembled from various online sources (with the exception of the <a href=”https://www.ronenbekerman.com/goto/pg-skies/” class=”thirstylink” rel=”nofollow” target=”_blank” title=”hdri” data-thirsty_gct_link_id=”33214″ data-thirsty_gct_link_name=”PG Skies” data-thirsty_gct_link_post_permalink=”/tomorrow-2017-challenge-submit/”>hdri sky from no-emotion). I created the foliage with <a href=”https://www.ronenbekerman.com/goto/growfx/” class=”thirstylink” rel=”nofollow” target=”_blank” title=”Grow fx” data-thirsty_gct_link_id=”34266″ data-thirsty_gct_link_name=”GrowFX” data-thirsty_gct_link_post_permalink=”/tomorrow-2017-challenge-submit/”>Grow fx and the scatter leaves where hand modeled. I knew I had little ram to work with so I tried to optimize as hard as I could while keeping the amount of scatter objects very high. this meant that the grass what in fact texture-less and was made with just a gradient and the final image had close to 0 displacement maps, water was made with a material and not modeled. I also kept 3 3ds max files 1 with the trees, 1 with the terrain (grass, path, bridge etc..) and another one with just the building.
I browsed the entire section a lot and noticed all the gloomy/exaggerated images and decided I did not want to be part of them. so, I kept my goal of a merry autumn scene with and followed the original concept. I started with the ground object which was a simple plane that was subdivided according to distance to camera and used the paint deform tool to get a general feel for the scene, next I worked in <a href=”https://www.ronenbekerman.com/goto/growfx/” class=”thirstylink” rel=”nofollow” target=”_blank” title=”grow fx” data-thirsty_gct_link_id=”34266″ data-thirsty_gct_link_name=”GrowFX” data-thirsty_gct_link_post_permalink=”/tomorrow-2017-challenge-submit/”>grow fx to create my golden grass geometry the hard part was getting the right tone/color
the golden grass was a tad bit tricky b/c it needed to have the right greenish golden color so it looked alive and not completely dry like the first couple of images. In the end after asking some people who know nothing about archviz for input on colors or if anything looked off I found a couple of flaws in the grass and it was ready to go. The fact that scattering objects with the right mapping/setting was possible with little memory was great and made the whole process less nerve racking. (to be honest I was really worried whether my poor laptop could handle it at the beginning) the scattering objects are as follows:
20k leaves not on path, 20k leaves forest, 15k leaves on path, 5k leaves on river, 22k dry leaves, 200k river stones, 400k fallen grass, 7k short grass, 30k medium grass, 15k long grass, 40k fallen grass forest, 3k short grass forest, 10k medium grass forest, 5k long grass forest
so 792k scatter objects plus the manually placed proxies (trees and more grass) (sorry I lost count of the number of polys)
working on the building was probably the easiest part as it was just a matter of finding a reference object for scale and modeling from the arch plans the cladding on the building was done by hand and took around 30-40 min. I probably spent the most amount of time playing around with my materials. all materials are made from scratch (including the maps)
during the process, I probably crashed my laptop about 15 times, it barely managed with 3 ready boost thumb drives (I can’t believe it worked either). and everything after that just clicked together, I learn a lot from each project I do and this one was no different as I felt I grew less dependent on plugins and got a good feel of corona. as for post production this image just has some very basic tone adjustments.
f I had to do anything different I would probably start with the building as that would have saved me lots of small problems later. I would also spend more time with getting my camera setup properly. and a lot more time studying the color pallet of autumn as I feel I got a good result but it could have been a lot better. Lastly, I feel I missed a big opportunity of adding mountains in my background.
in the end i feel like the image definitely has room for improvement but i’m still happy with what i was able to accomplish, this “event” was a lot of fun and i’m grateful for the challenge/opportunity
I was inspired by the Grieghallen tutorial by Tamas Medve (featured a long time ago on the blog) to try my hand at making his wet stone pavers before the competition was ever announced.
When the competition started, I figured it would be a good opportunity to both add to my portfolio while also testing the pavers in a full scene.
My computer at home is quite old and as such it really can’t handle large expansive scenes, or scenes with a lot of assets or accessories so I had to be clever about chosing my camera angle. Luckily I found a reference photo of the building online which I used as my inspiration. The angle is suitably dramatic and also limits the amount of background scenery I would have to build, allowing me to focus on the lighting and materials and not worry about my computer dying!
The scene itself is fairly straightforward spline modeling for the most part. The pavers out the front are a simple texture with a custom displacement as in Tamas’ tutorial – with a plane of water put on top to simulate the puddles. The background (and the reflection in the windows) are free building models downloaded from 3dsky.org and most of the textures came from my own personal library, Arroway or Textures.com. The background trees are a simple forestpack with some zDepth applied in post production. I made extensive use of the Corona Light Mix as it allowed me to leave my computer render the scene out once (as it took forever on my old machine) and then tweak the lighting afterwards to get it looking how I wanted. I don’t think I would have had the time otherwise to adjust the lighting in the short amount of time I spent on the project (overall I think it was 3 days after work).
Here is my final submission, I’ve had a lot of fun and experimented along the way, I could always do more but there has to be a point at which to end. Best of luck to all entrants.
Ok I Think I am satisfied with the result, that exactly what I imagined for the scene .
at the end i would like like to say that i really enjoyed working on this project .
Thank you and good luck for all.
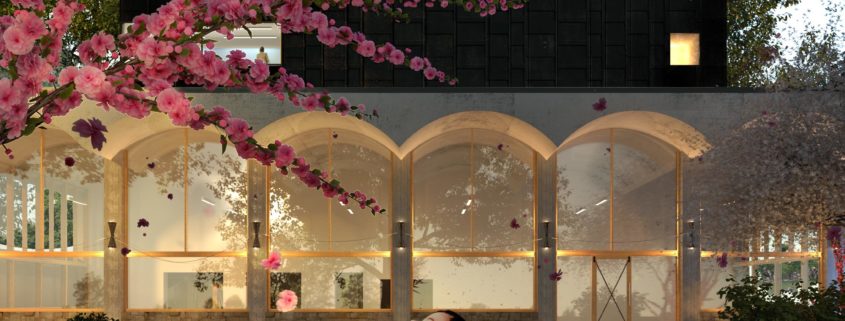
Scene
The renders setting is the moment when a warm evening breeze picks up fragrant pink tree blossoms, carrying them higher into the sky, and them gently layering on the pavement. A little boy in awe tries to catch the little pink flowers.
Process (3DS Max, Vray, Photoshop):
At first I build a general massing model.
Then, rendered in clay material and chose HDRI map.
After that rendered with basic materials on and printed and sketched over.
After that picked camera proportions. At first I set it up as the landscape image but after some tests decided that I like portrait better.
After that started to add Forest Pack greenery and added particle system.
At the very end tuned materials and minor mood lighting.