


Making of “Villa in a Forest”
Making of a recently completed set of images for a private villa designed by mw|works. Situated in a breathtaking environment, this was a challenging but very exciting project to take on and here we describe our process with Cinema 4D and V-Ray as our main tools of the trade.
Introduction
Hi all,
I’m Alberto Cibinetto, founder and project manager at Baumatte Architectural Visualization Studio and founder of Bauclassroom ArchVIZ school based in Treviso, Italy.
First of all, we like to thank Ronen for this opportunity and attention for our project. It’s an honor for us to write down a making-of this set of images. We hope that someone could find inspiration from it as we did with other great articles in this blog.
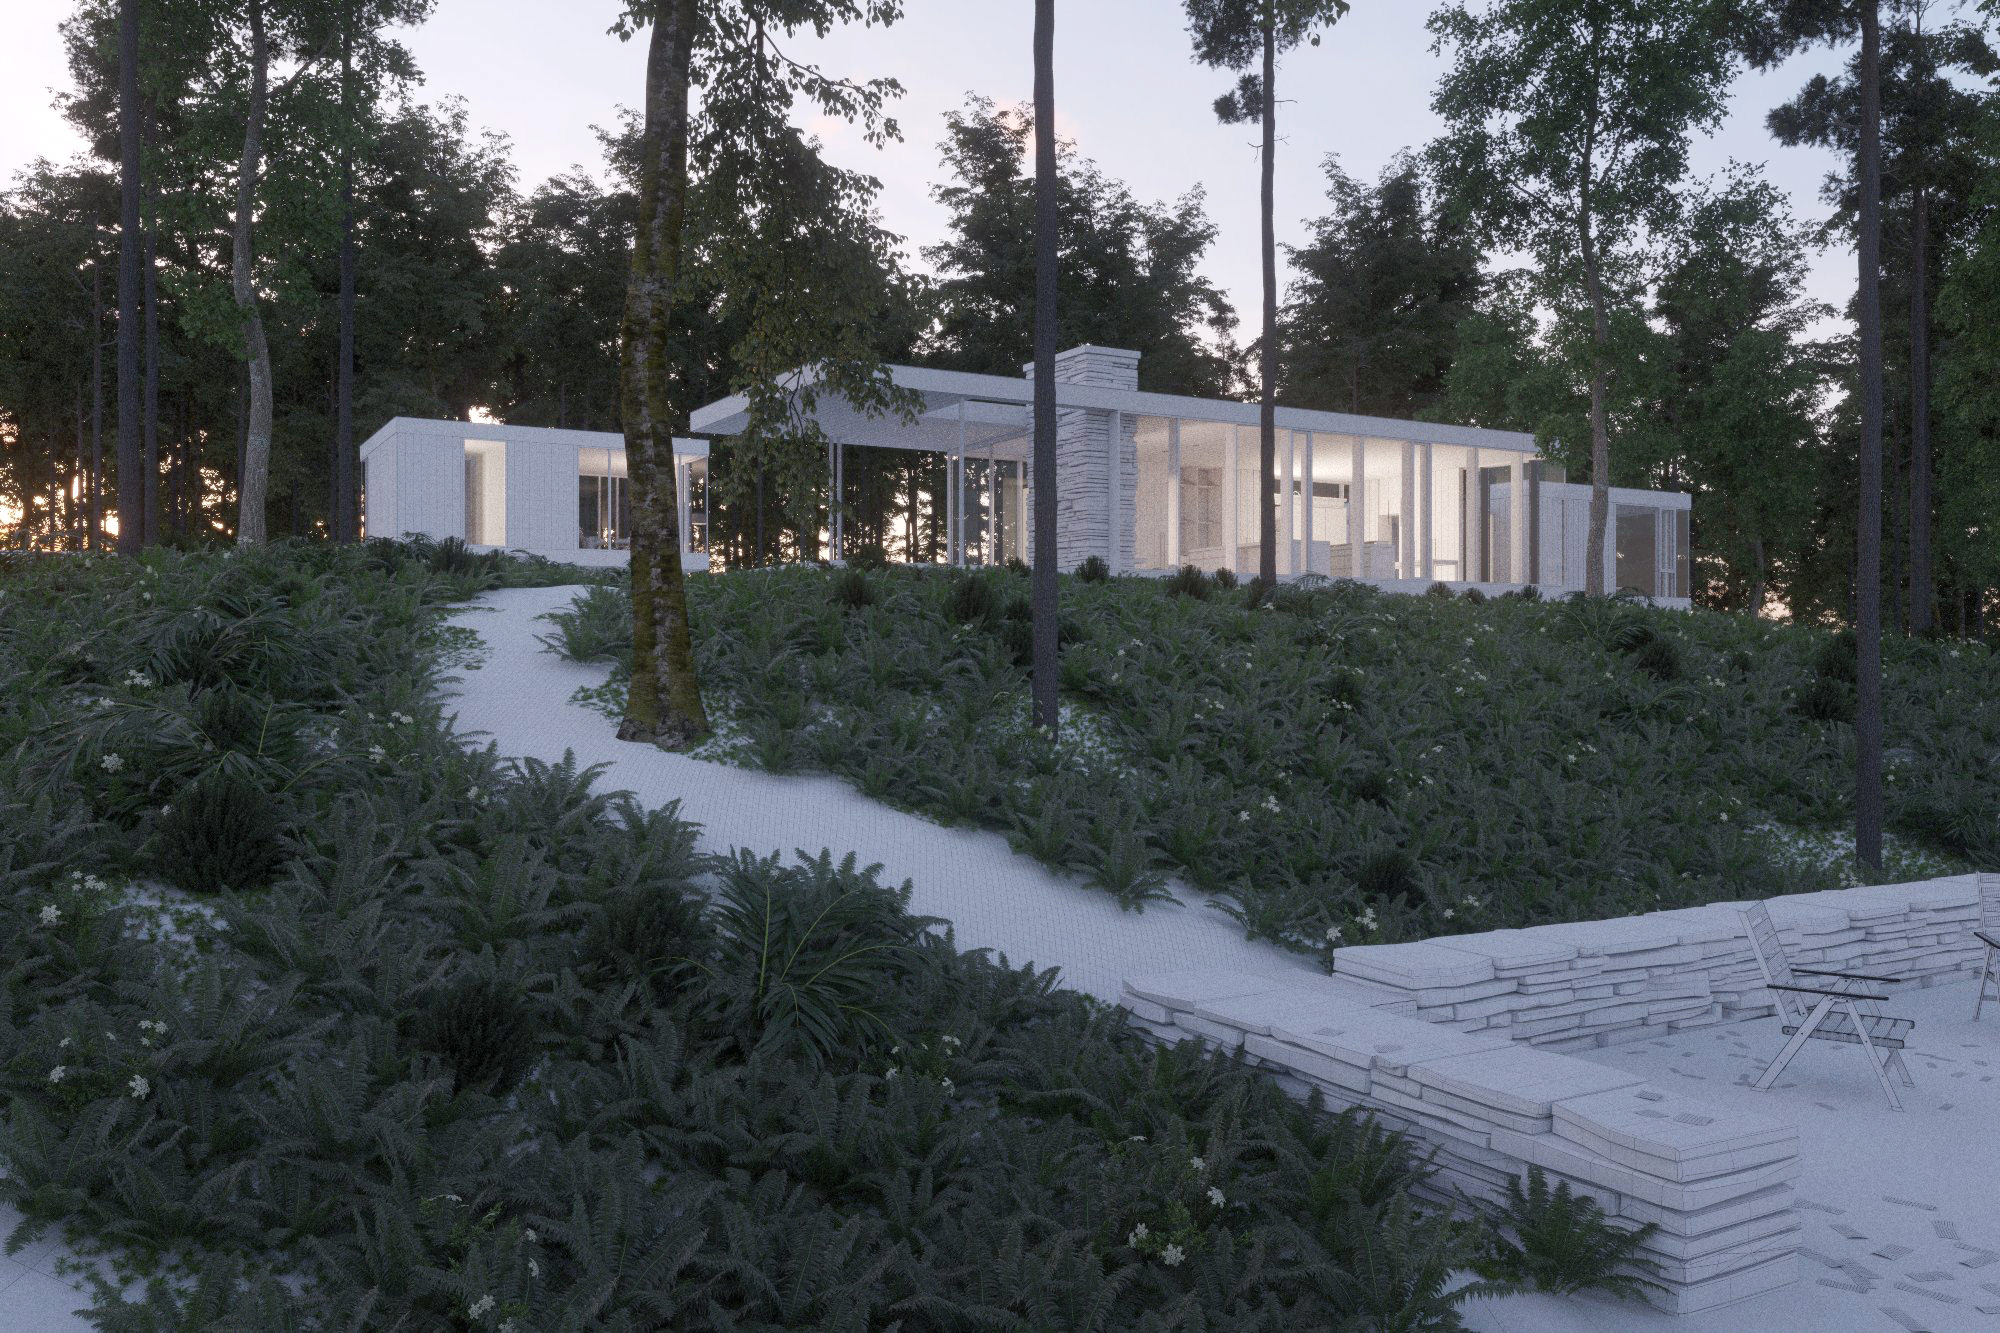
We recently completed a set of images for a private villa designed by mw|works architecture+design located in a breathtaking environment. This was a difficult but exciting part of our workflow in order to work mostly in 3d with little post production.
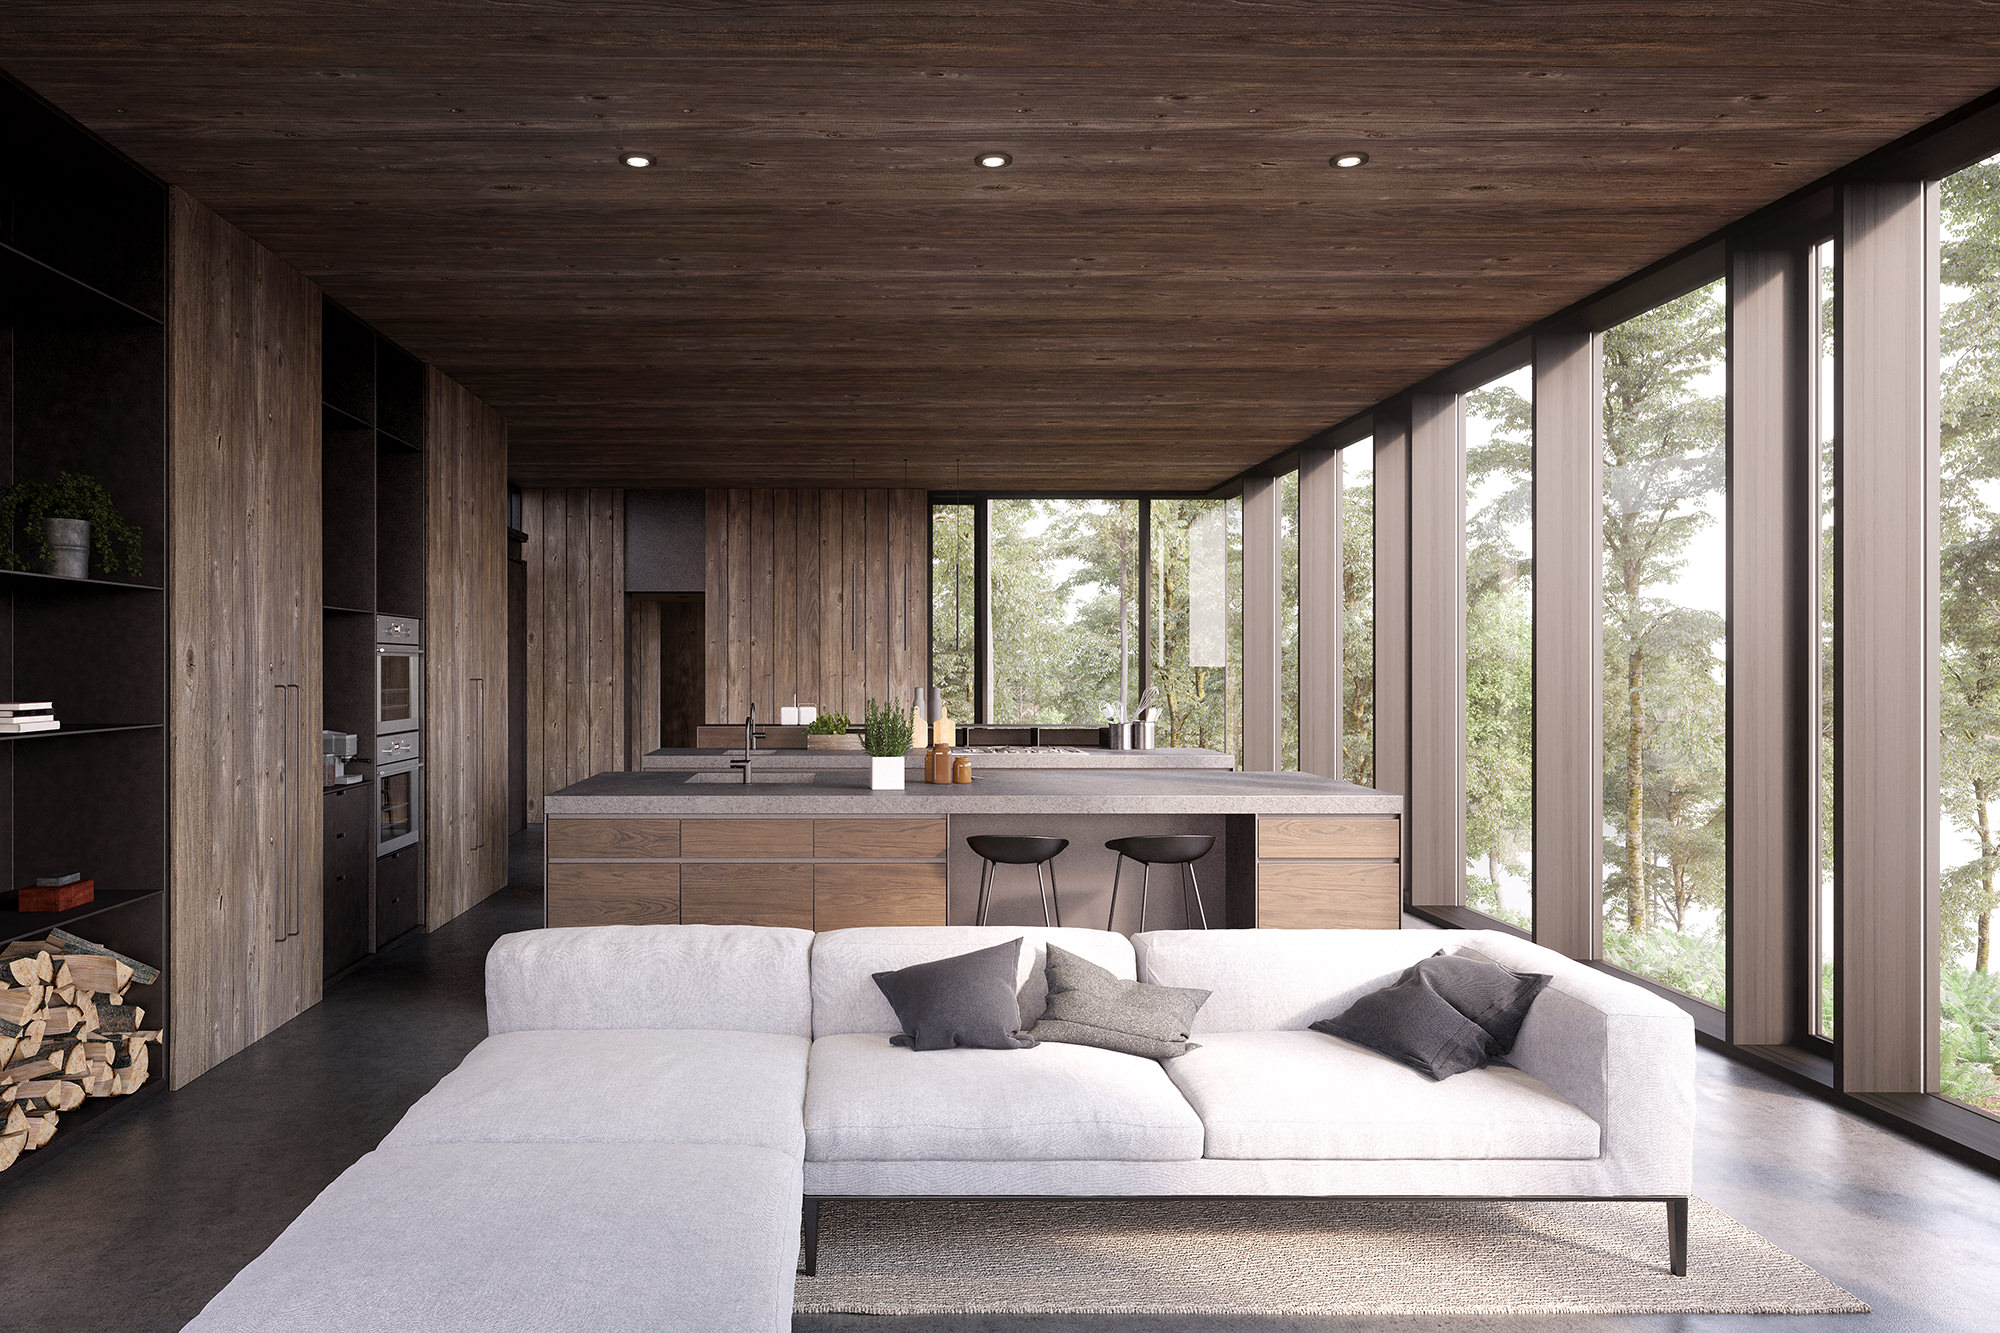
Here are 3 images of the exterior set…
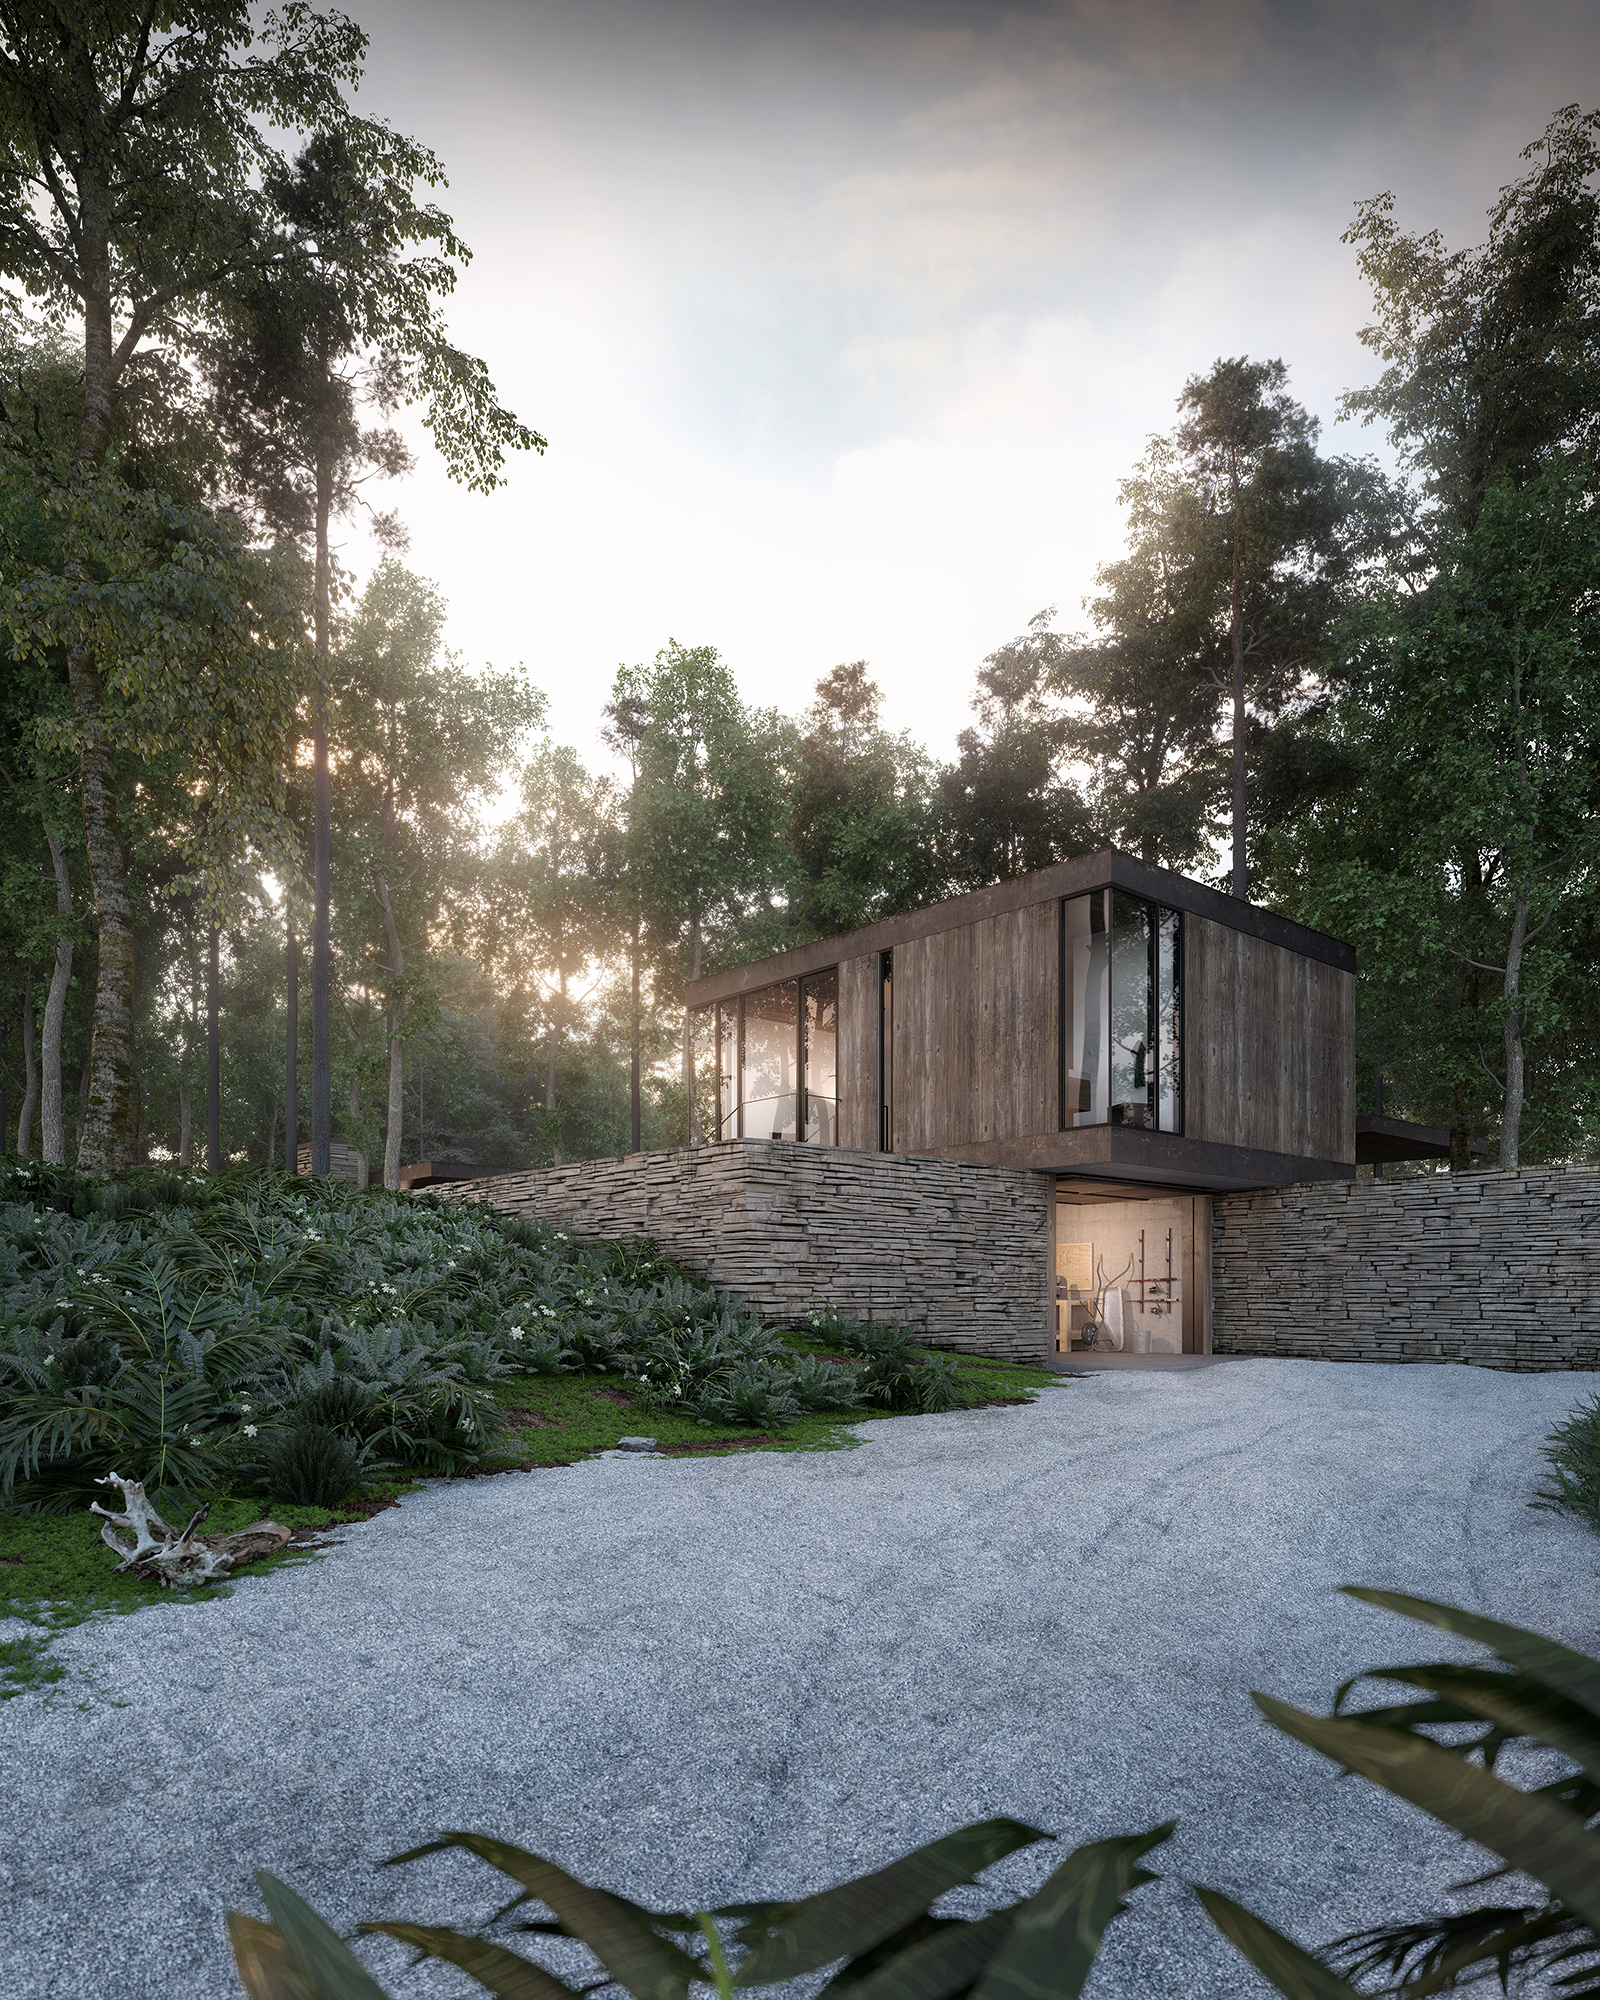
Who left it open
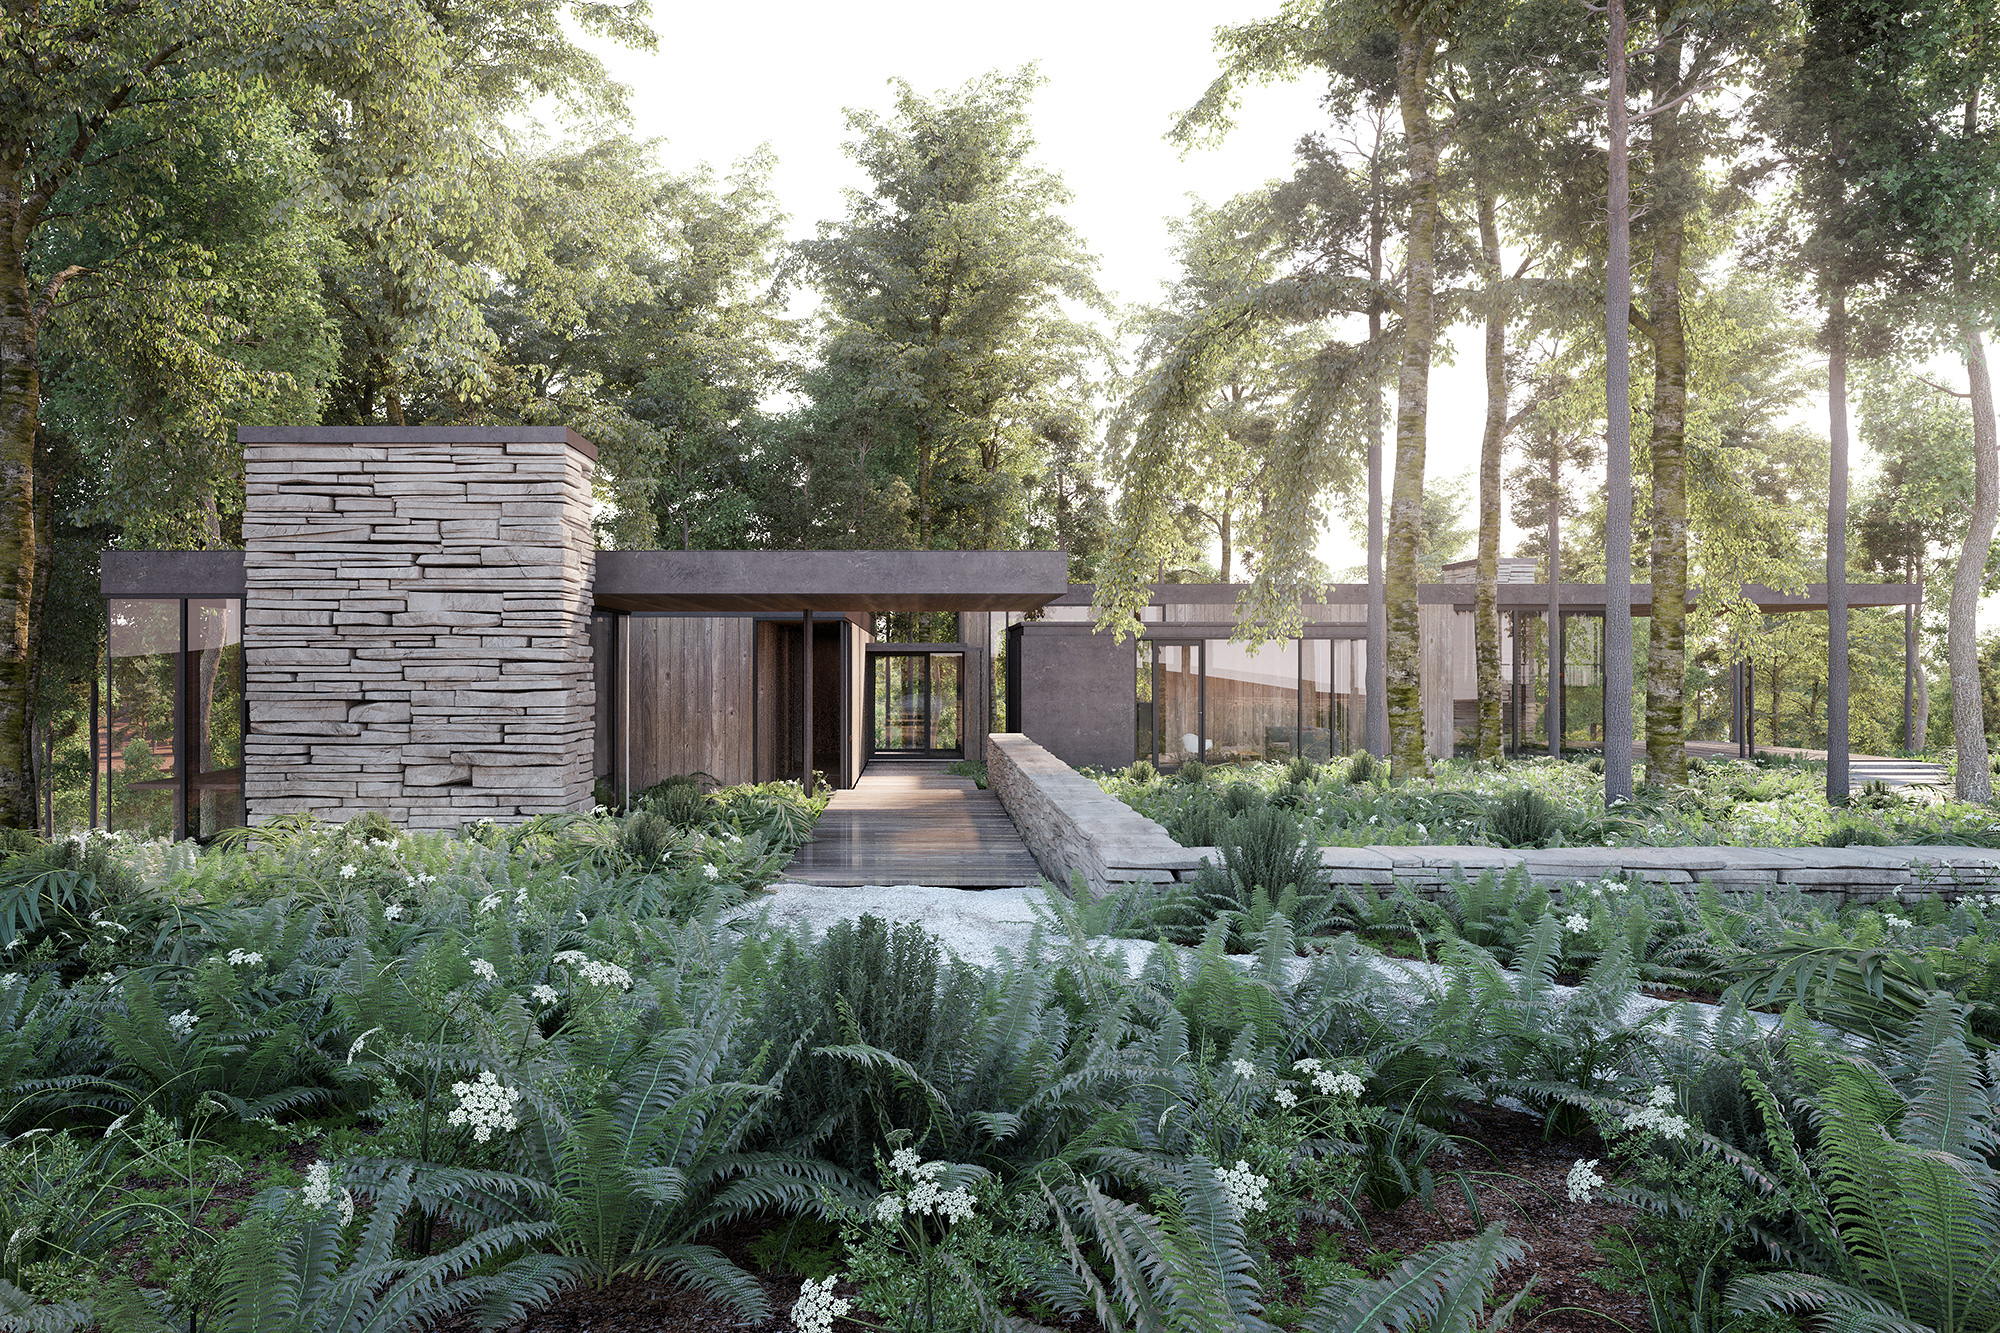
Lost in vegetation
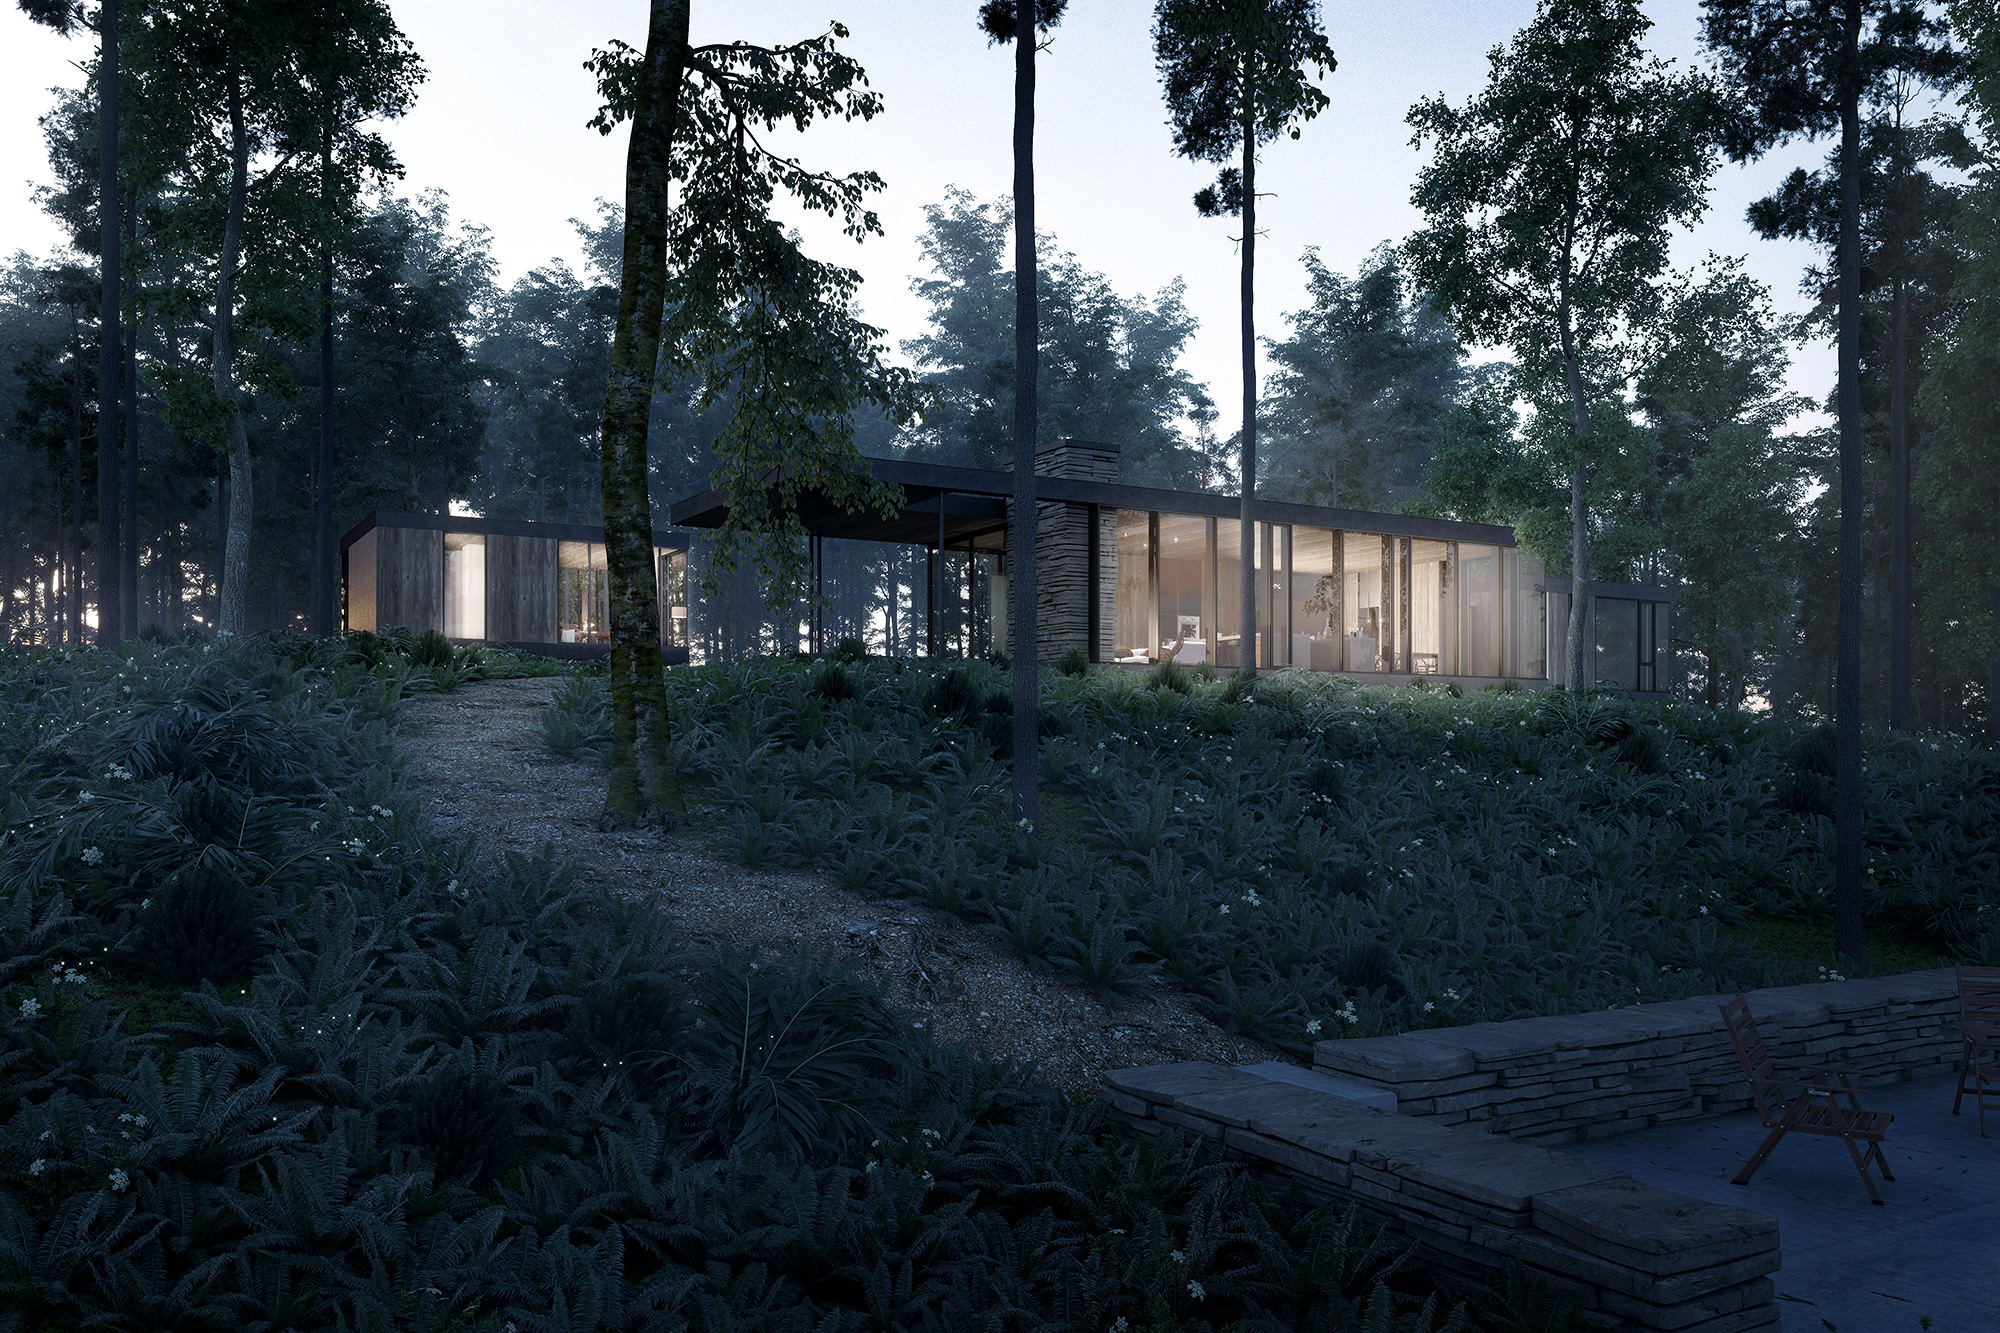
Dew
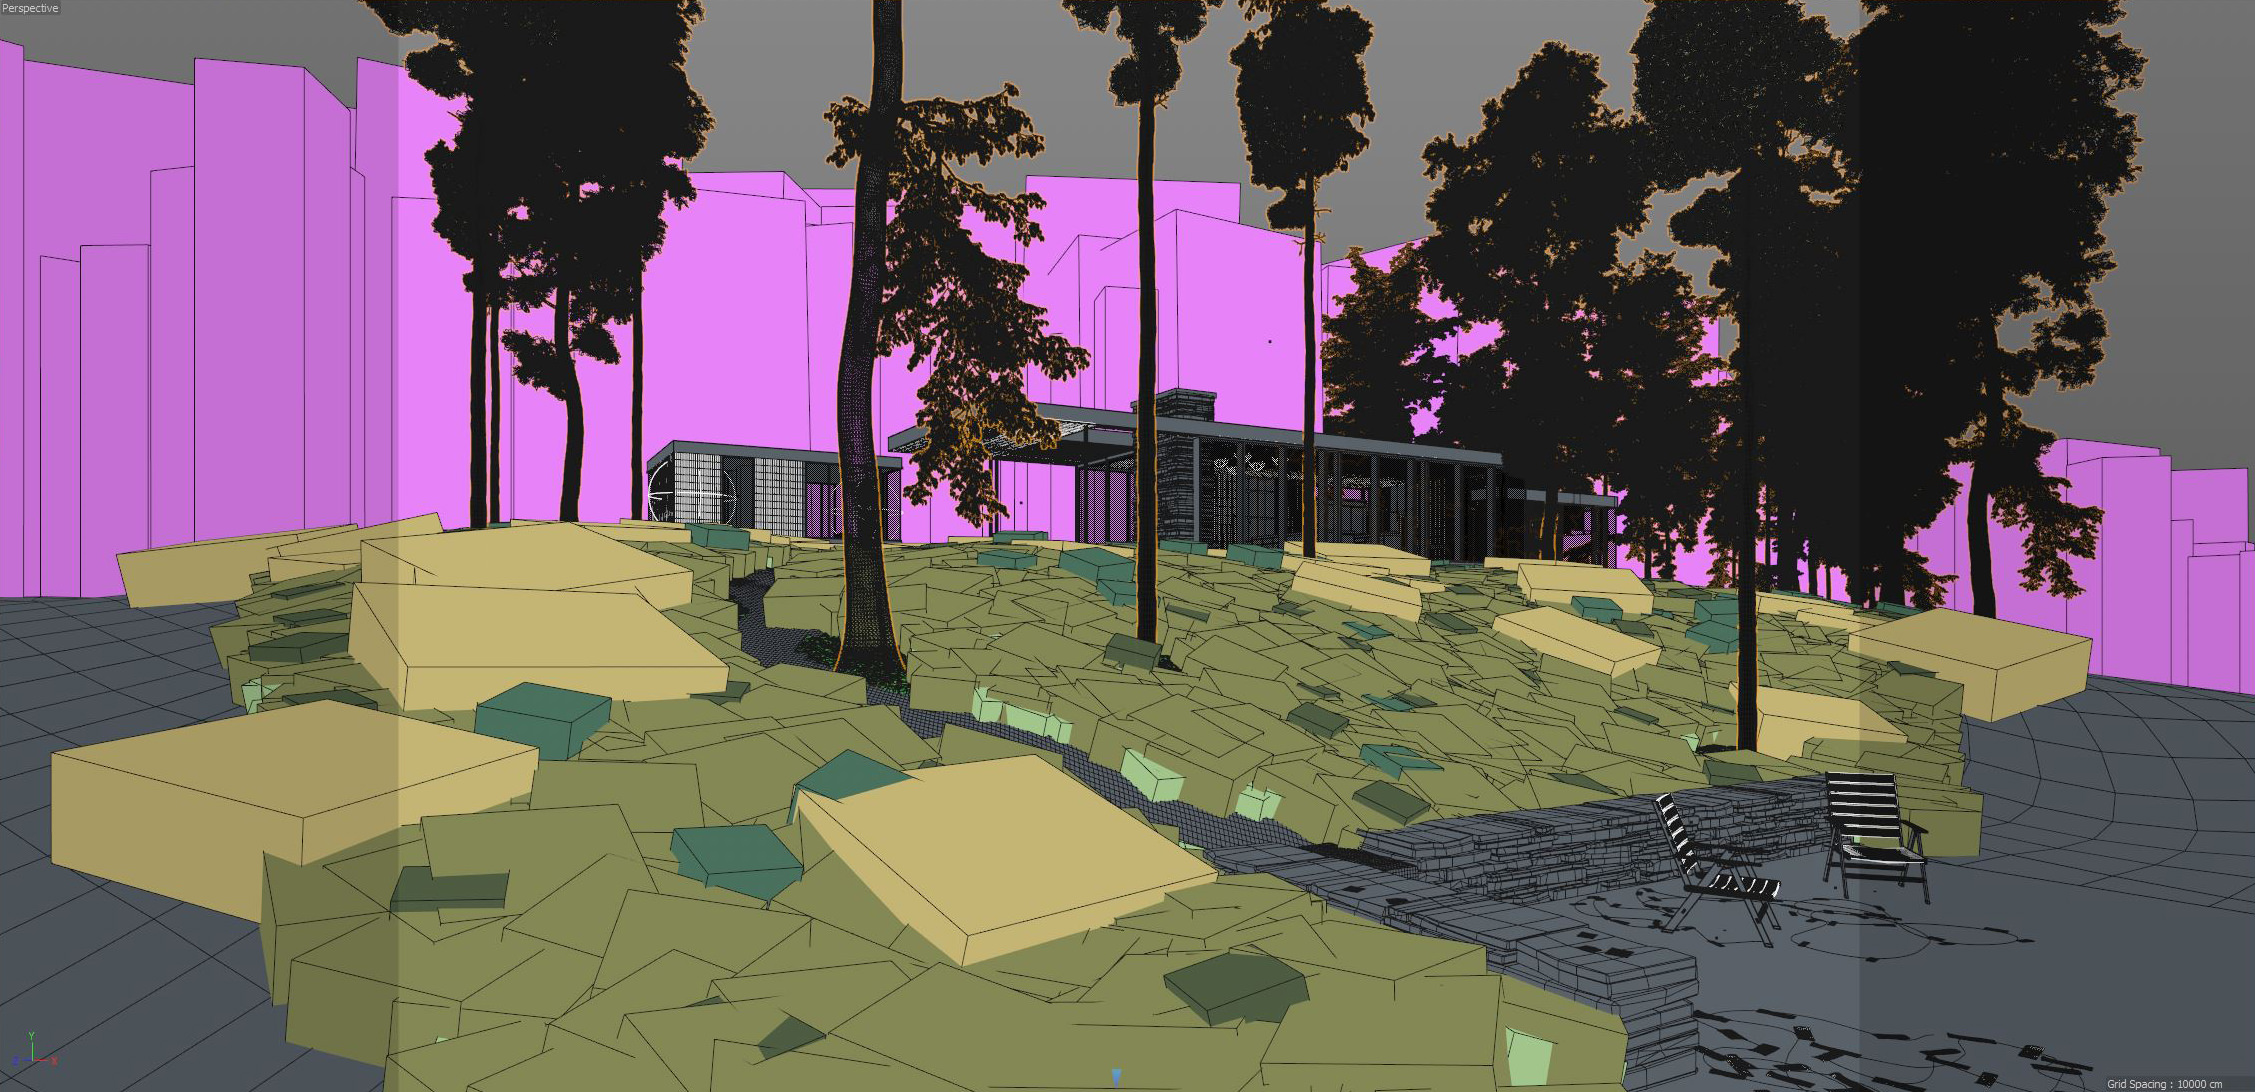
3d Modeling
Clients provided a SketchUp 3d model and some detailed 2d drawings. We also have some built project from the same designer from which we could find some reference to details and materials.
We use Cinema4d as our primary software for 3d modeling in our studio, and I love it for the tools it comes packed with. We can model large landscape and tiny details with the same simplicity.
This great architecture has straightforward and elegant concrete structure with wood cladding and big windows to cherish the incredible environment around it. For the structure, we used mostly polygon modeling with spline and primitives.
It was simple to create wooden cladding using MoGraph tool of Cinema 4d studio version, some deformations, and random effector to obtain little variation for planks. Many times in our workflow we start with basic modeling, and then we go in deep with details depending on cameras. For example, we used a great stone wall 3d model founded on TurboSquid.
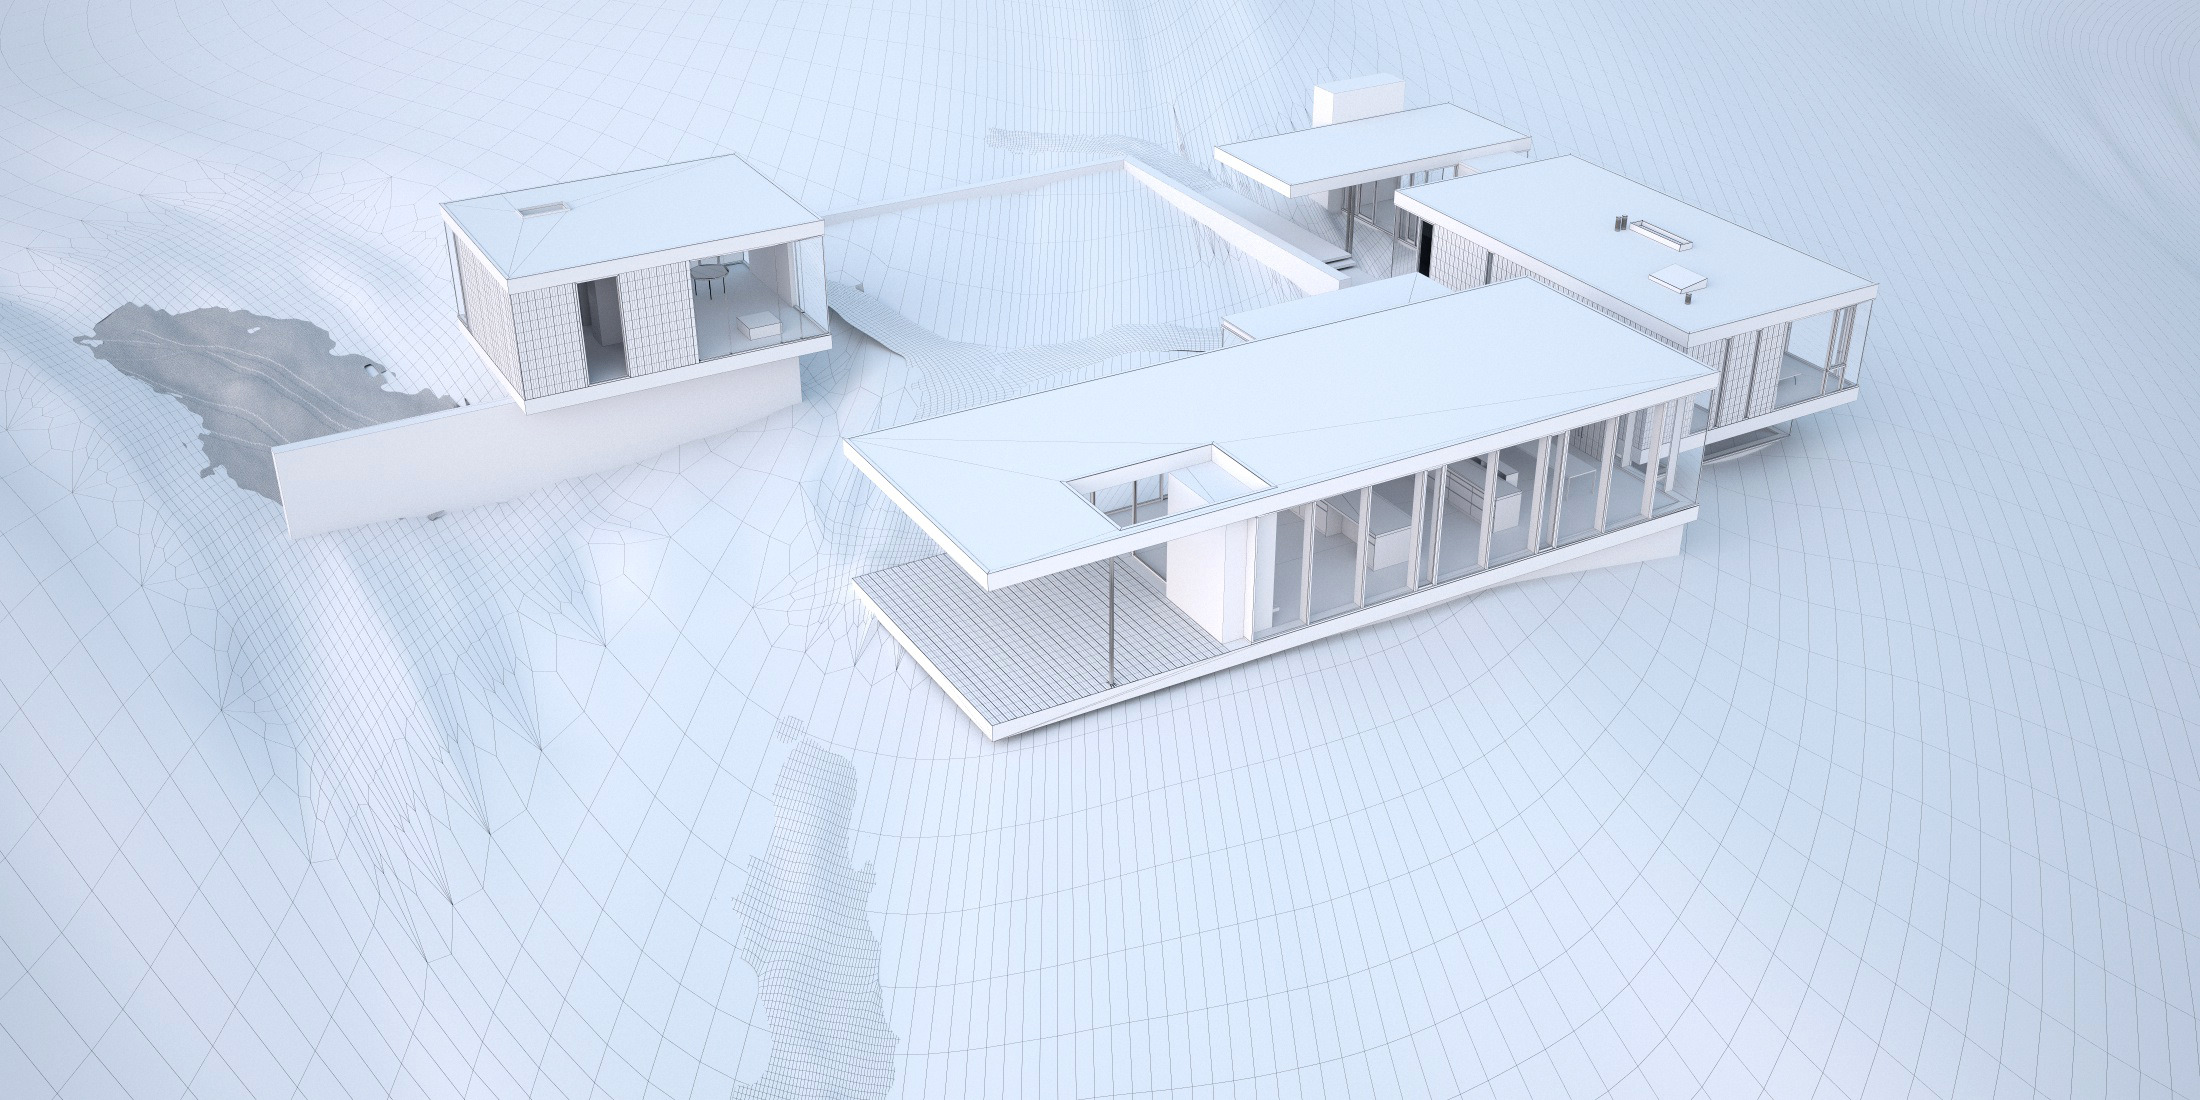
Basic architecture modeling

Stone walls detail
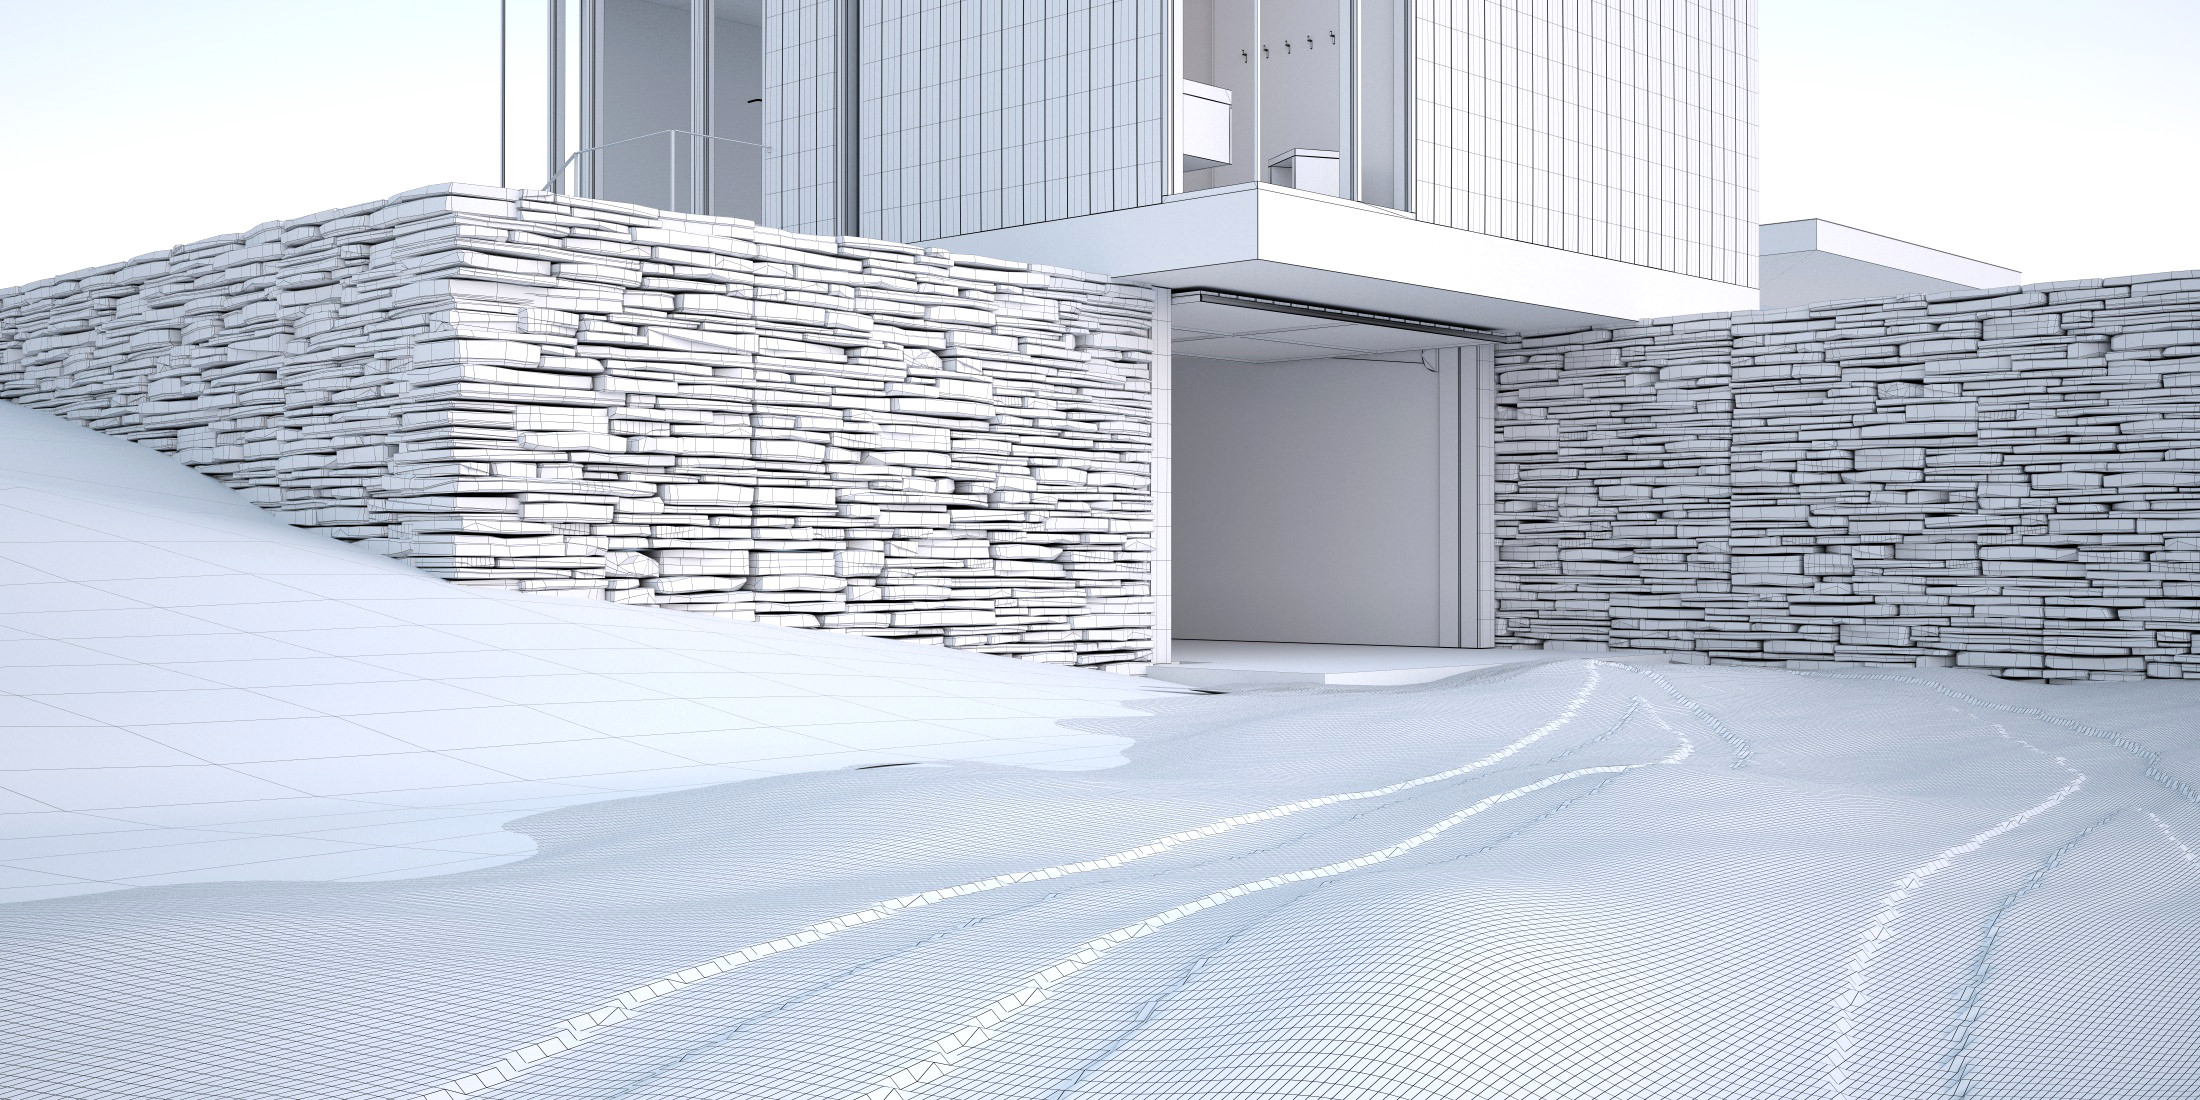
Tires detail
For wooden cladding we start modeling a single plank, then we made copies of it, each one with different deformations. With MoGraph we clone them (3-4 variation is enough) obtaining a random variation and combining this with a large seamless wood texture we have a great result.
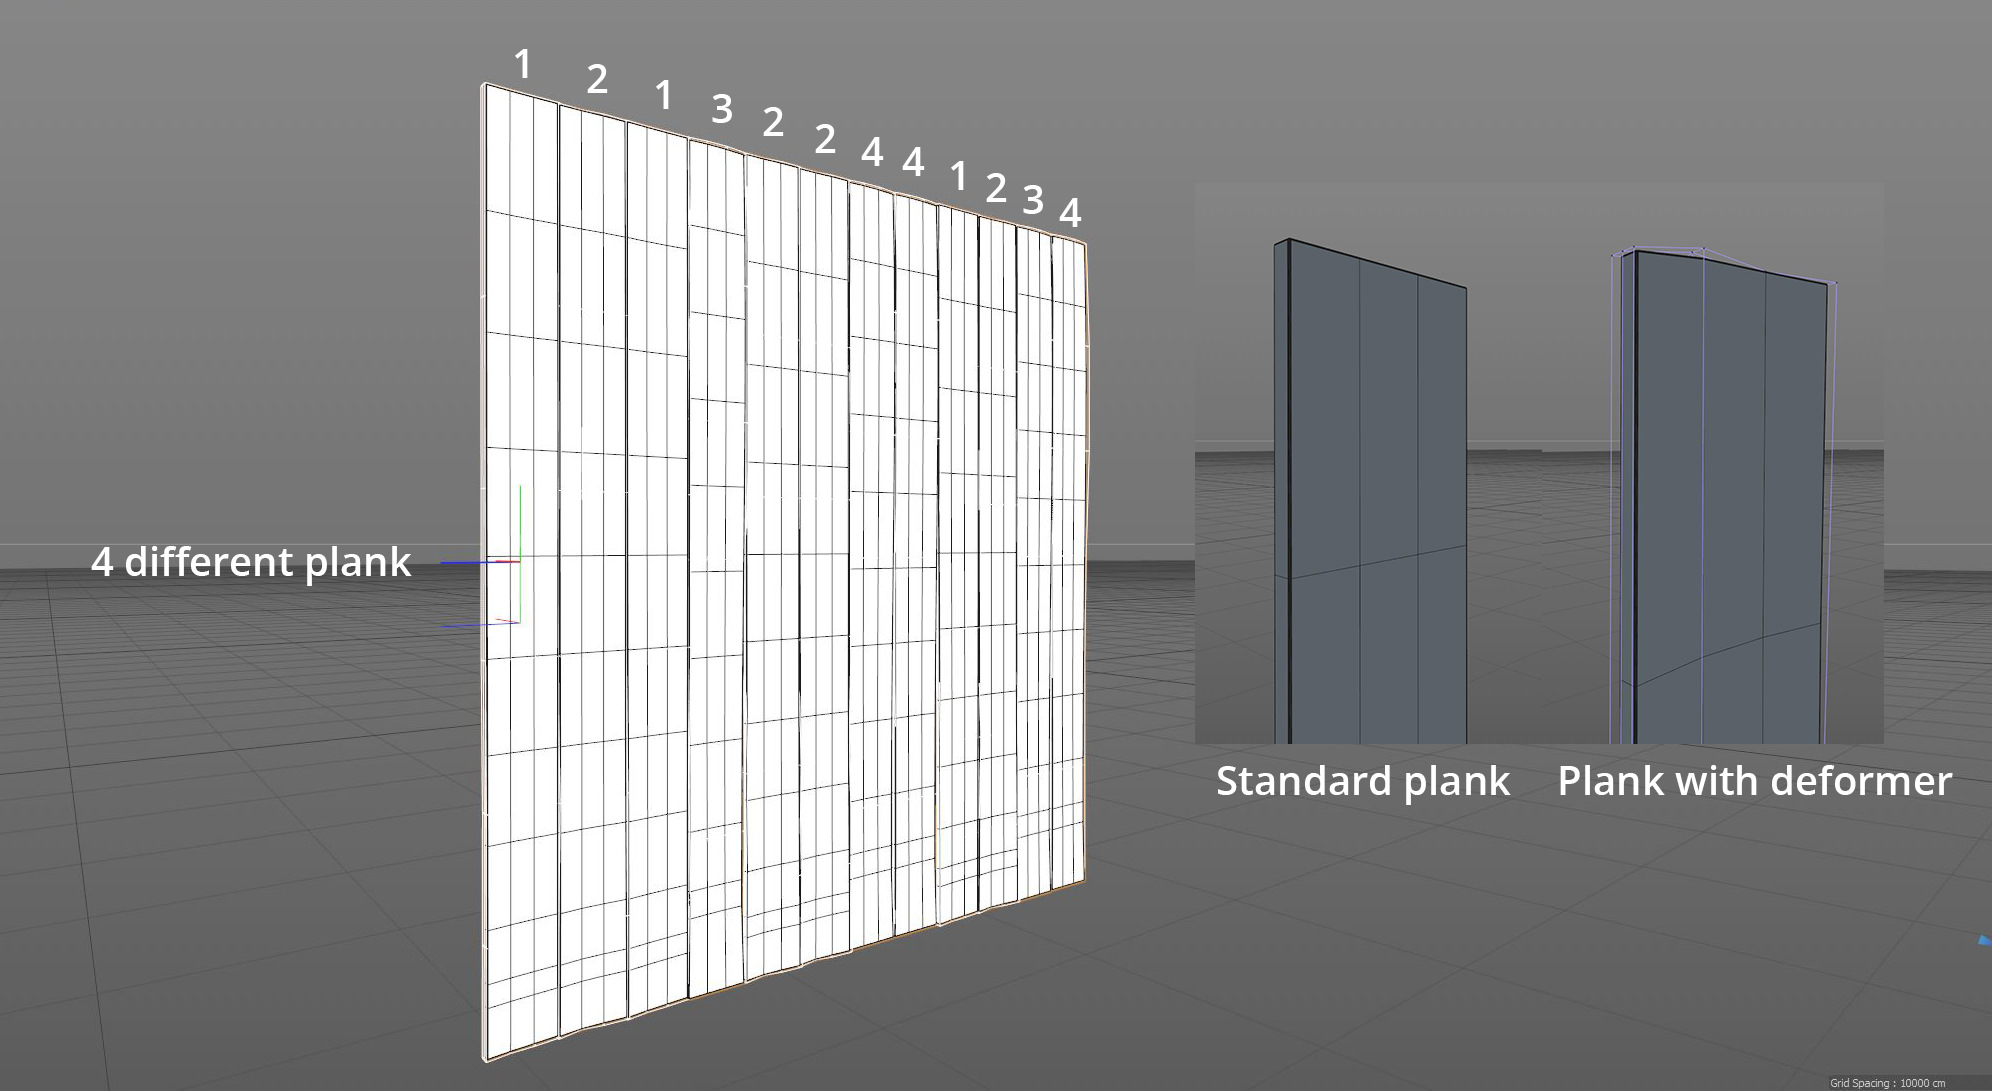
Different type of planks
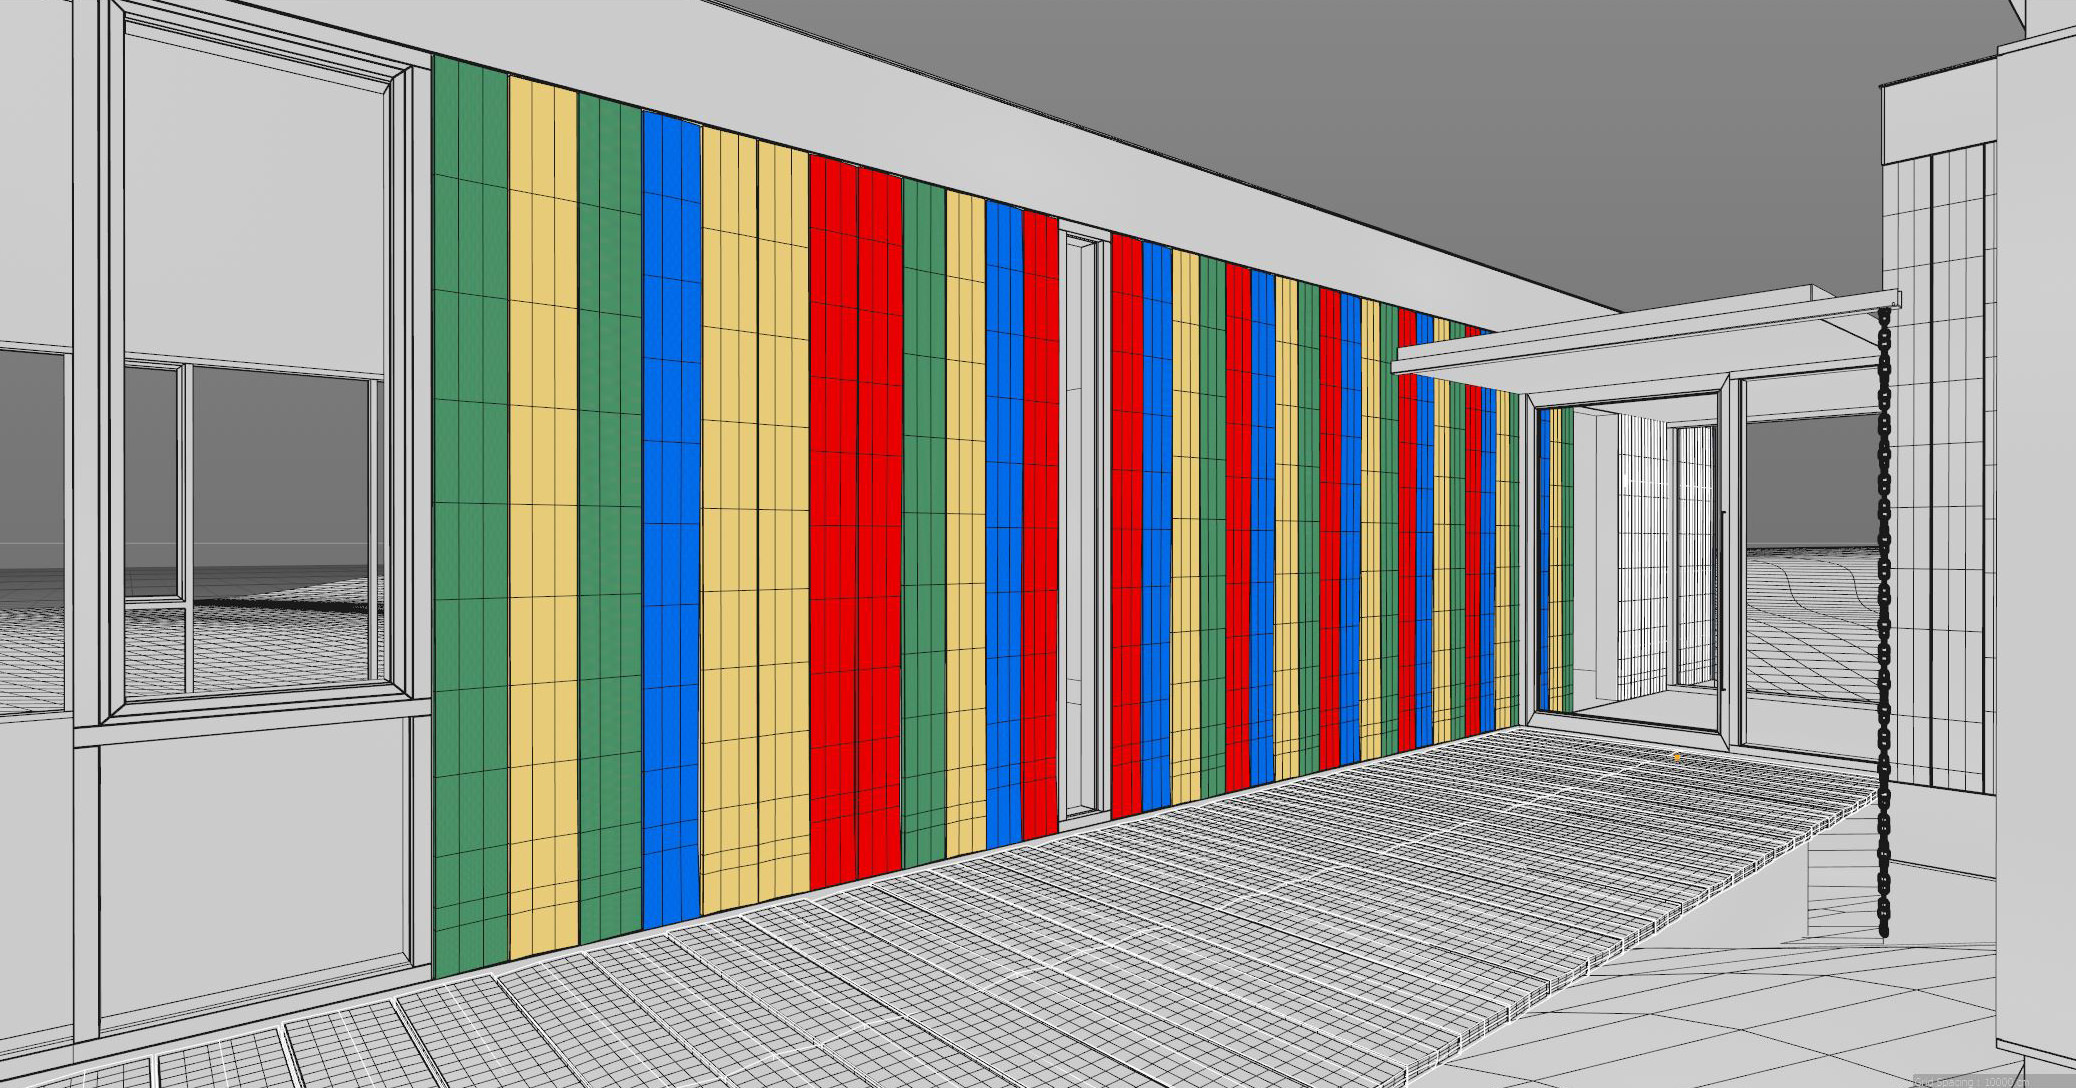
Random cladding’s
For the interiors, we modeled a lot of details like taps, shower and more. We often start to work with low poly mesh to obtain the basic shape, then using SurfaceSubdivision we have high poly mesh, and we can detail it as necessary.
A lot of time I prefer to work with low-poly (as possible) as you can see for the tap; fewer polygons allow us to modify the shape more quickly and the great Surface Subdivision tool of cinema 4d does rest of the job.
To get more realistic results we used a lot of dirty and curvature V-Ray shaders combined with high-quality textures. We also like to work on furnishing using sculpting tools of Cinema4d that can reach high quality in few steps.

Shower details
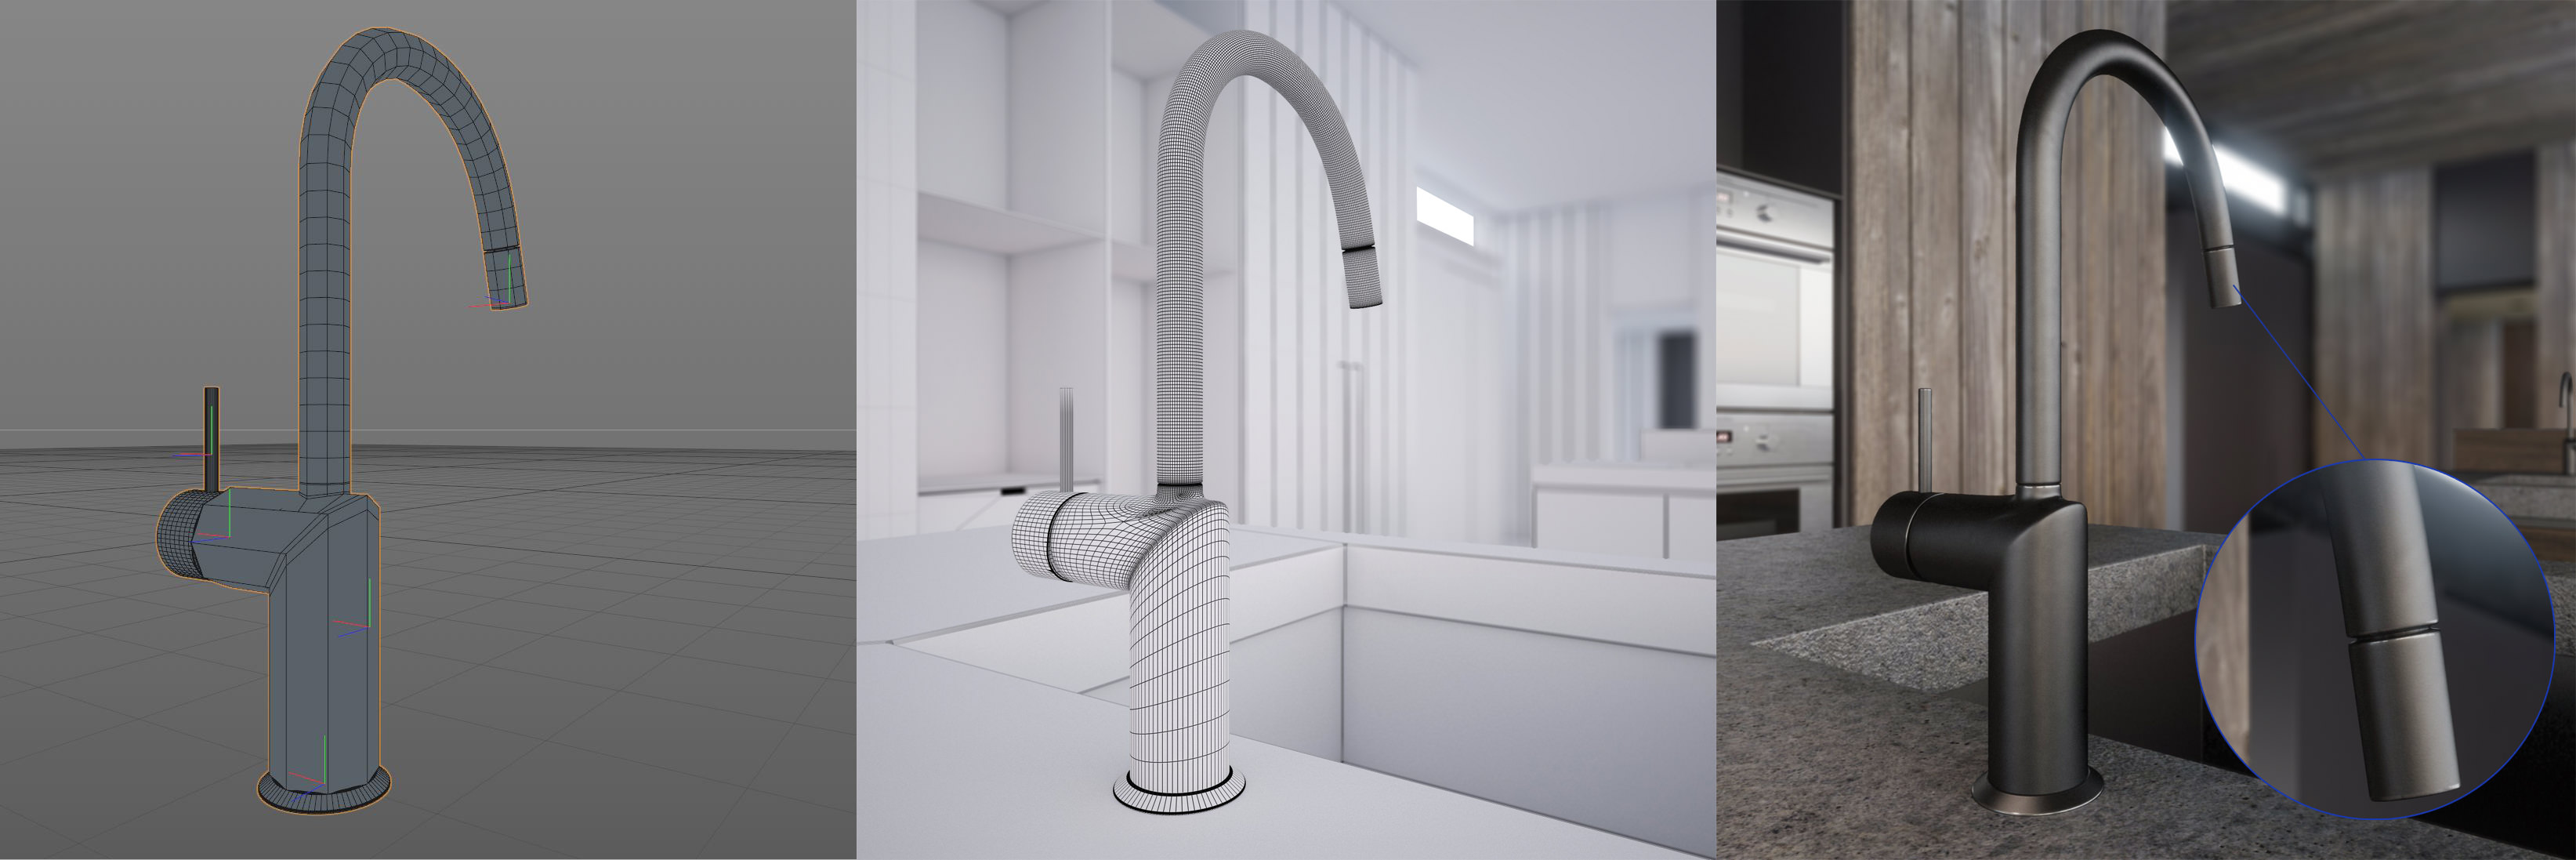
Tap process
Environment Creation
I think that about 50% of the work for exterior images was for the environment because we decided to create a full 3d scene, so we start searching a lot of references especially for low vegetation.


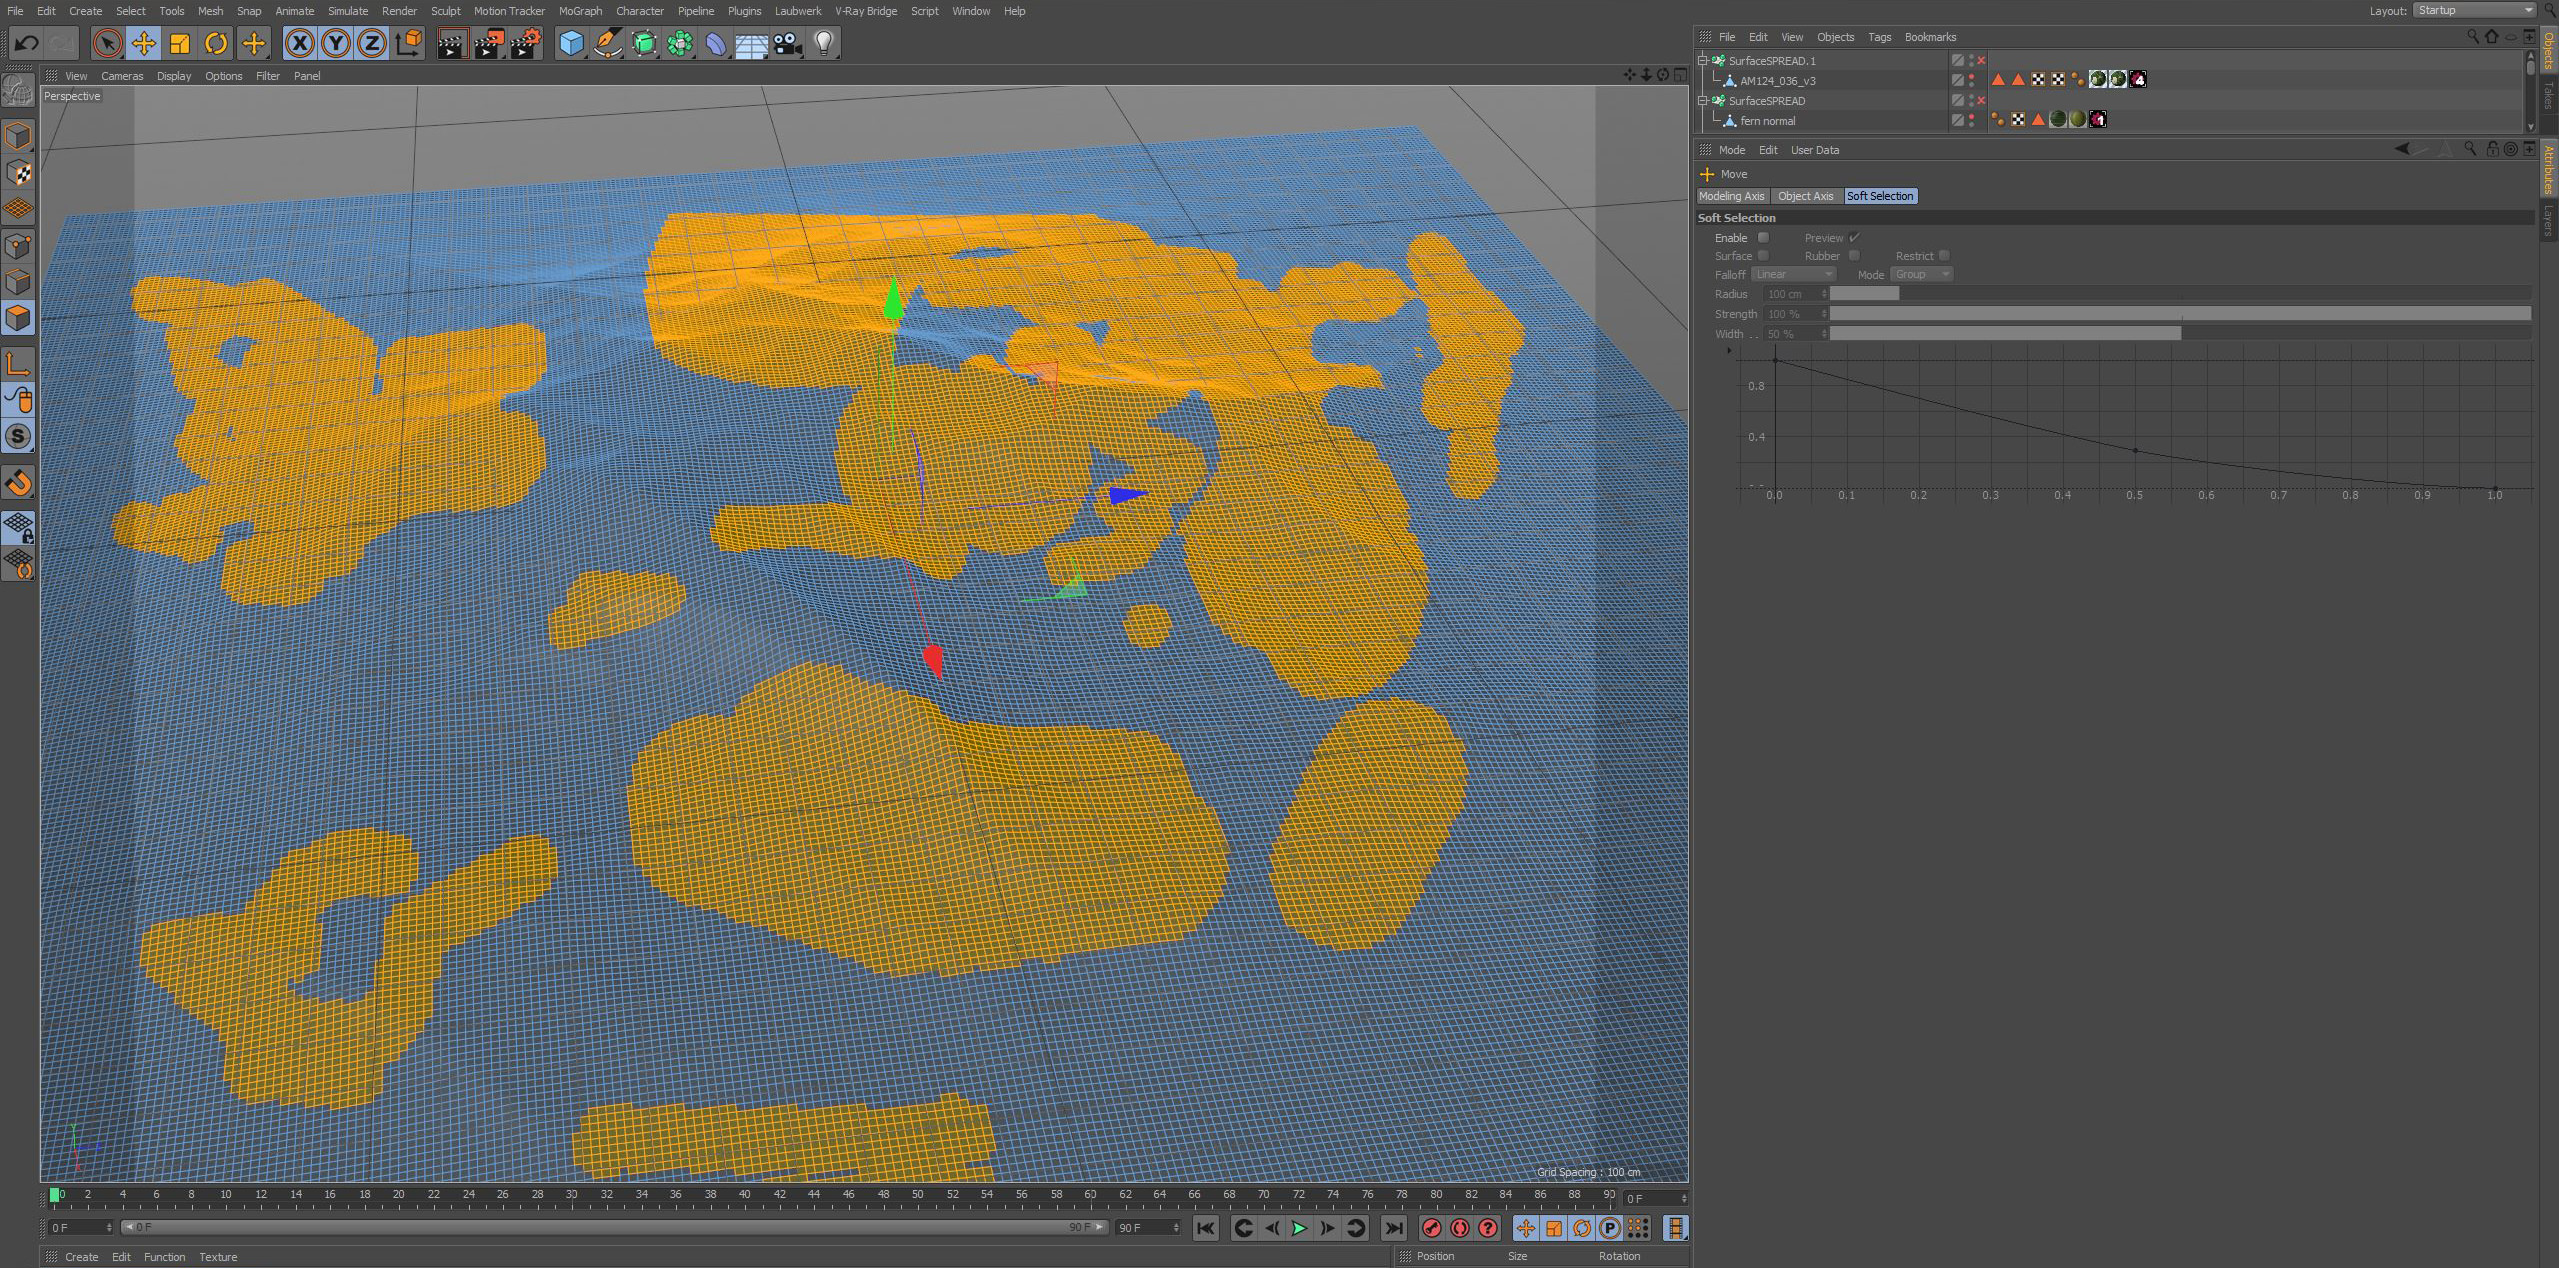
To have thousands of clones of different kind of low-cover plants and trees we used SurfaceSPREAD by Laubwerk.
I’m a beta tester for this great plugin and for this scene I used 2.0 version, but you could achieve same results also with commercial 1.0 version.
With this plugin, we’re able to scatter thousands of clones without stress too much video card.

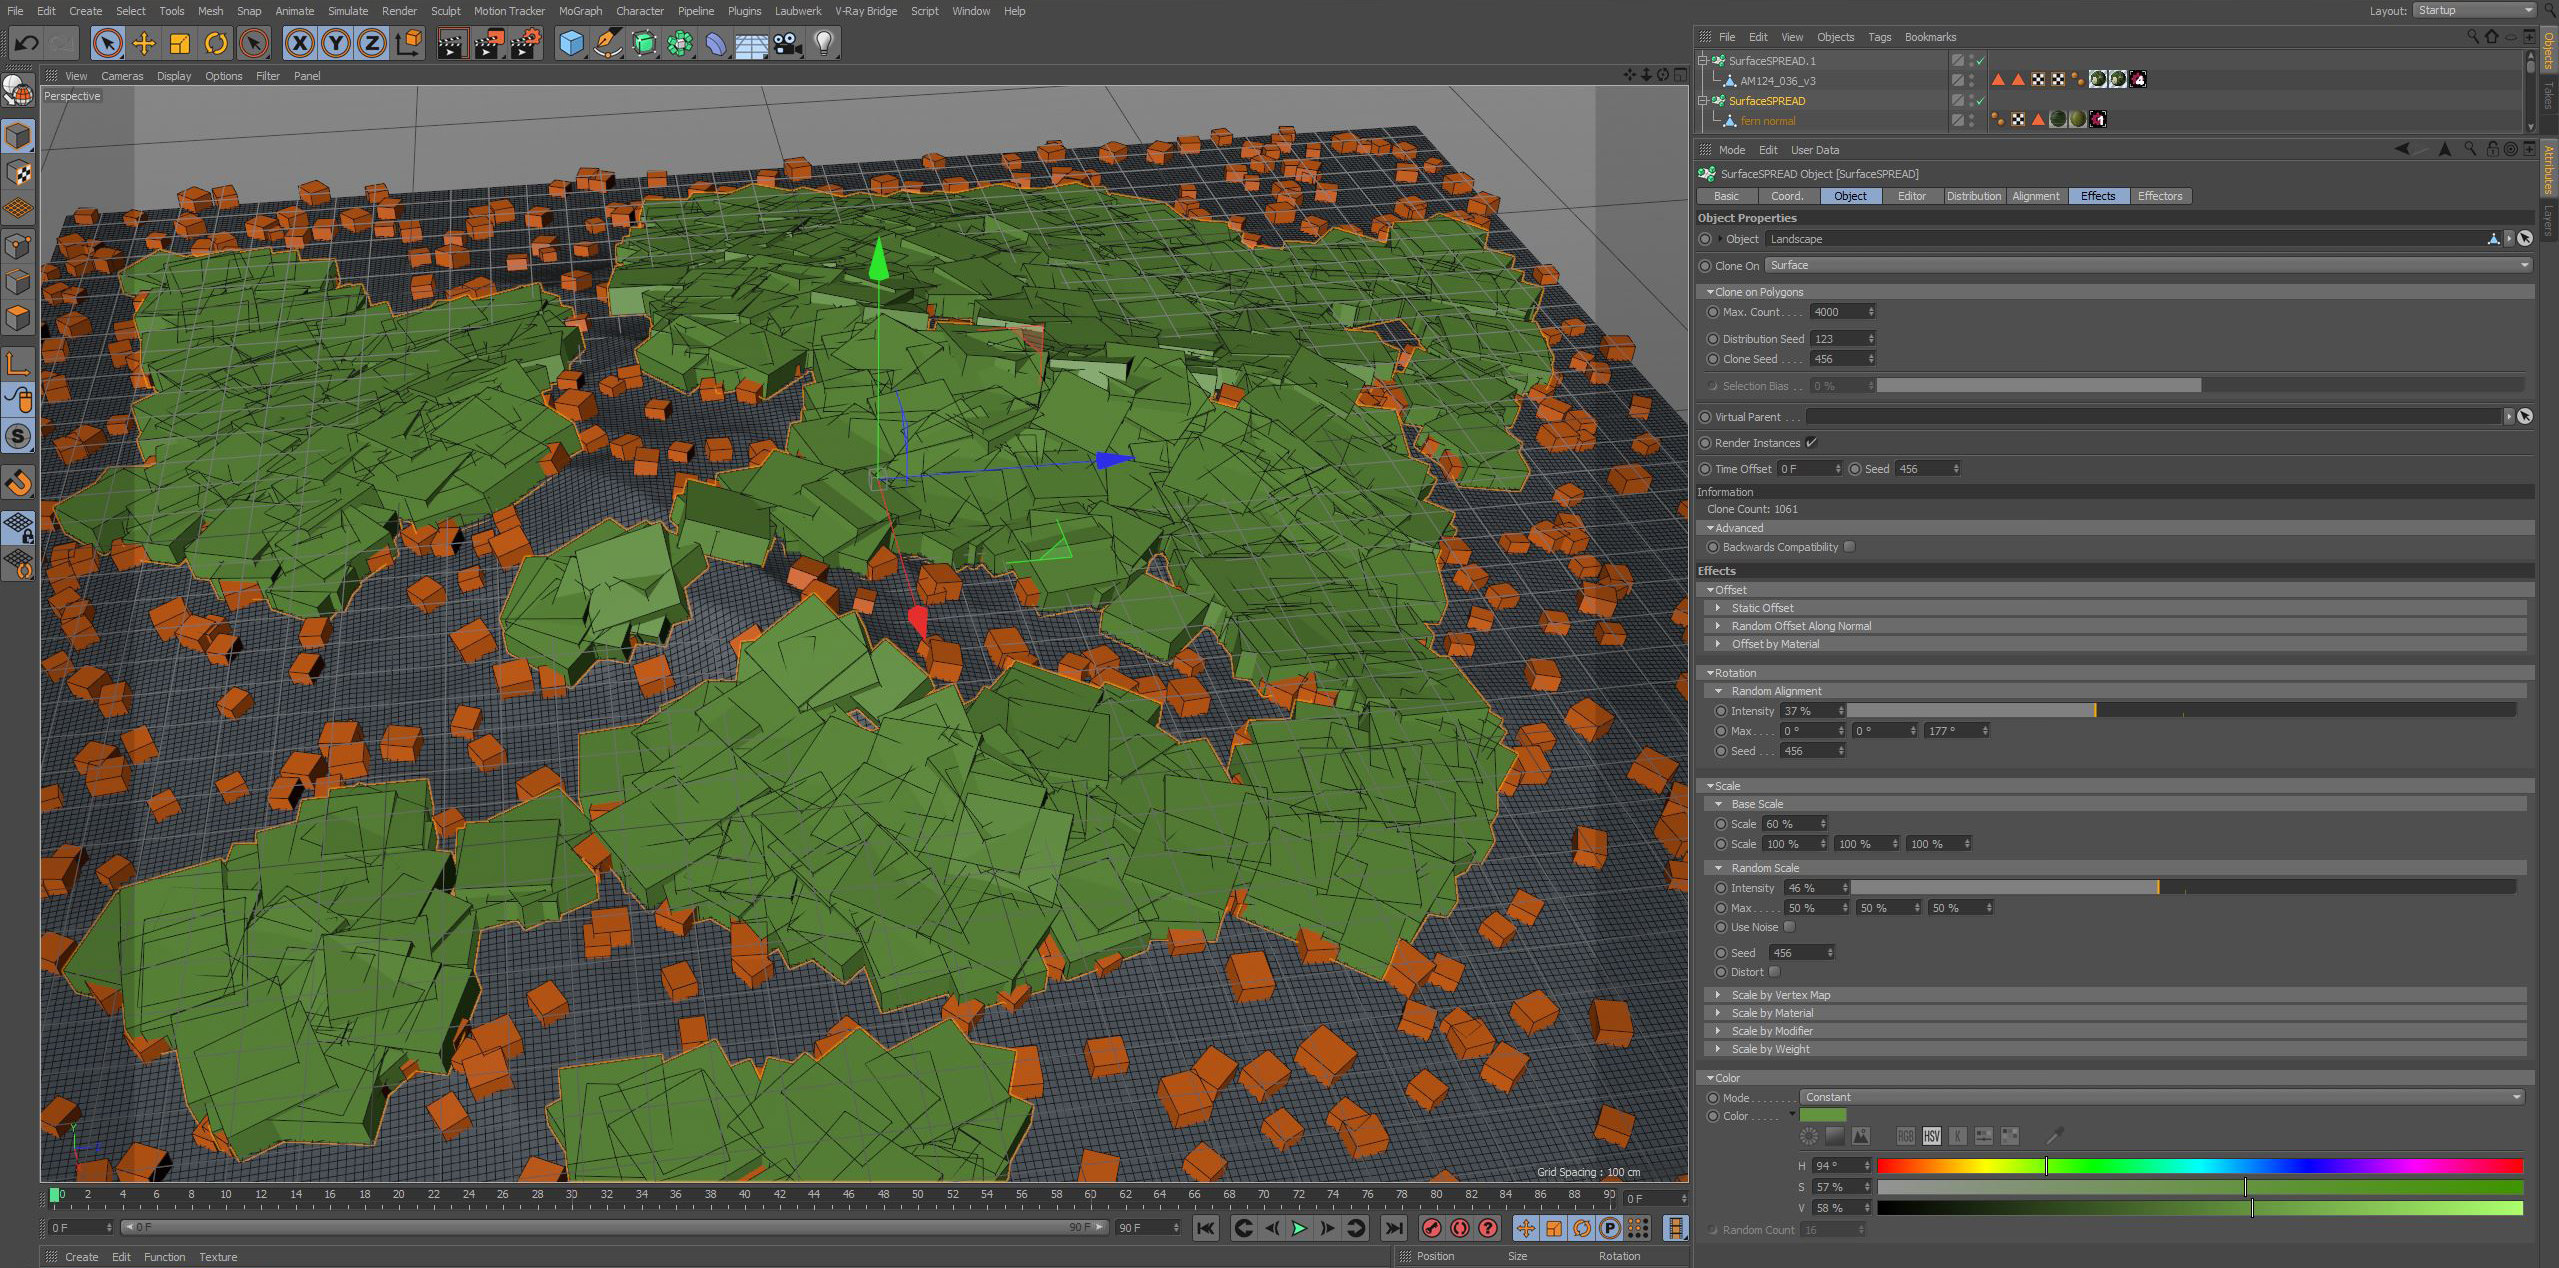
For this scene, we created two assets: one for low vegetation and the other for trees using 3d models from Evermotion, Darstellungsart, Silva 3d and free models from Quixel Megascans.
For trees, we used different pine models from 10m to 14m and we made by ourselves some quick color foliage variation for each species.
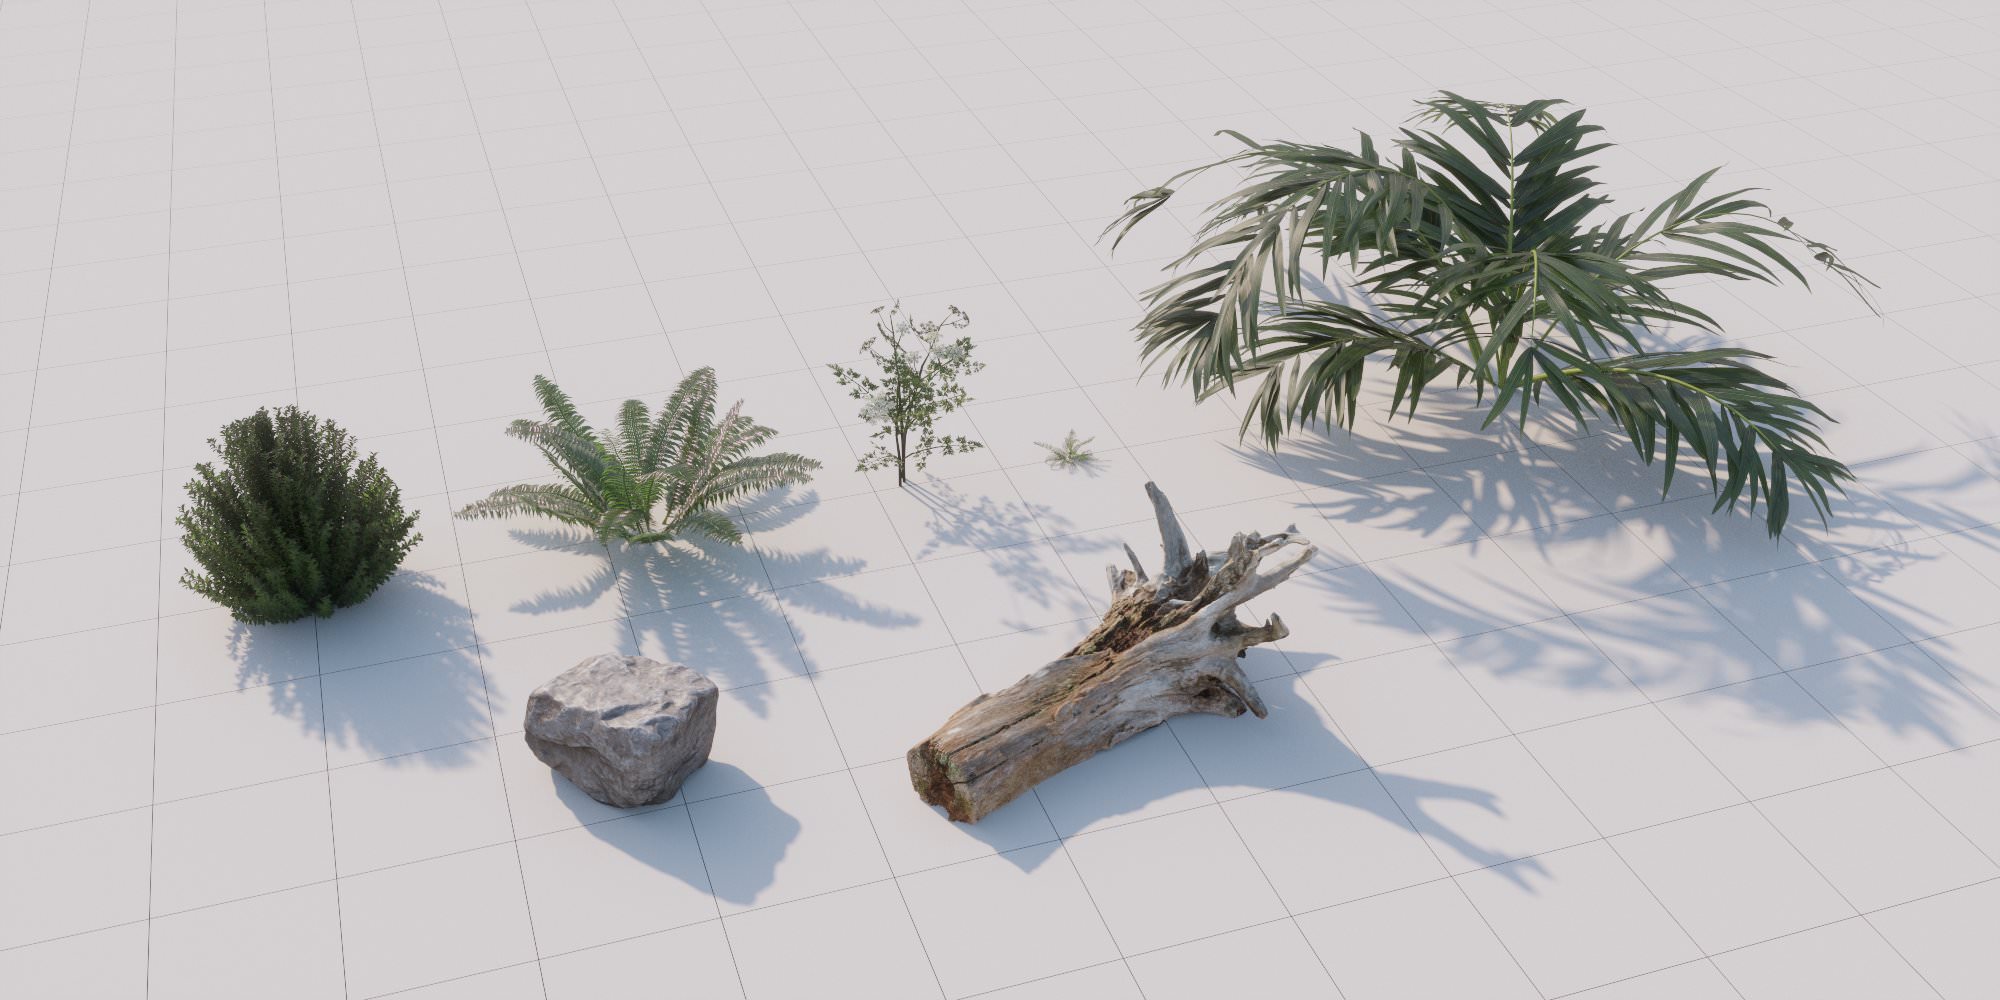
Low vegetation asset
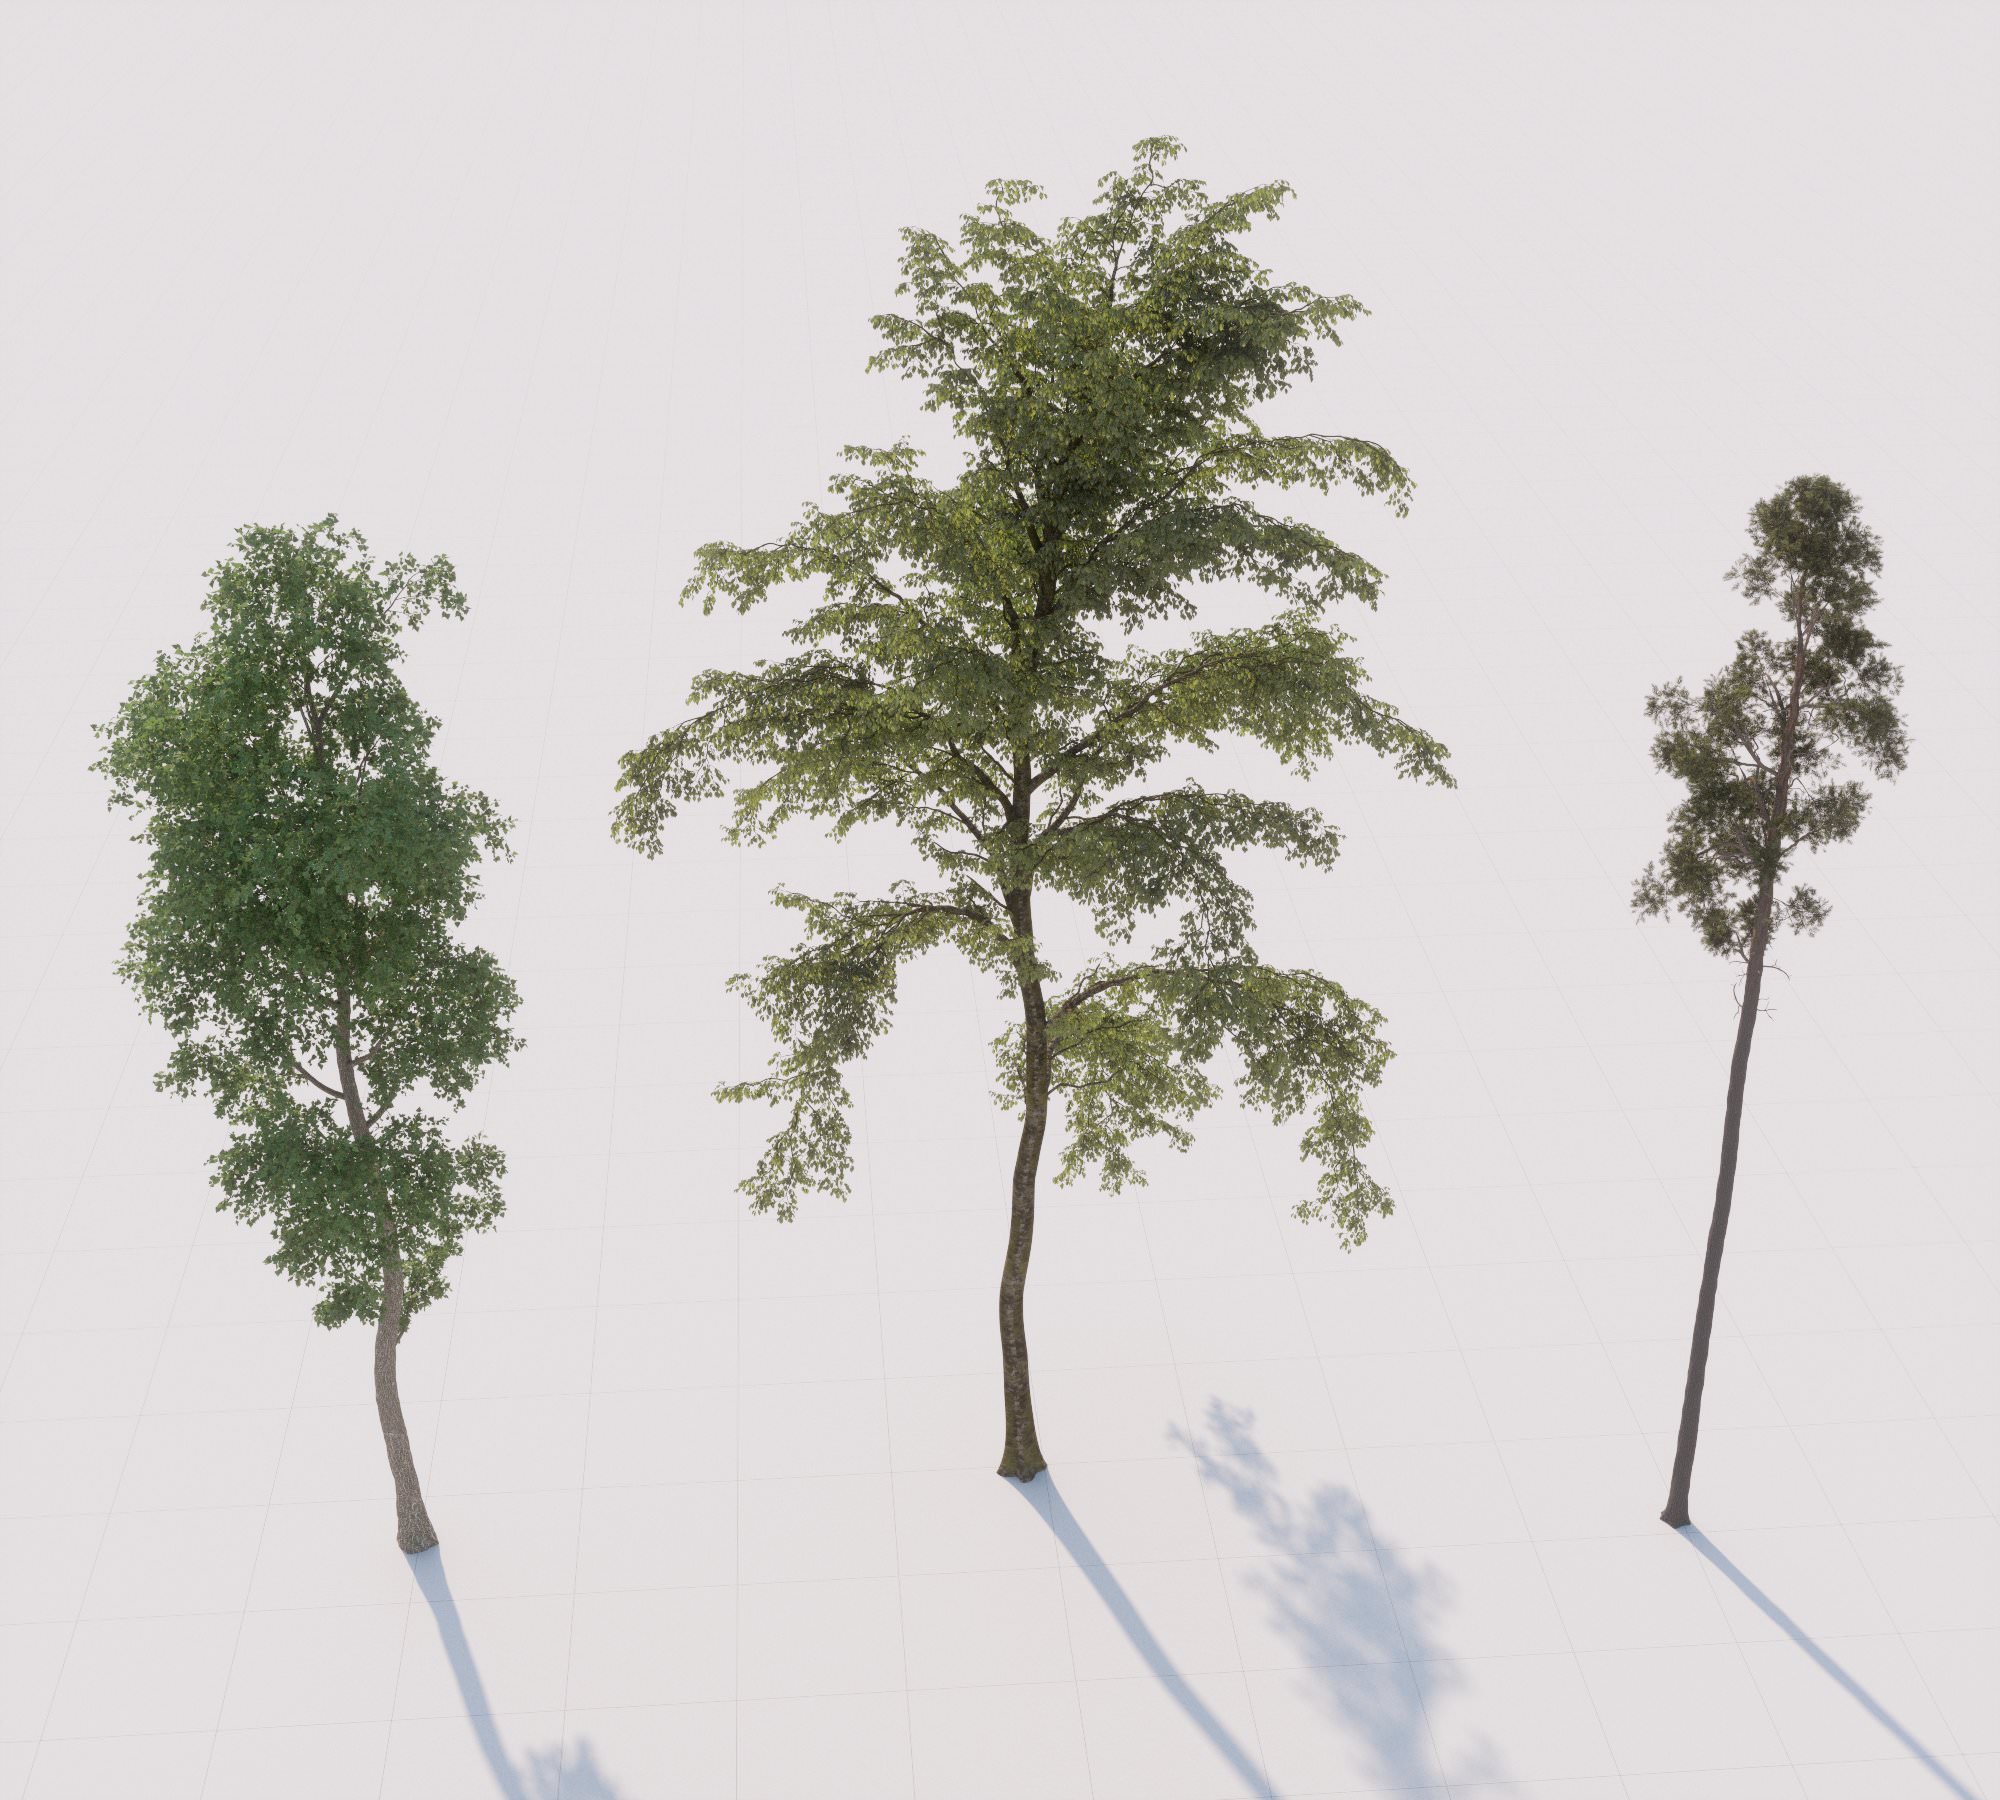
Trees
When using SurfaceSPREAD, we’re free to recreate each environment as we need.
It has a lot of parameters you could modify to achieve great results. We spent a lot of time during scattering analyzing real photo references and then replicate in 3d.
SurfaceSPREAD preview
Raw vegetation test
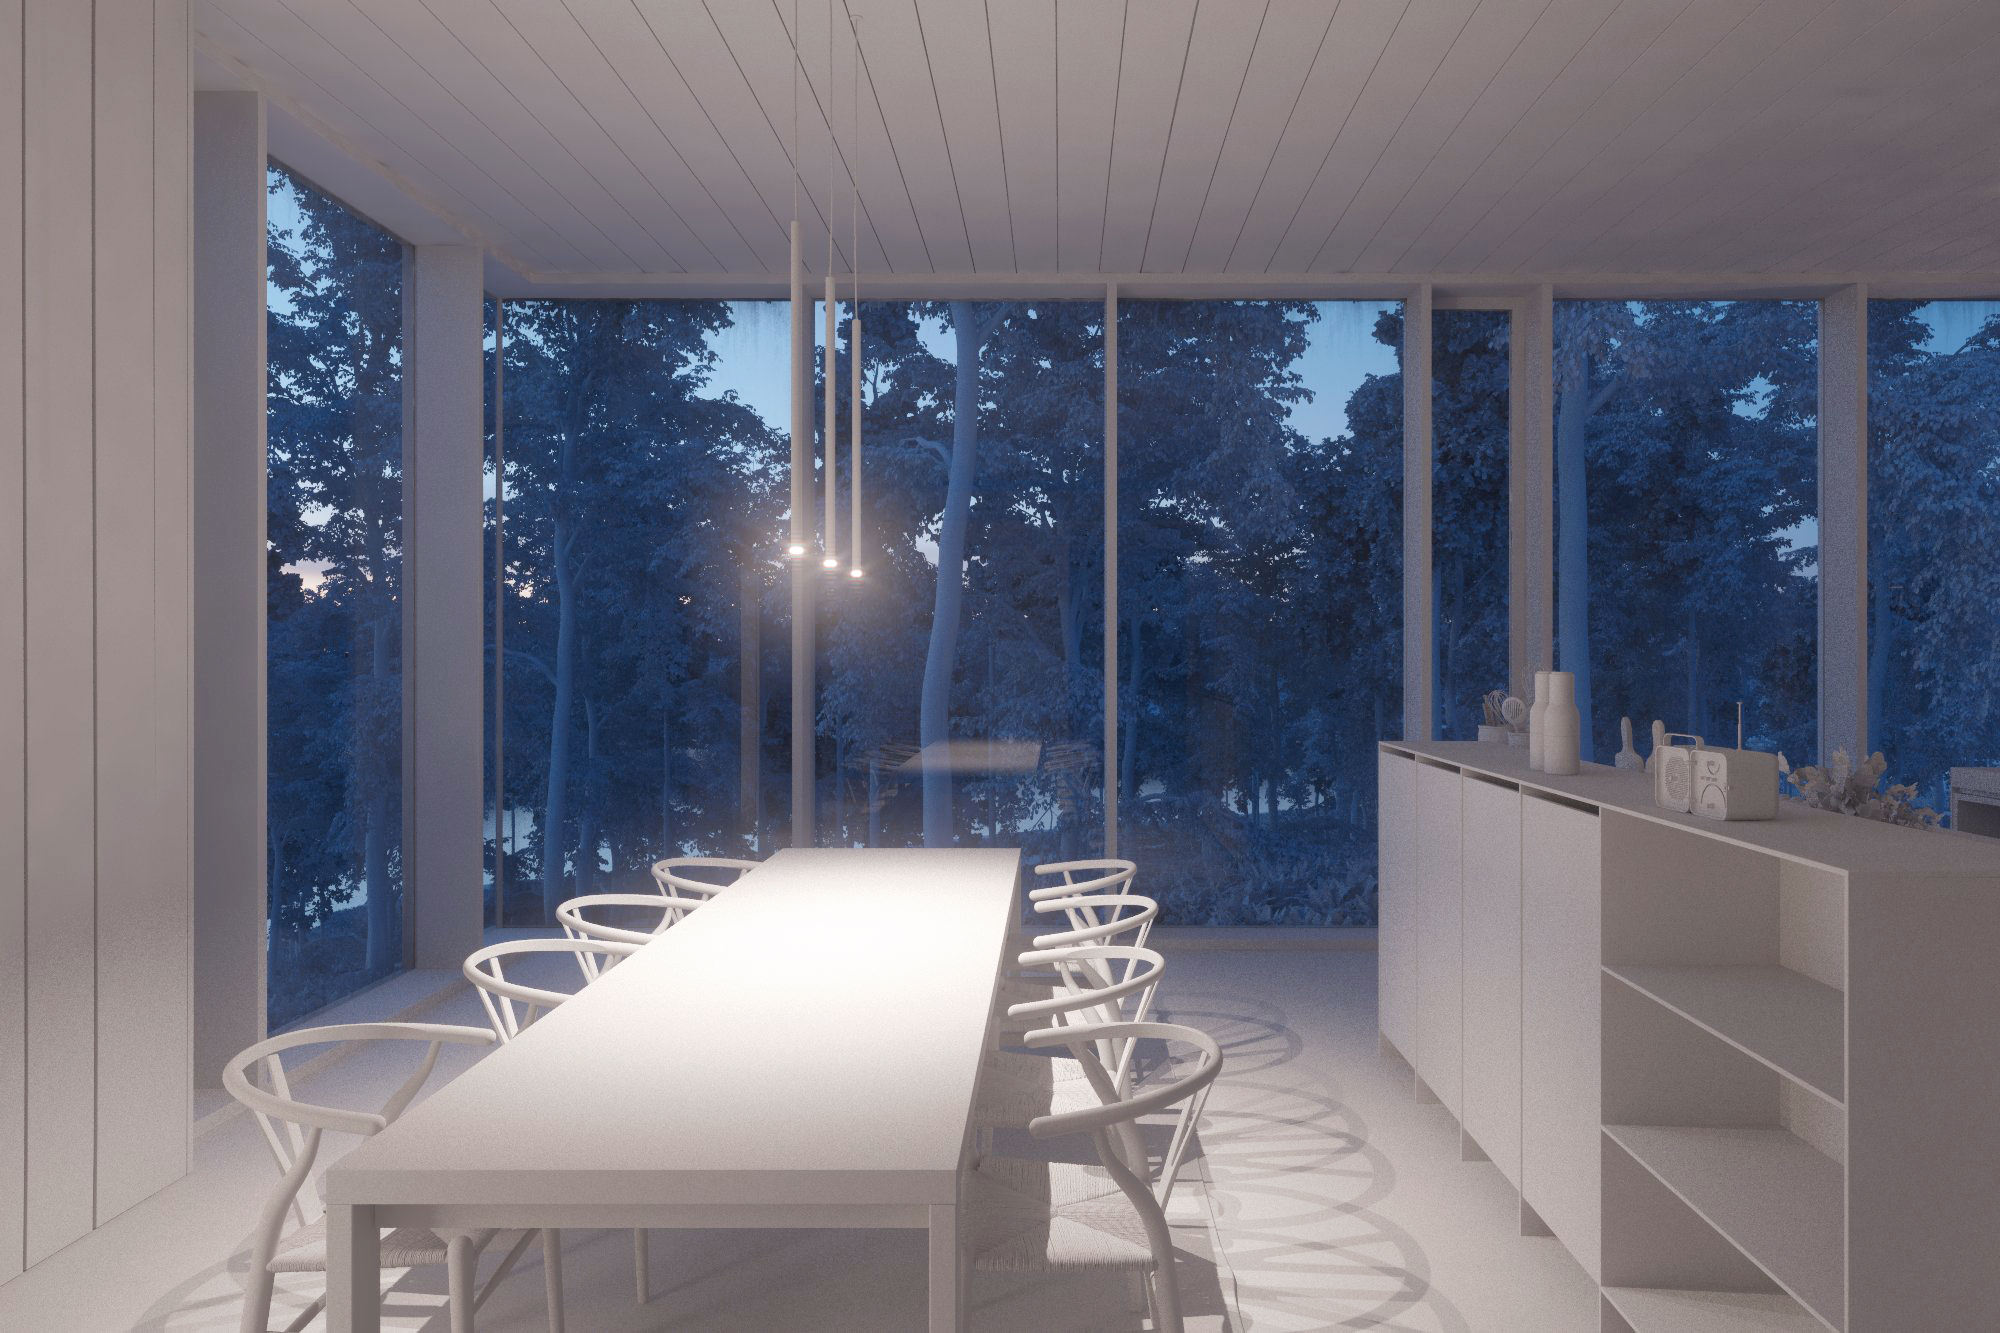
Lighting
Lighting this project was an essential aspect for us because in this stage we fixed camera angle and images mood.
We would like to give a peaceful feeling to those who watched these images.
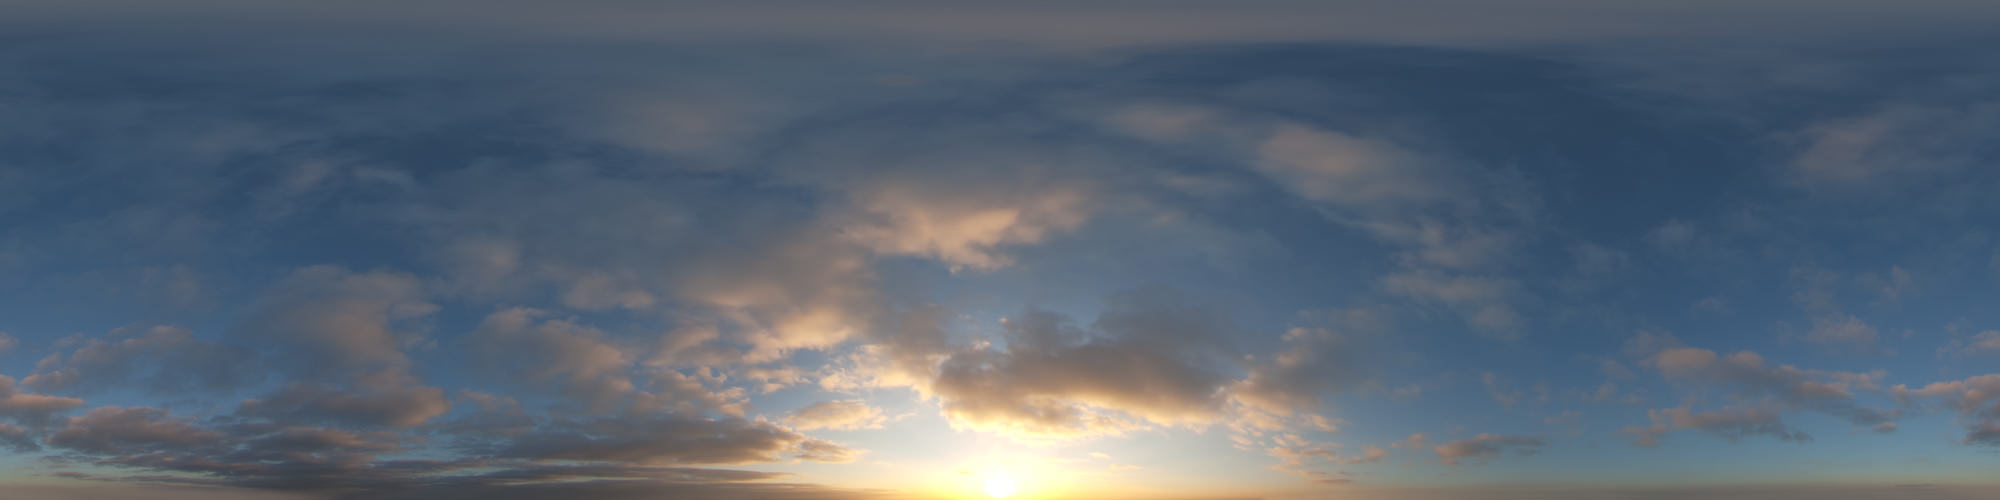
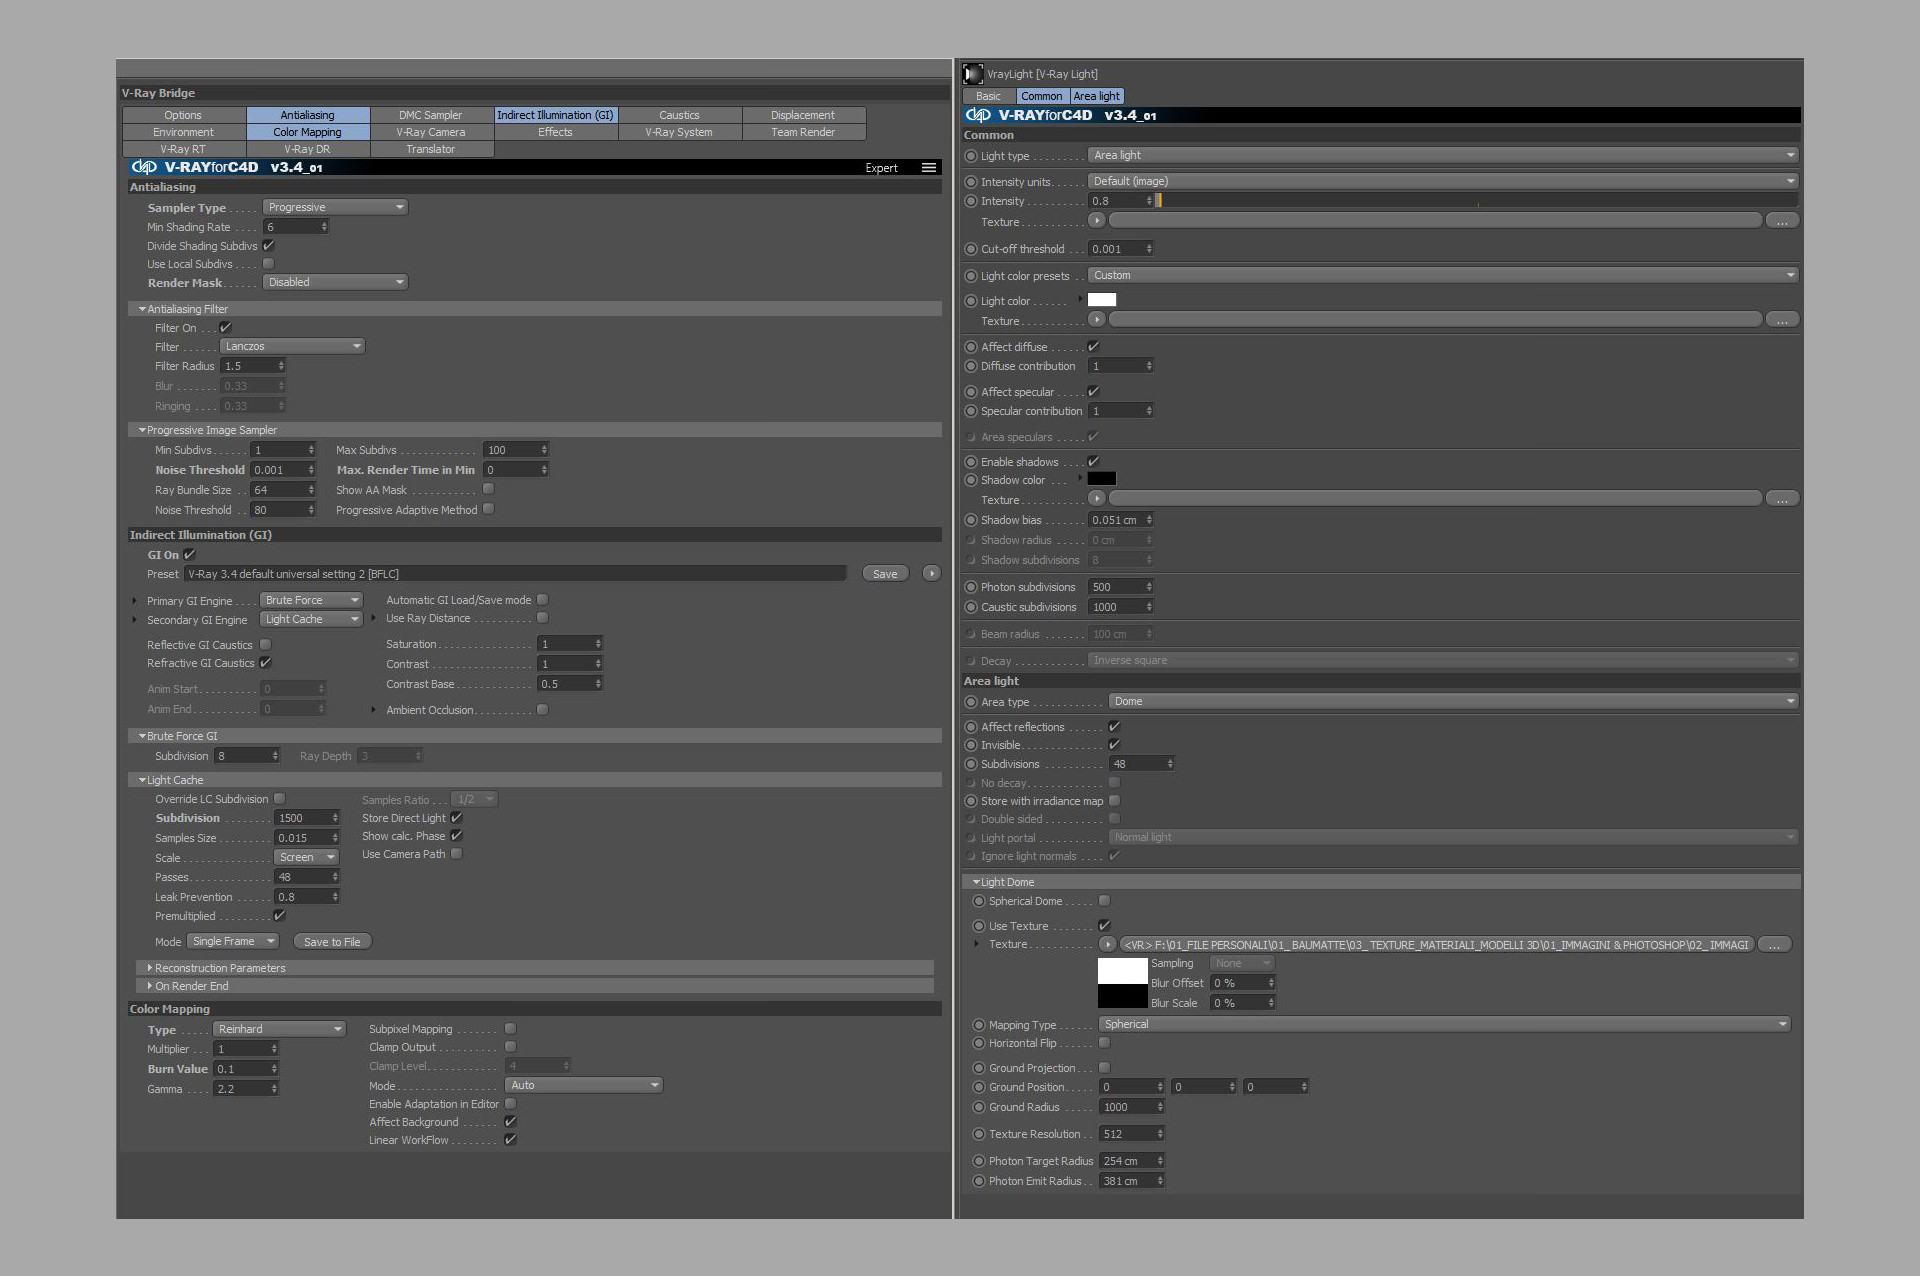
We worked with HDRI’s from PG Skies and V-Ray sun. Never underestimate using a simple V-Ray sun light
For the “Who left it open?” view, I would like to recreate an early-morning mood, so I used 0839 HDRI a little over exposed.
PGSKIES 0839
The Night View

PGSKIES 2028
For other views, settings were quite similar. I like to use a combination of BF and LC, especially for exterior views.
For the entrance view I used V-Ray sun and playing with lens effect of the new VFB was simple to achieve a great “after the rain” sun.
V-Ray Sun Lighting
Materials
This scene needed a lot of different materials!
When we’re working on a project, we go in deep with all the materials (as much as the deadline allows us) as if they were all seen up close and personal.
For this and other reasons we started to work with great Poliigon textures, and we simply love them.
Interior concrete floor is a mix of three different textures for the diffuse and quite simple specular layer settings.
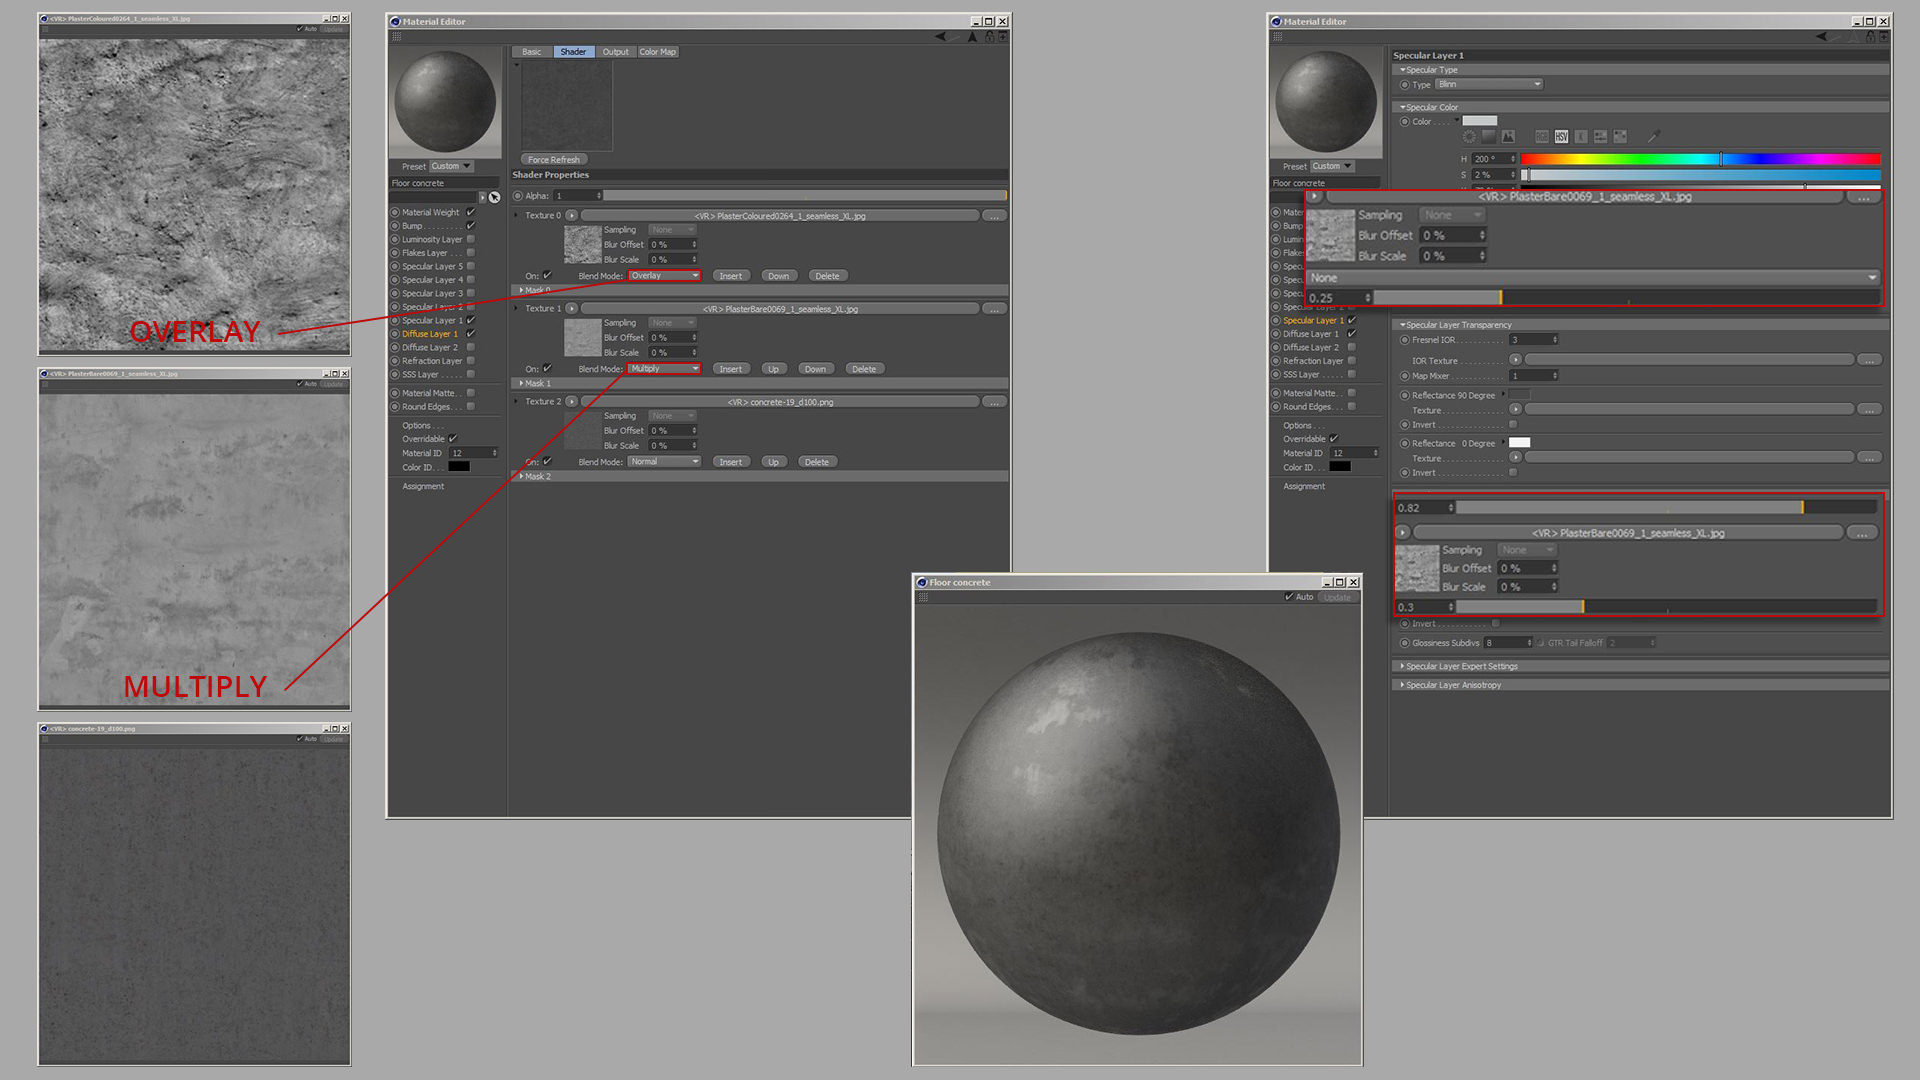
Concrete floor

Tree leaves
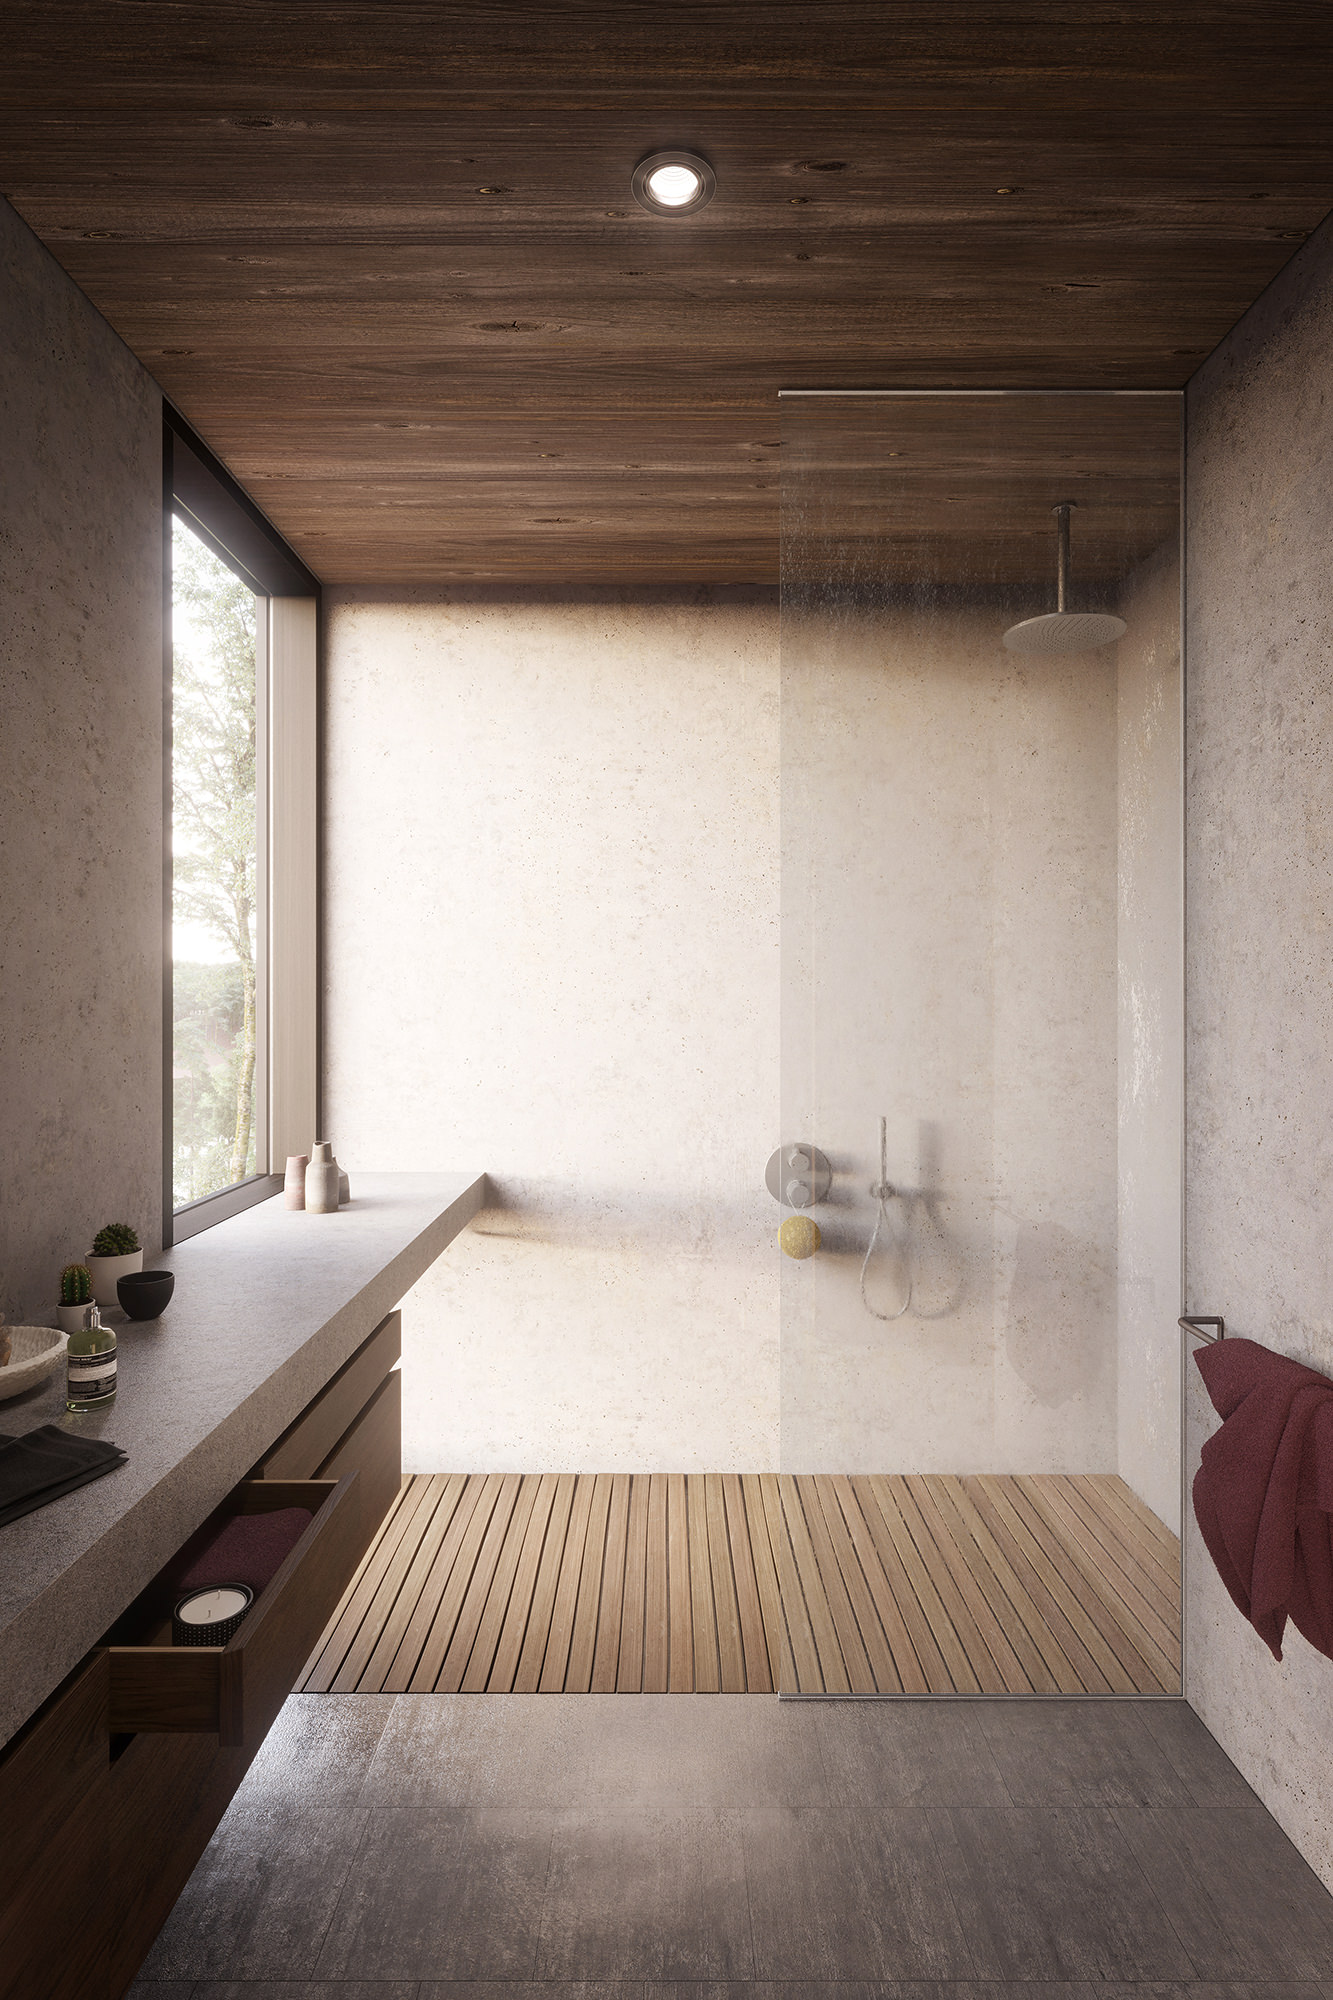
One material I like to work on was the shower glass with droplets.
I combined two kinds of materials, one was clear glass with low transparency texture on the refraction glossiness and the second one was the droplets (only a diffuse with a droplets texture on the material weight).
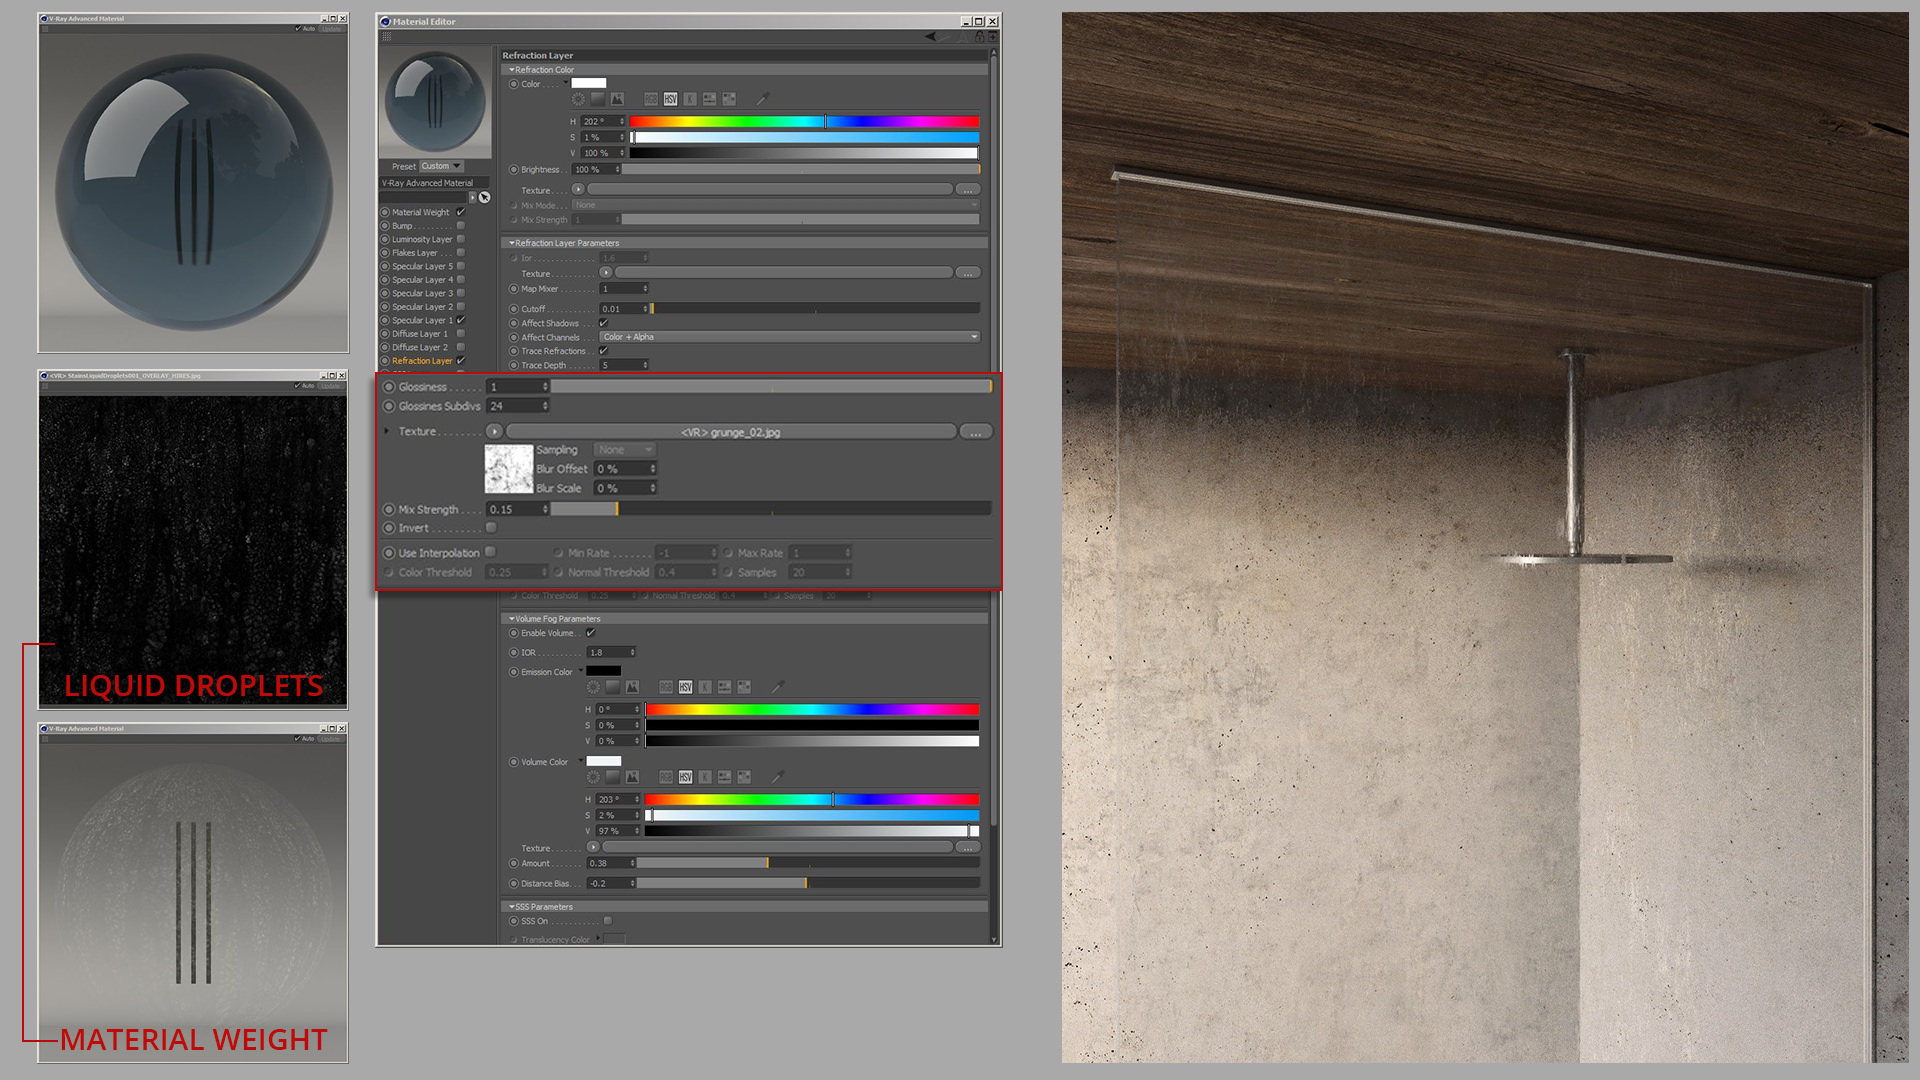
Shower glass
This is another ultra-close up for the armchair metal.
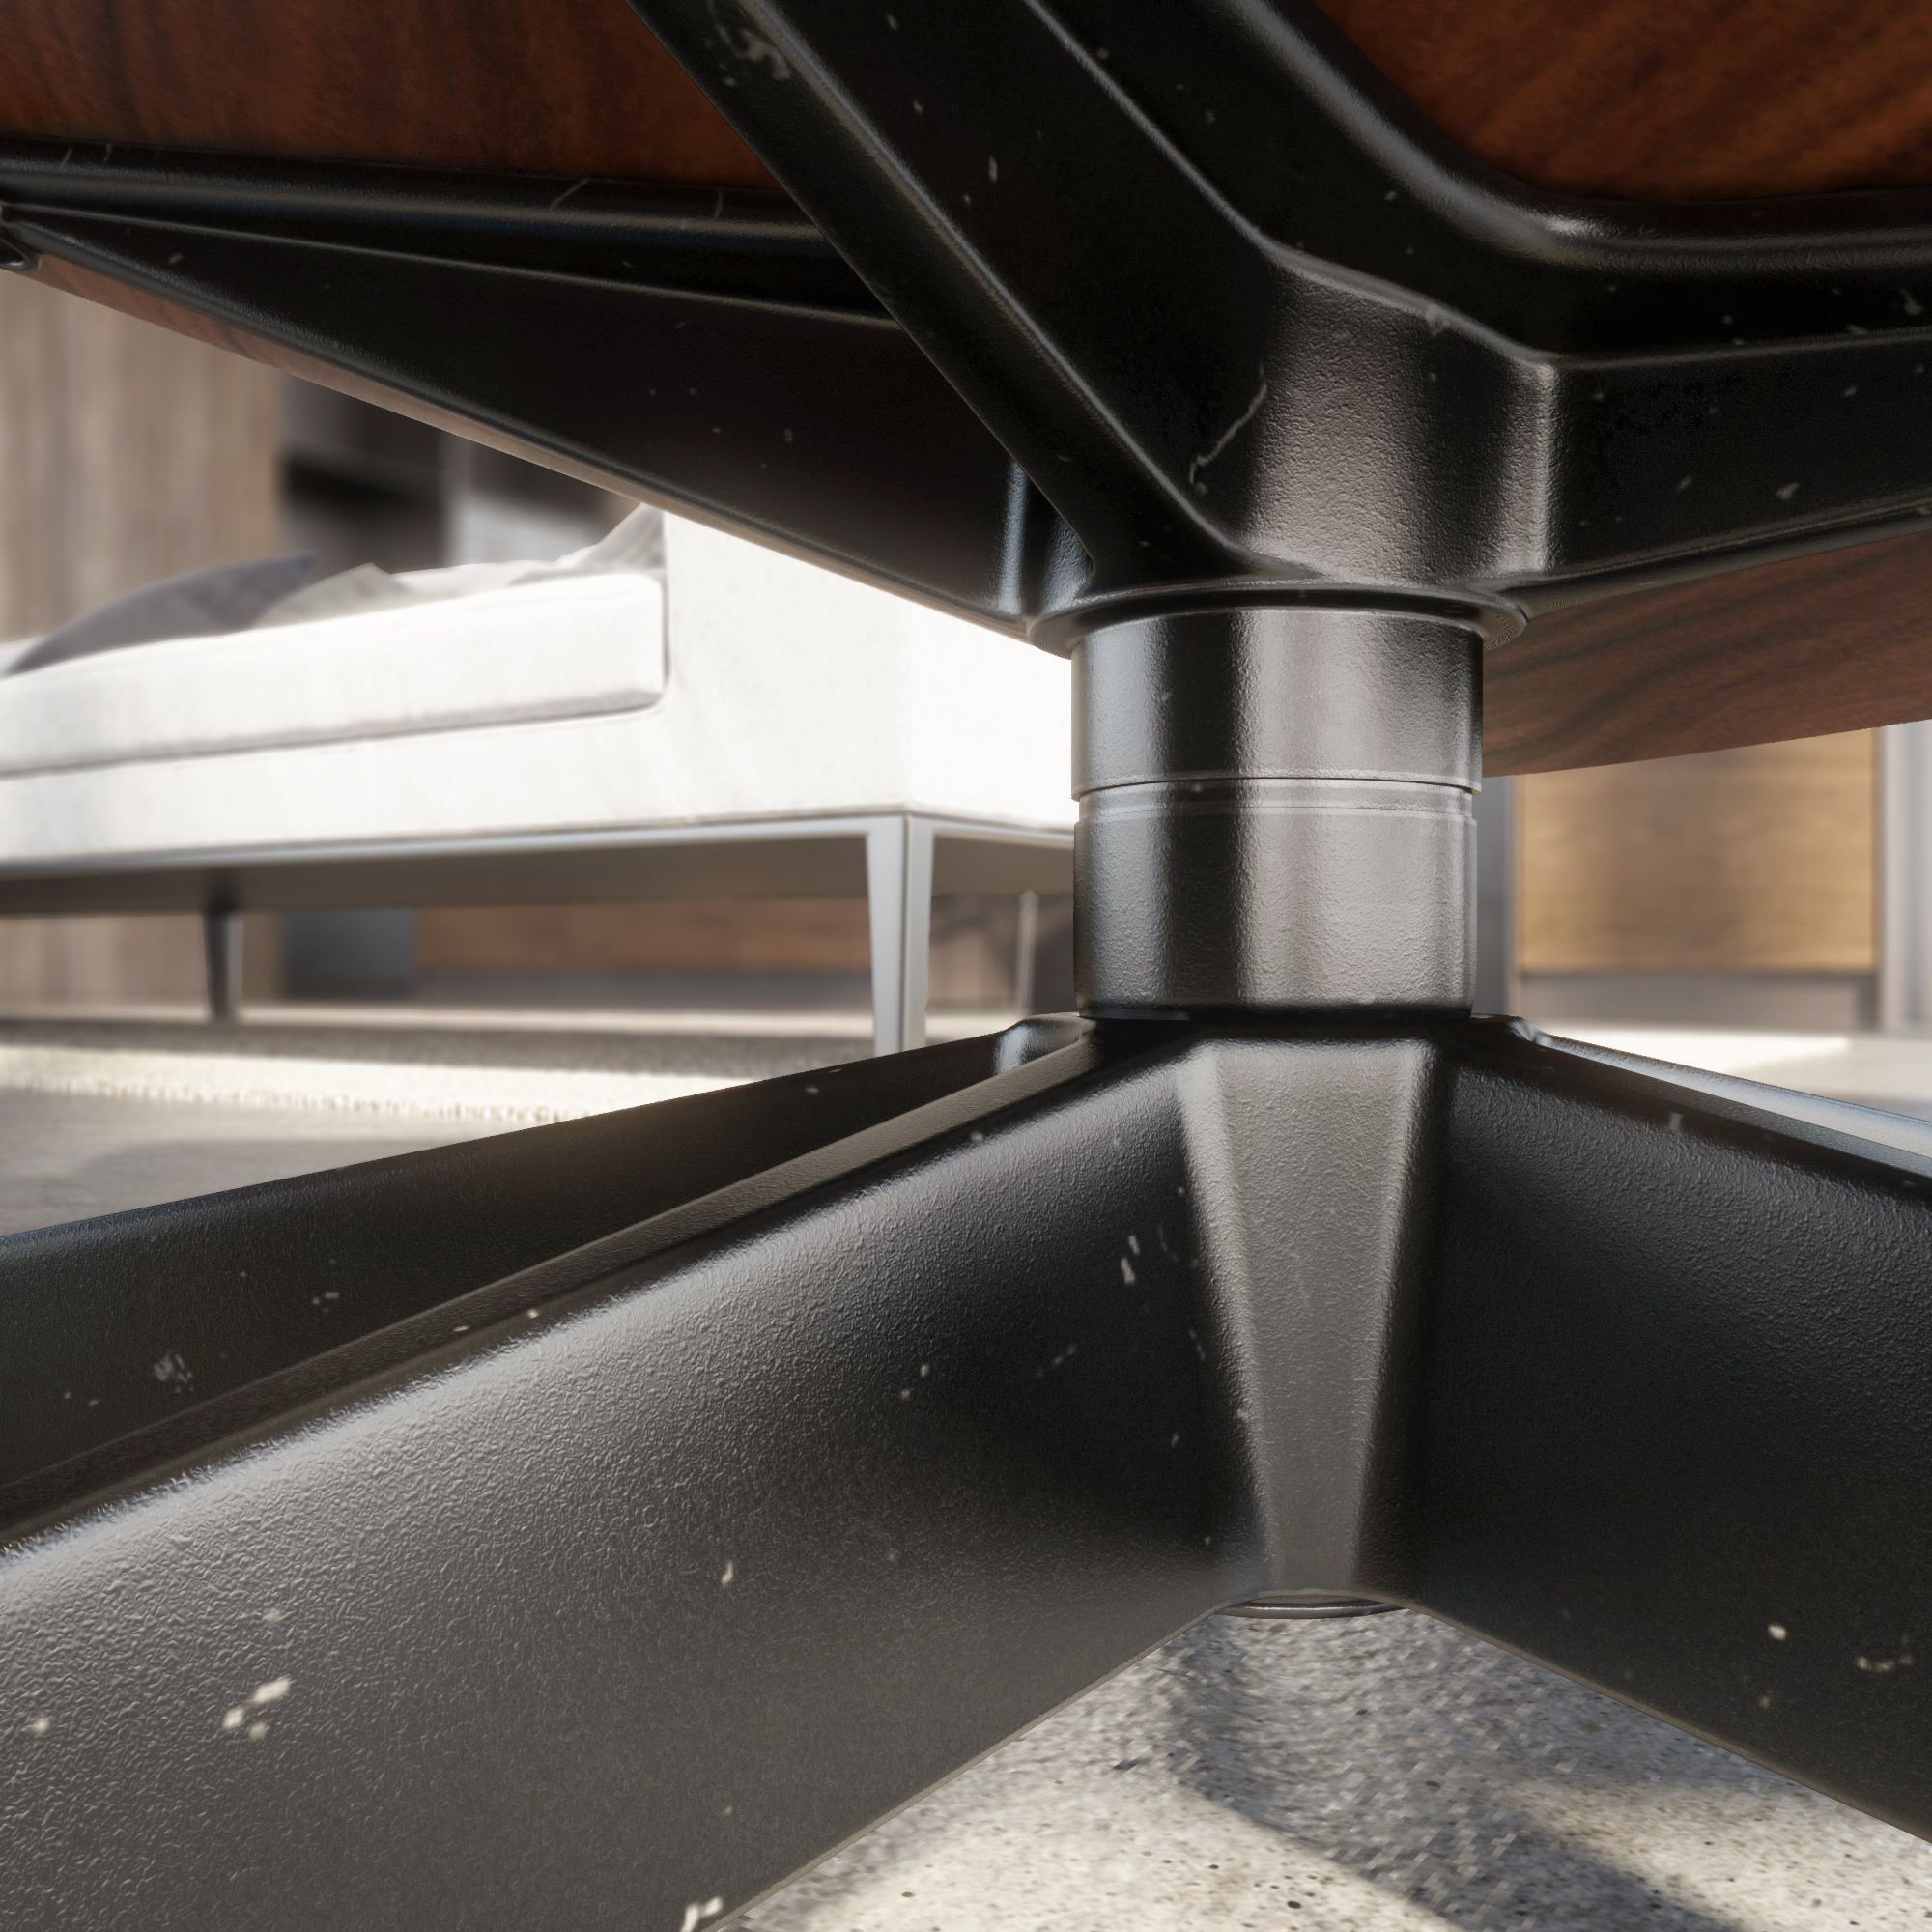
Metal close-up
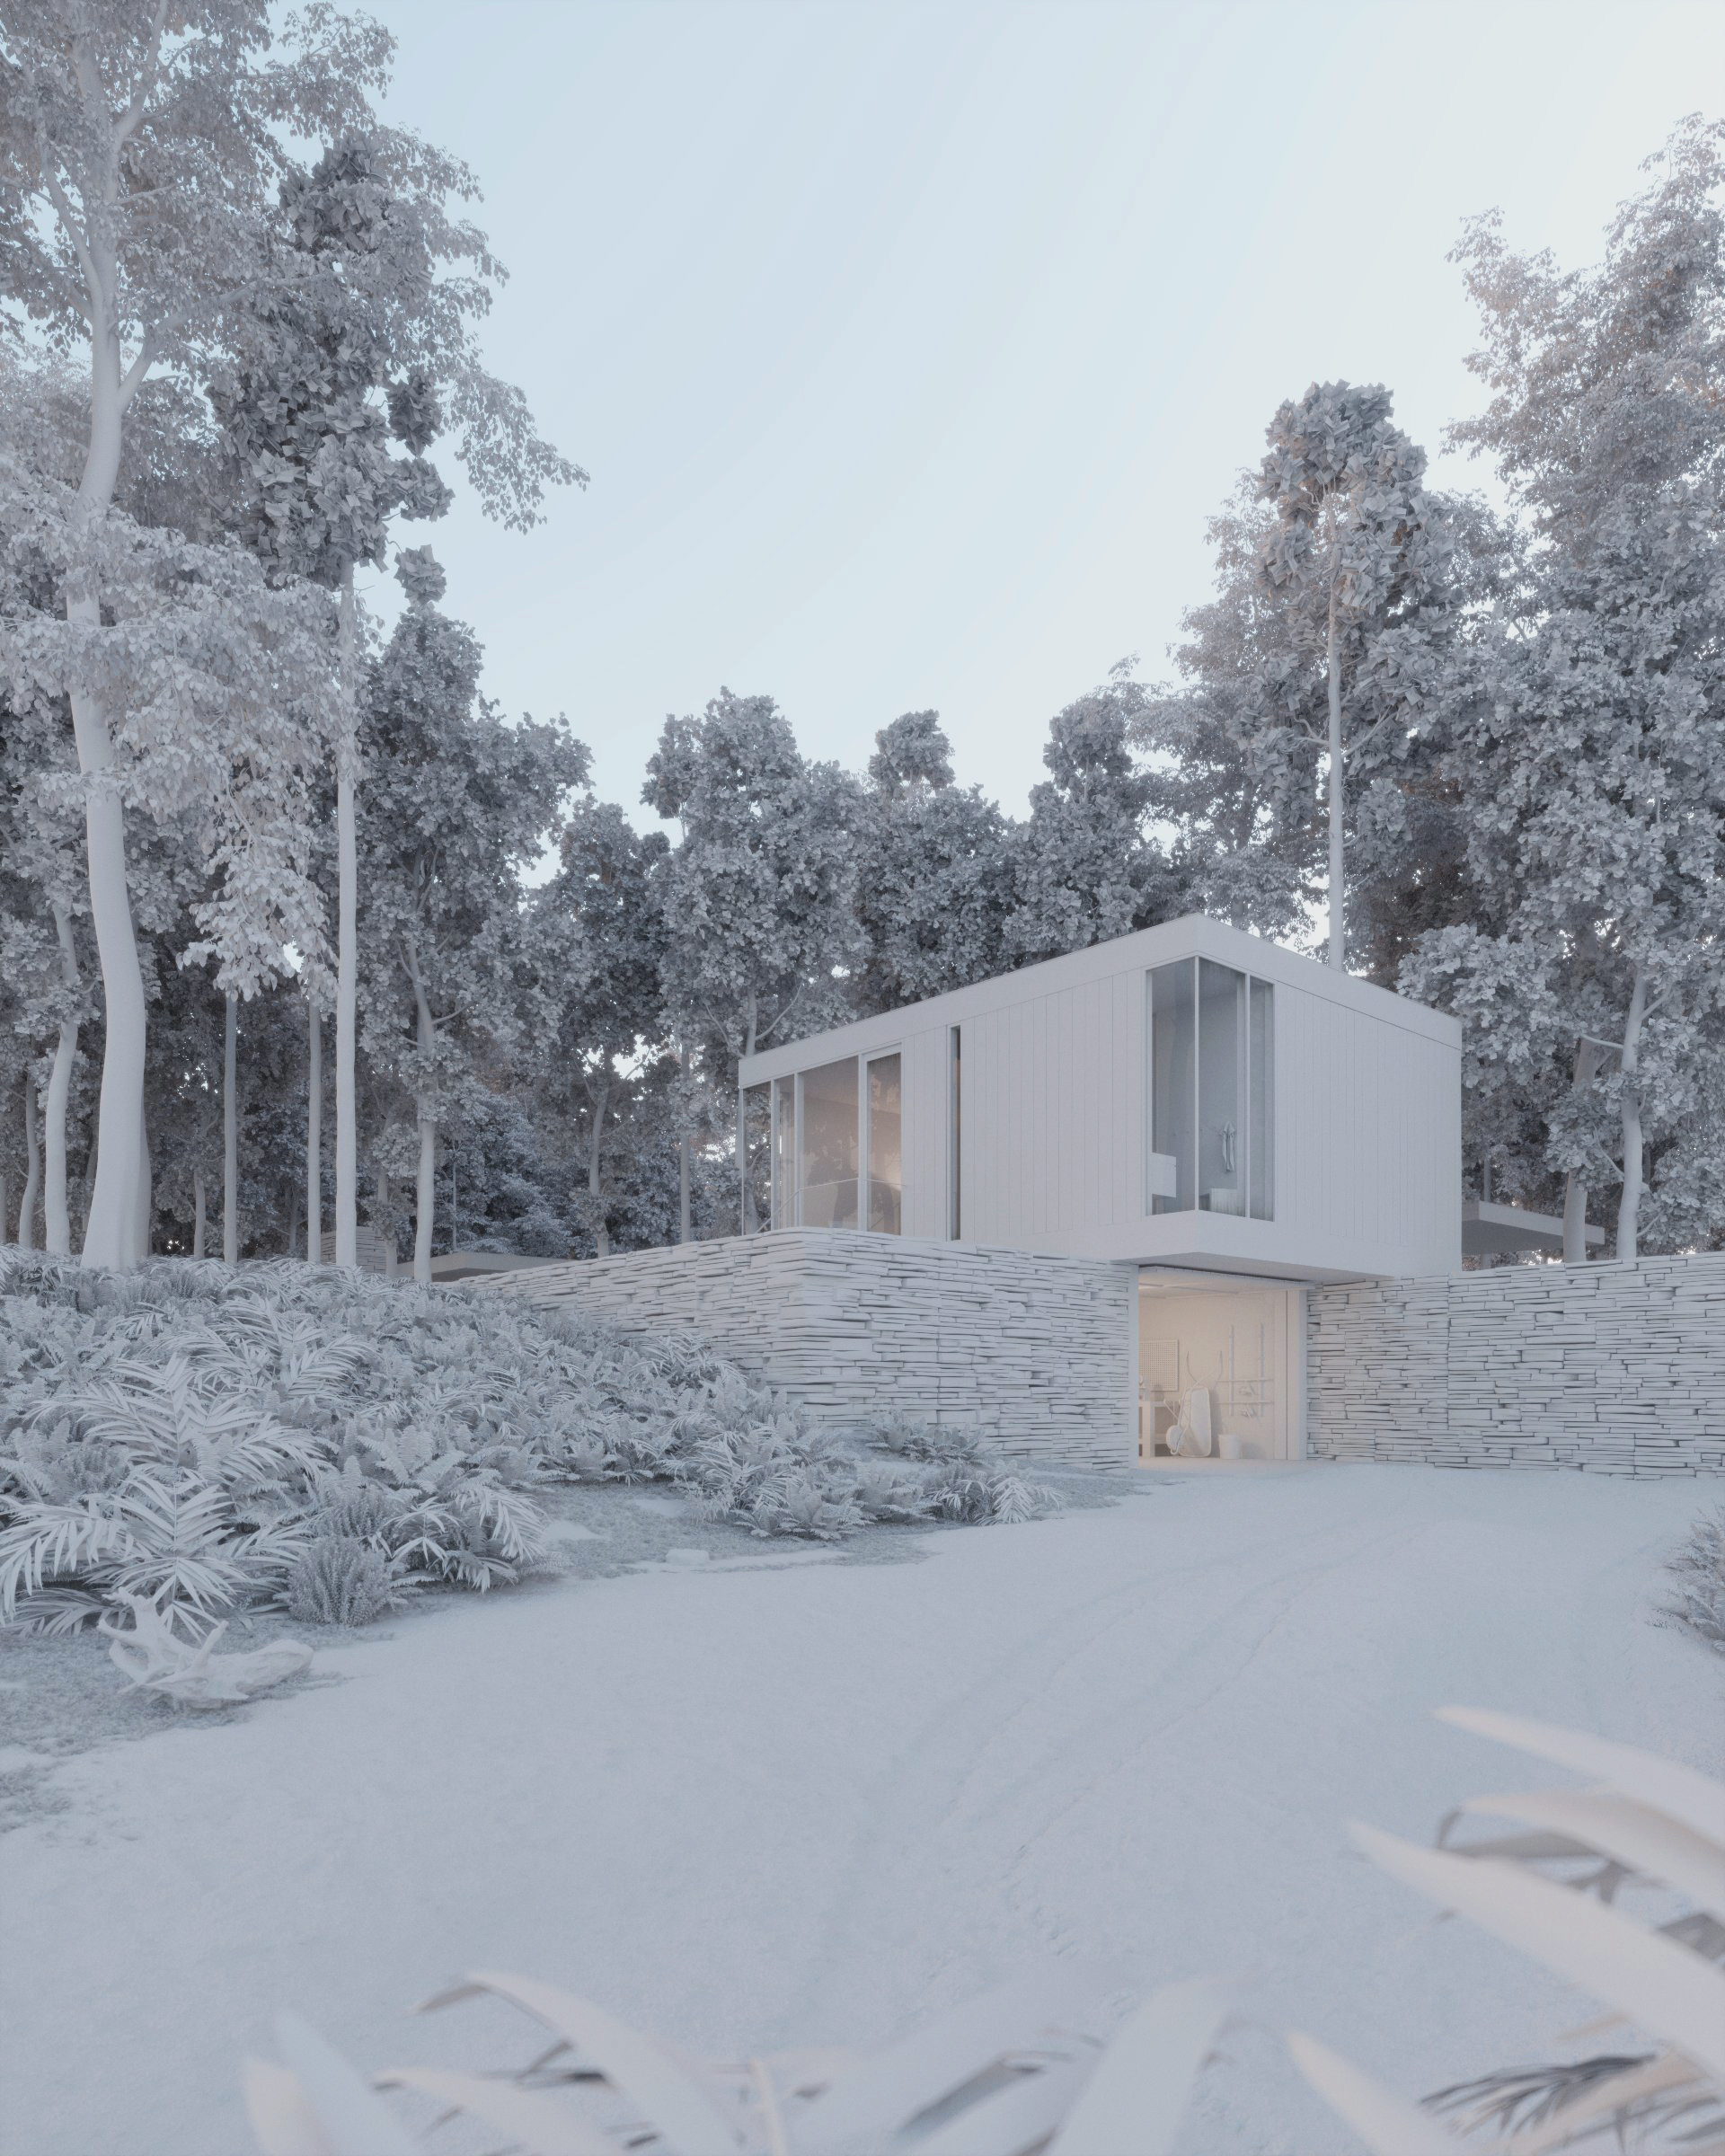
And if you zoom a lot in one exterior view you could see also a lot of details inside the garage, for example, a couple of fishing poles…

This is the interior set.
Wooden
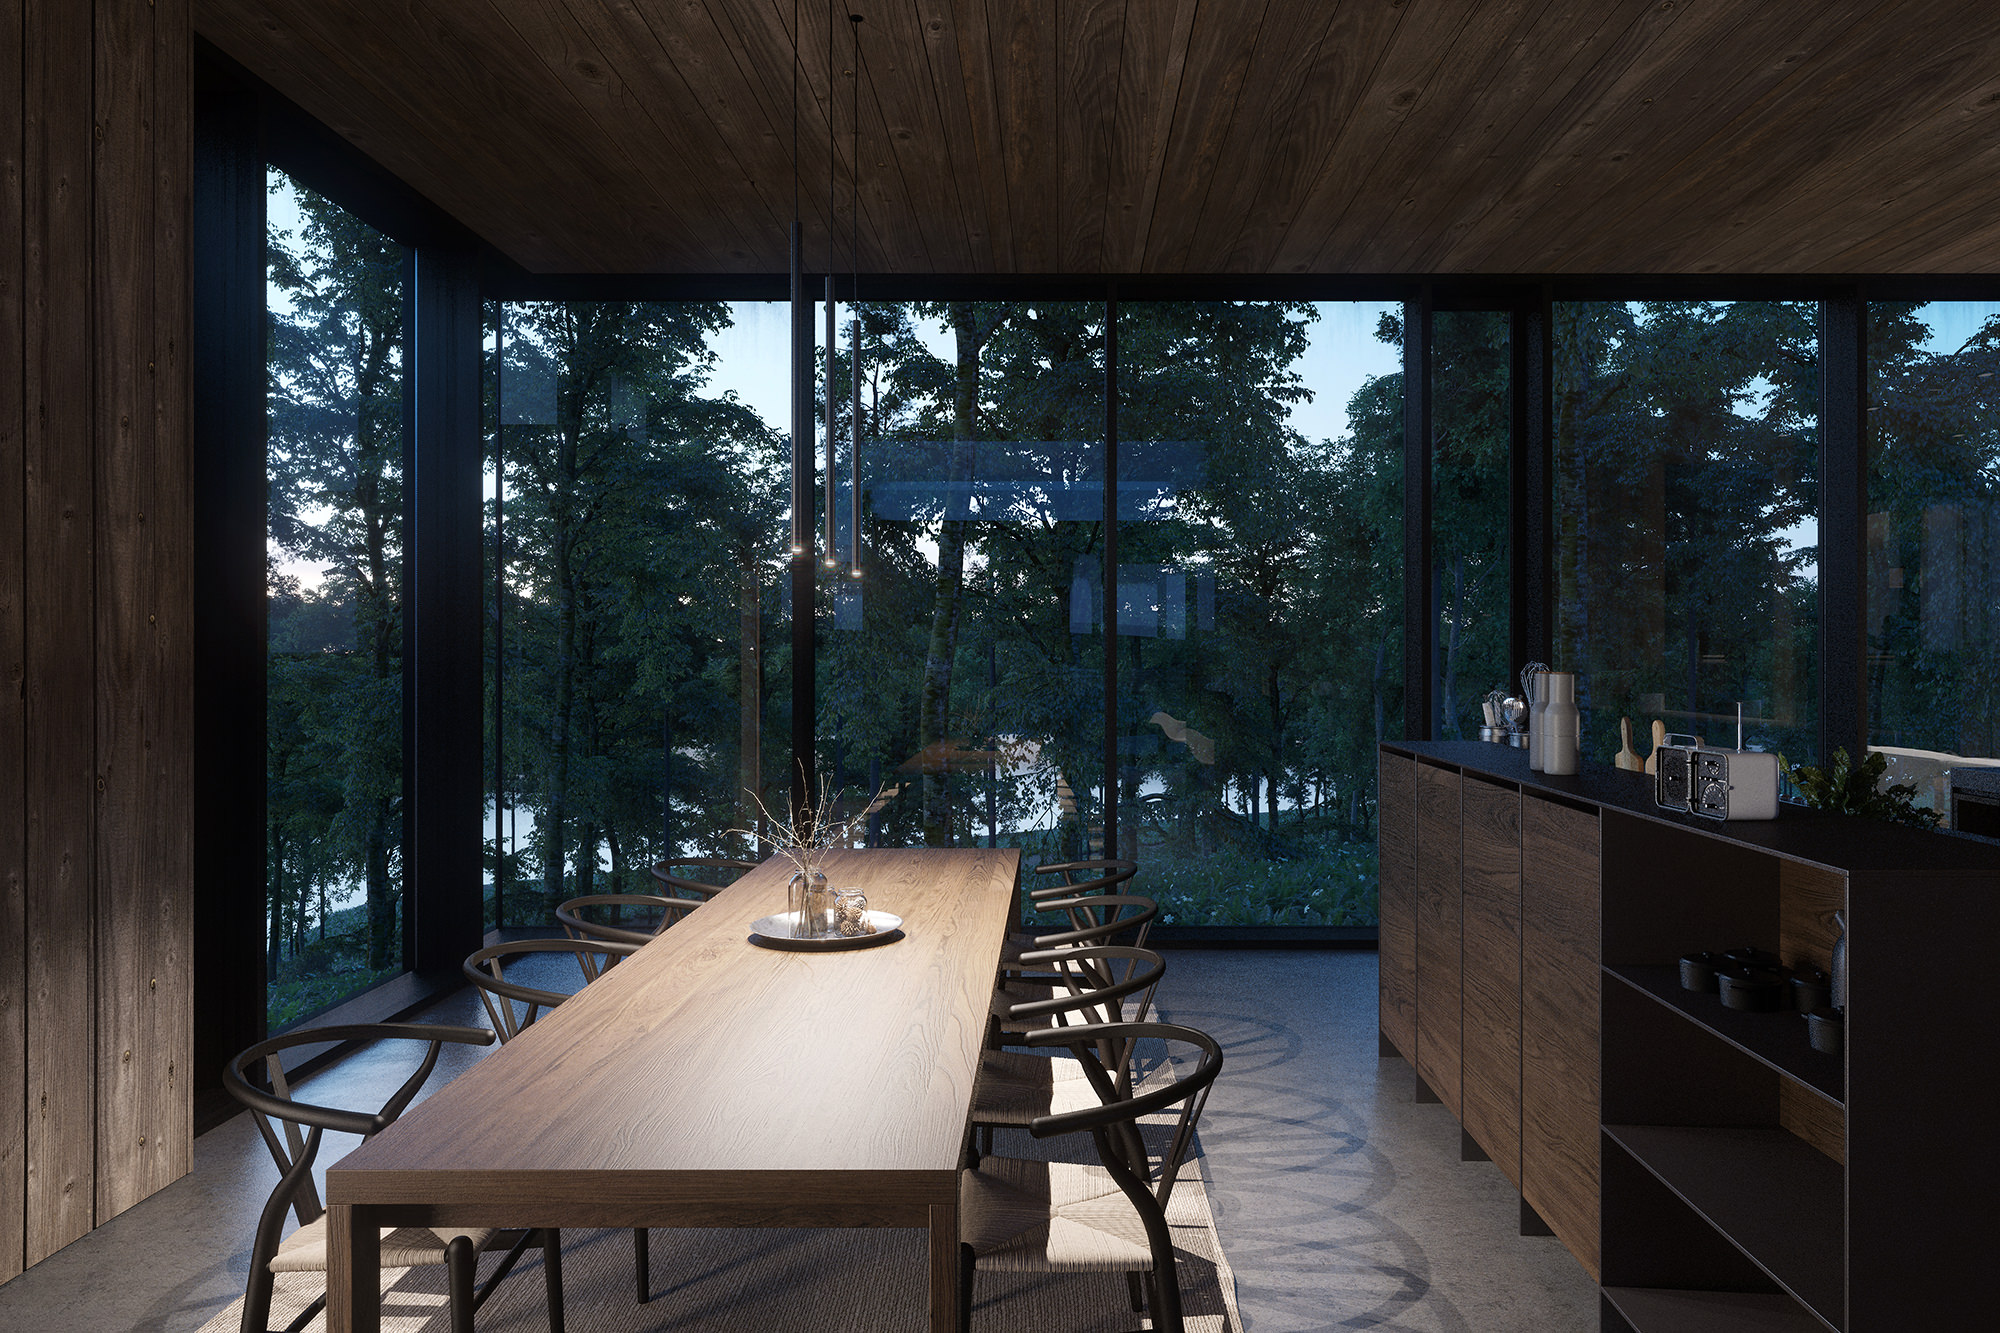
Hush
Drops
Post-Production
For this project, we didn’t work a lot in post-production since we had a very detailed full 3d scene.
We just work on depth and lighting to create the mood we love. Some final touches and contrast. That’s it!
https://d2mxuefqeaa7sj.cloudfront.net/s_D4D076E056FAD827BE3574A7D9B50ED4A02E0E39942ADDECBD955B7A80936580_1500582058808_Barbecue-gif.gif
https://d2mxuefqeaa7sj.cloudfront.net/s_D4D076E056FAD827BE3574A7D9B50ED4A02E0E39942ADDECBD955B7A80936580_1500584417501_Entrance-gif.gif
And for these images, that’s all!
Thank you so much for the interest in our work and hope that this article could help someone.


This was a great Read! In some instances, I like to hear a bit more of the interaction between you and client. Clients always have revisions; were there any decisions they made (if any) during the project that caused a change in the final renderings. Awesome work By the Way.
I am always inspired and fascinated when I see process images of such a great range of beautiful digital images.
And after recovering from the emotional end of it, I’m always curious about the more mundane side. How many hours were allotted for this? Was it simply a piece in a much larger scope or was this simply a rendering task. And hours… I mean, setting a budget to something like this could be difficult I imagine. And budget? For me, this can be a labor of love, and “going over” to reach the desired result is the norm….especially if it educates and simplifies the next project.
What impresses me most is the mood of the lighting and the compositions. Plenty of air to breathe in these spaces. FANTASTIC!
Hey, impressive work ! I just have a question, why use Reinhard (@0.1 burn value) instead of more common Linear ? Thank you 😀
Hi everybody, for those wondering why Reinhard over Linear, I went and asked to Alberto, he said he just used Reinhard because it produces a better color tone and he doesn’t like the Linear multiply so much.
ALways nice to see a bit more of the modelling process, thanks!
Stunning render, love the mood!
Love your work! you use the shadows of the vray sun or the HDRI?