


Making of Sarmiento Museum
David Santos is no stranger to the blog, with a very popular article already posted before – The Making of Lake Lugano House. Today he is sharing the process behind making the Sarmiento Museum project in his studio. To recreate this National Historic Monument in the northern suburb of Buenos Aires, Argentina, David and his team used SketchUp, V-Ray for SketchUp and the new Skatter Plugin for SketchUp for scattering all the vegetation in the scene. Follow David in this article as he takes us from start to finish on this one. Enjoy!
Introduction
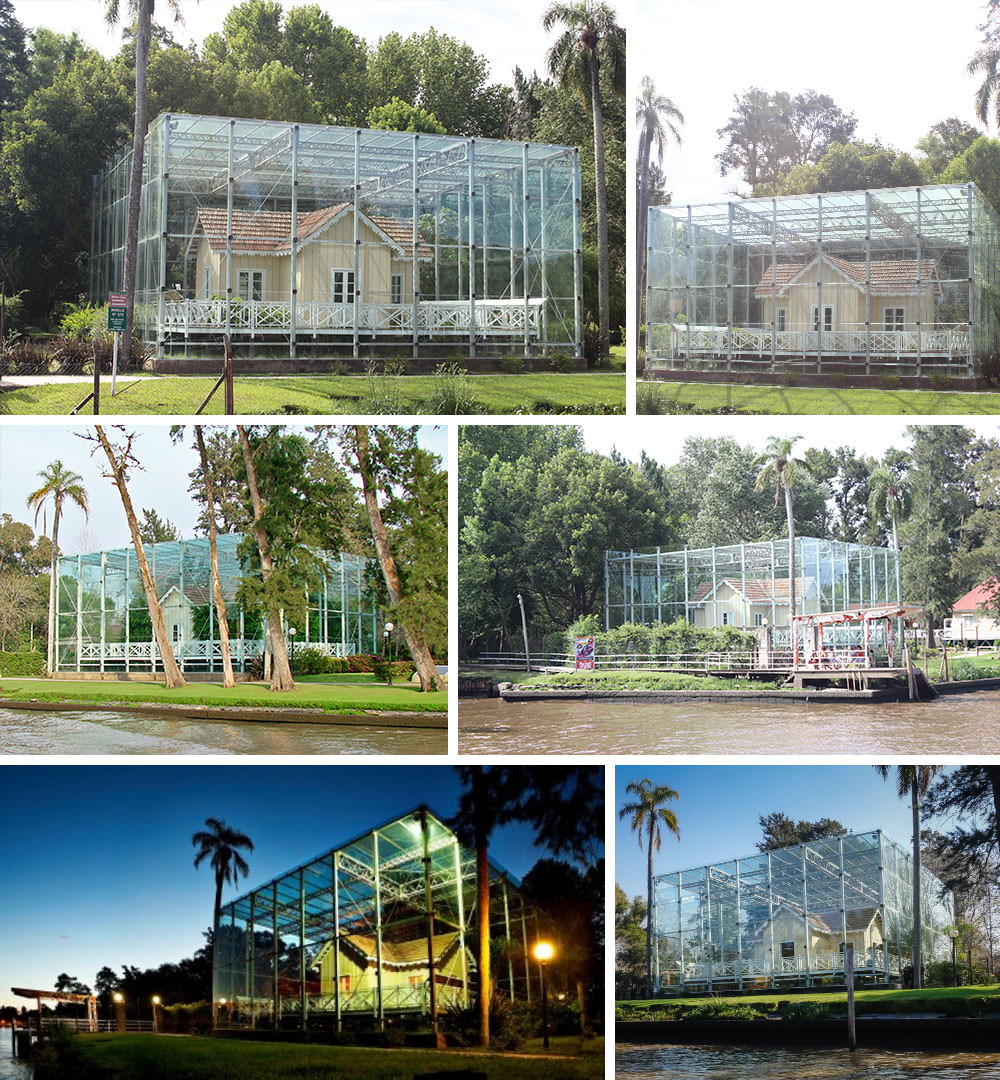
We start with the end in mind. Above you can see a closeup shot, and here are more images from this project set.


Introduction
First of all, I would like to thank Ronen for the opportunity to participate in his blog once more. I´ve been a huge admirer for some time now and I´ve gained a lot of knowledge about modeling processing, and most importantly techniques. Also, I want to admire the big effort that Thomas and Ronen have done with such an amazing software that Skatter is. Without them, this project could not be possible.
With great pleasure, I would like to present our project.
After the Lake Lugano House Project, I always wanted to do another project that would take advantage of all the new tools that SketchUp and V-Ray for SketchUp are offering.
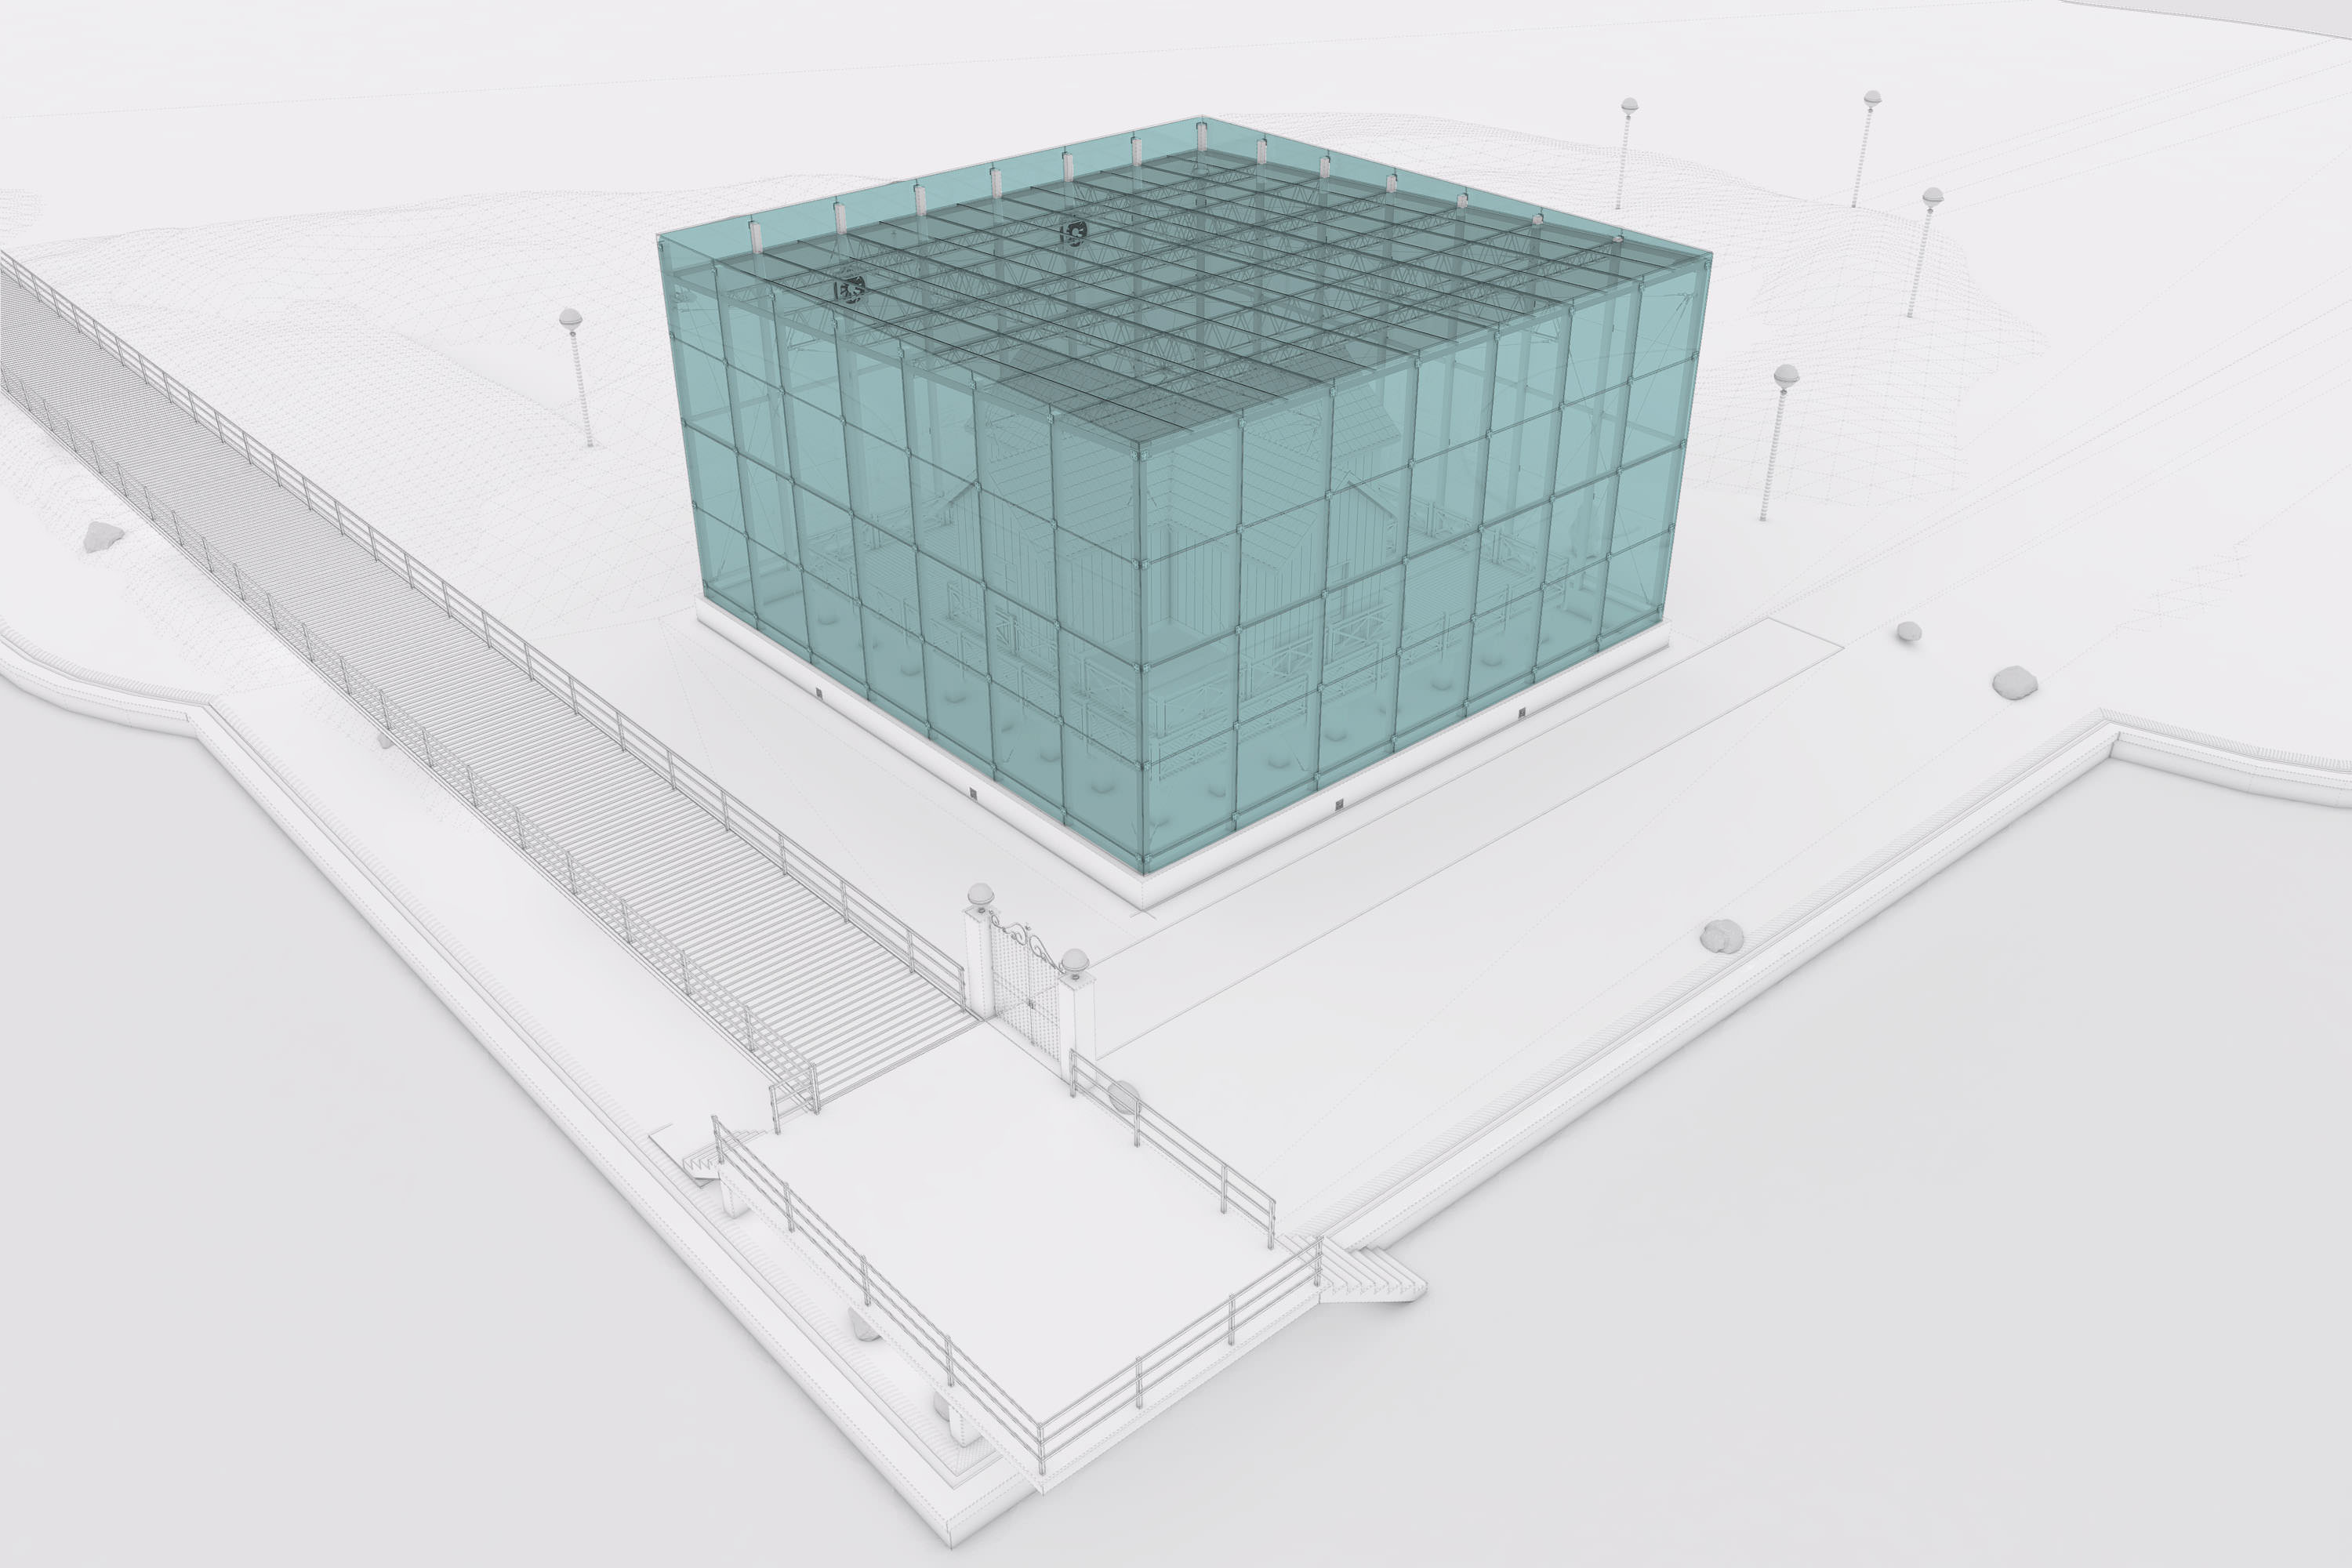
In my recent travels to Argentina, I discovered an amazing place that contained a “Caged House”. I was so intrigued to find such an interesting structure right beside a river, it immediately called my attention.
The Sarmiento House Museum is a historic house preserved in a Crystal Cage. It´s the creation of architecture to preserve architecture. Once I got back home, I immediately started the project with my team. The project demanded a lot of vegetation which worked perfectly with SketchUp´s new Skatter plug-in.
About the Project
Sarmiento House is a National Historic Monument in the northern suburb of Buenos Aires, Argentina. It was built as a residence in 1855 by the 7th President of Argentina. In 1966 it was declared a National Historic Monument and it´s presently a museum.
References
It´s always important to gather good references to be able to start a project. The photos that I was able to take from the site was a great start. Some important information to take into consideration :
- Dimensions.
- Type and density of vegetation.
- Shadows and lighting conditions.
- Glass materials and the color of the water on site.
- References (Collage).
SketchUp and 3D Modelling
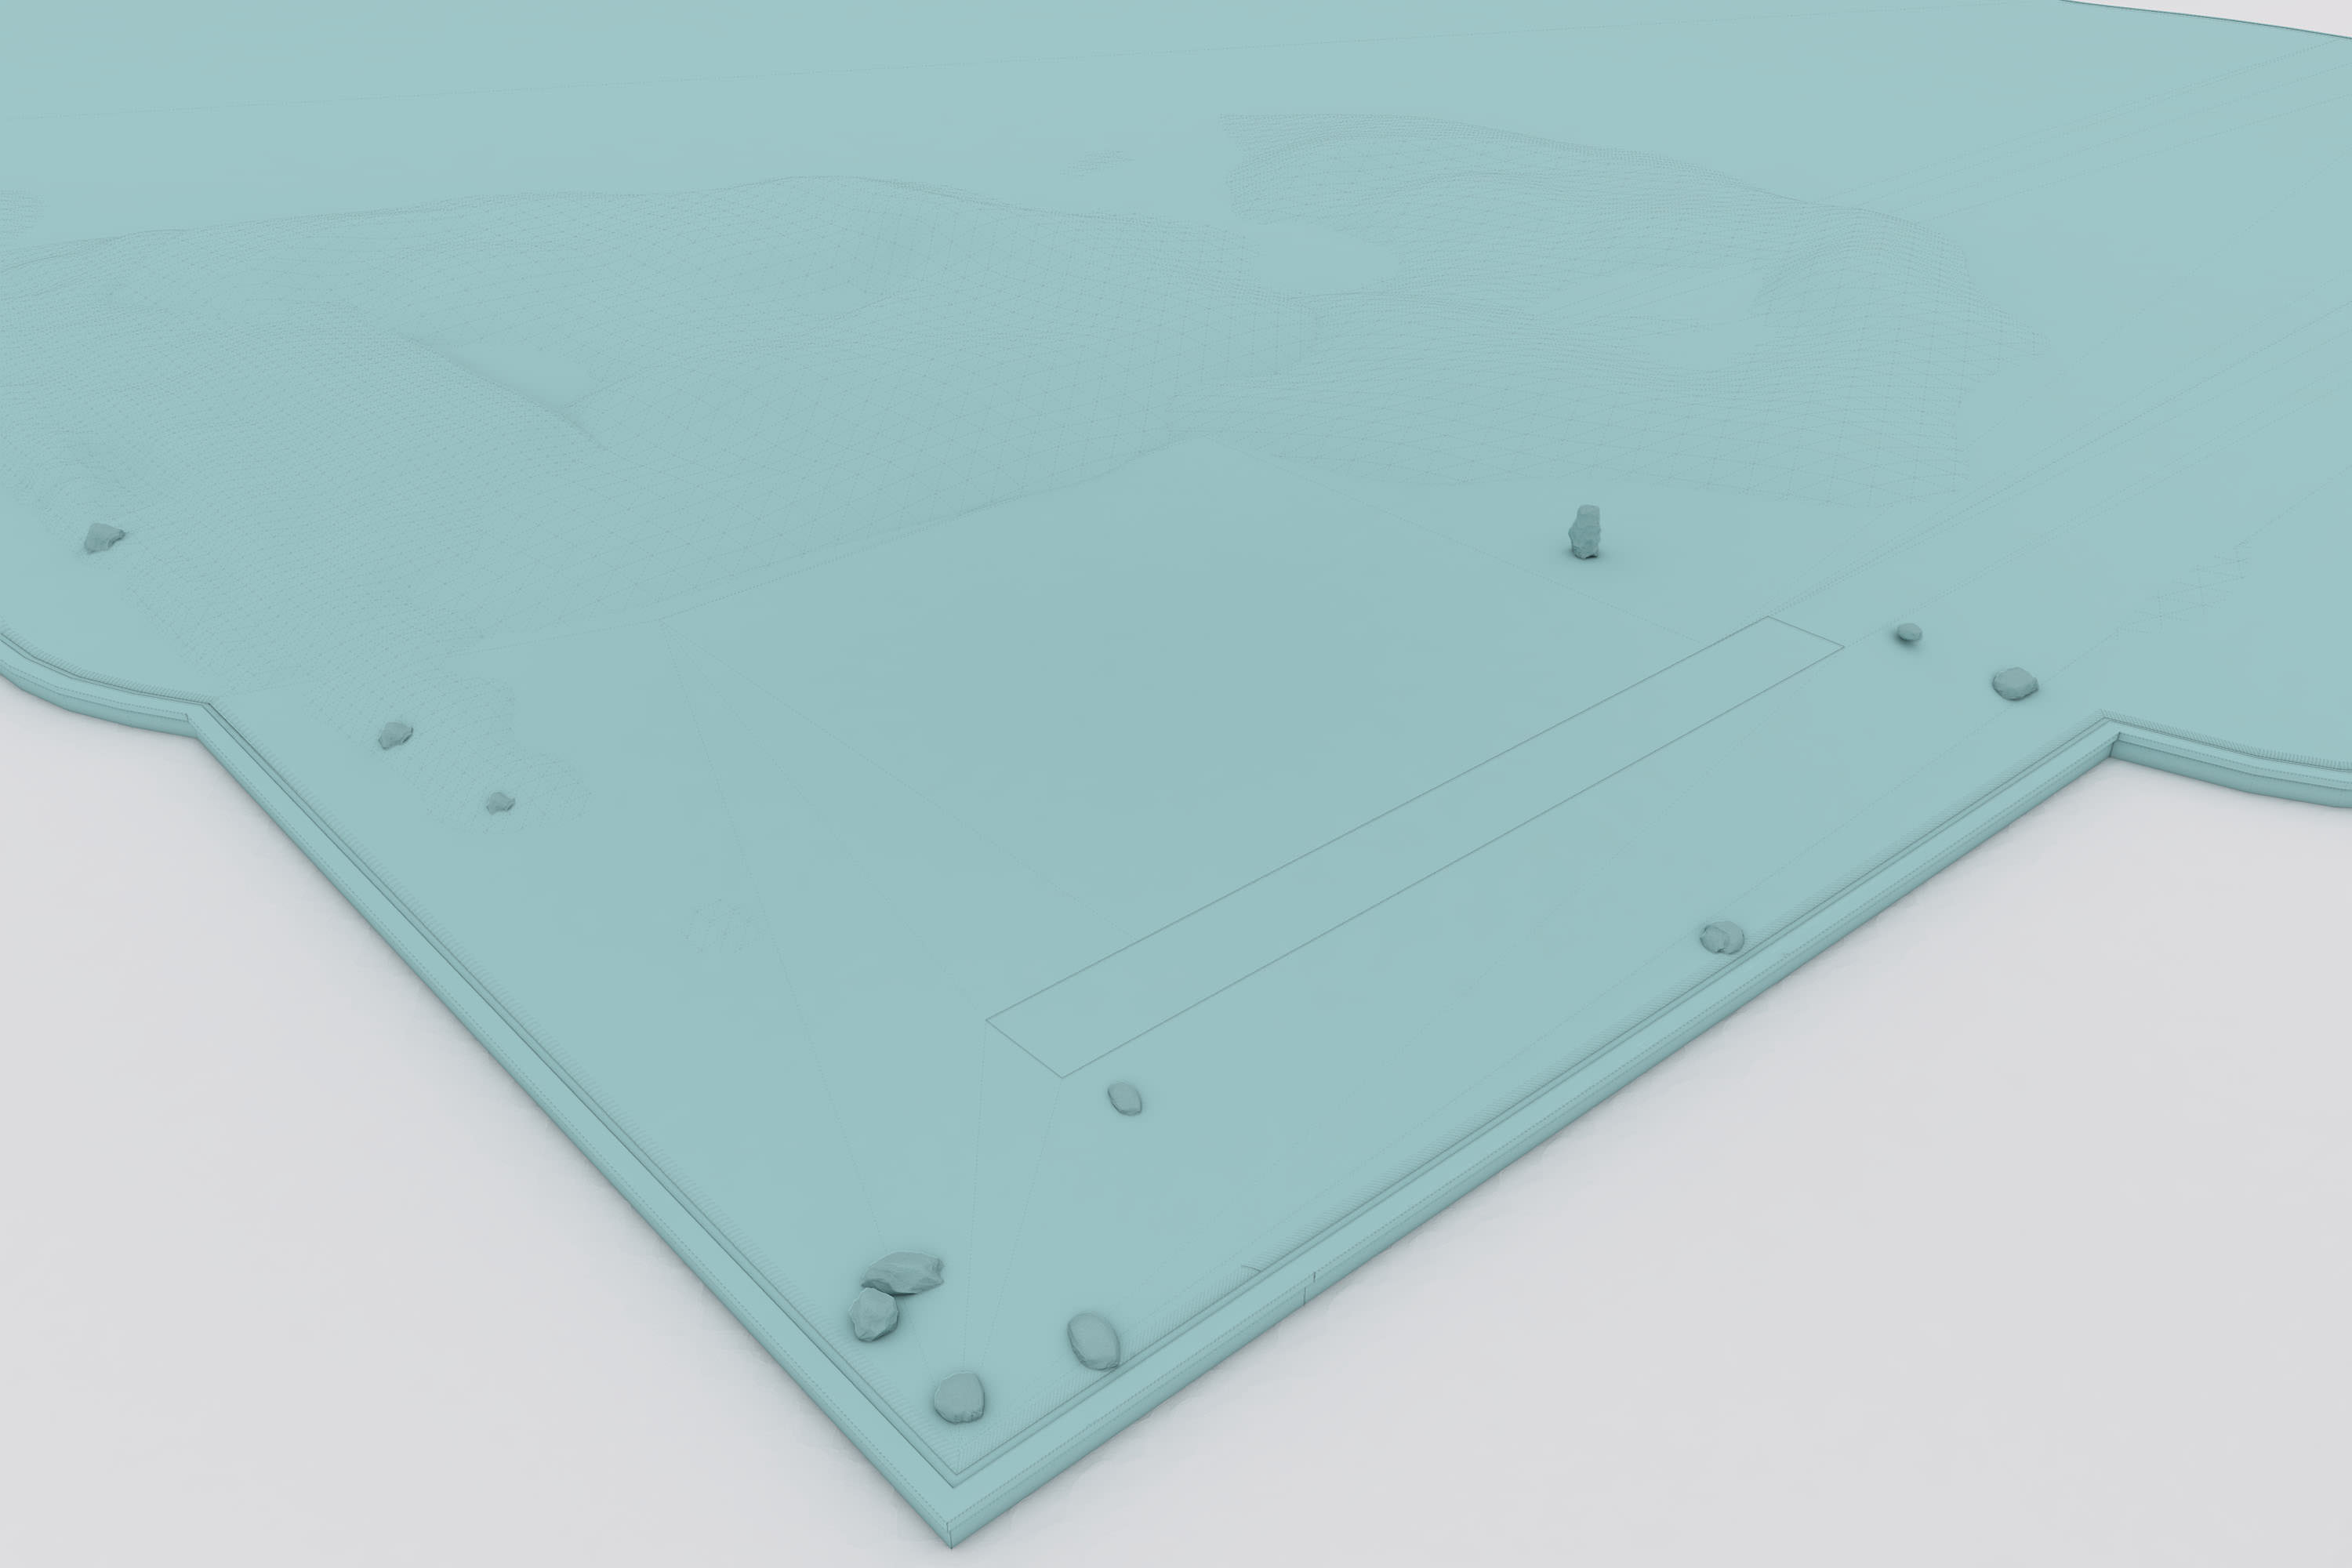
The next step to develop a SketchUp model was to locate the site on Google Earth to confirm dimensions and view the project´s context. Up next we´ll display a breakdown of the final SketchUp model.
The Context
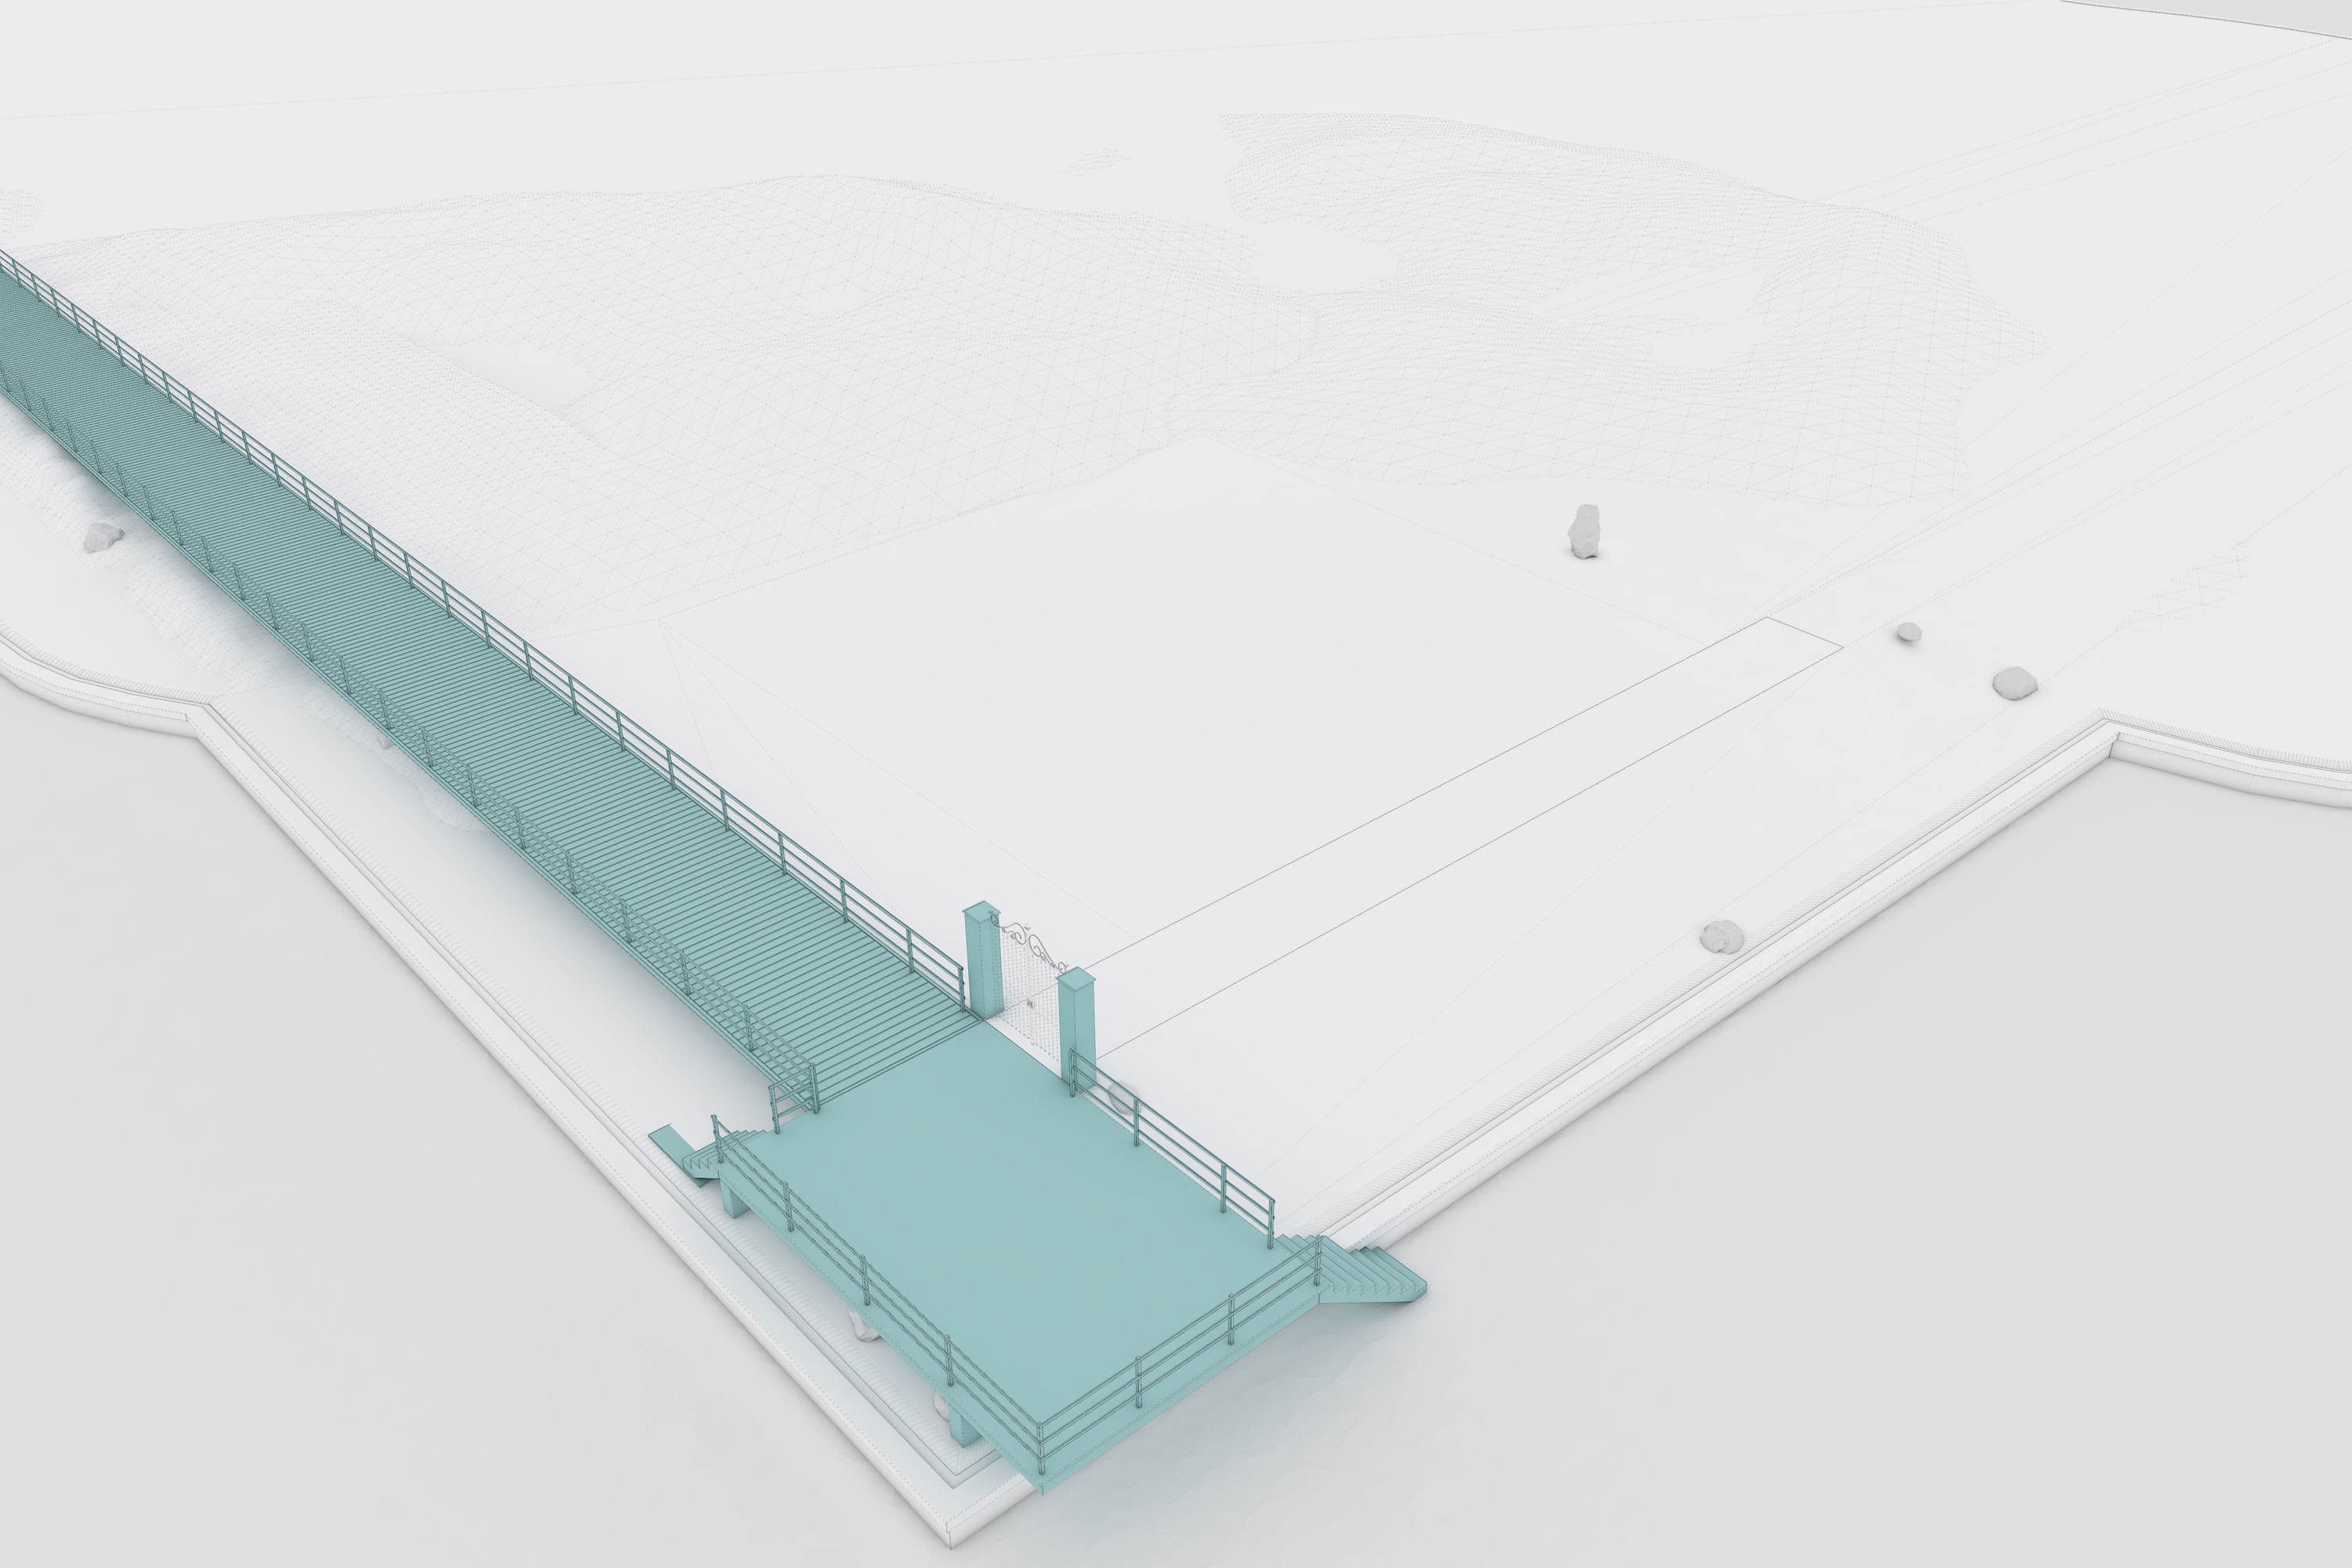
The Pier
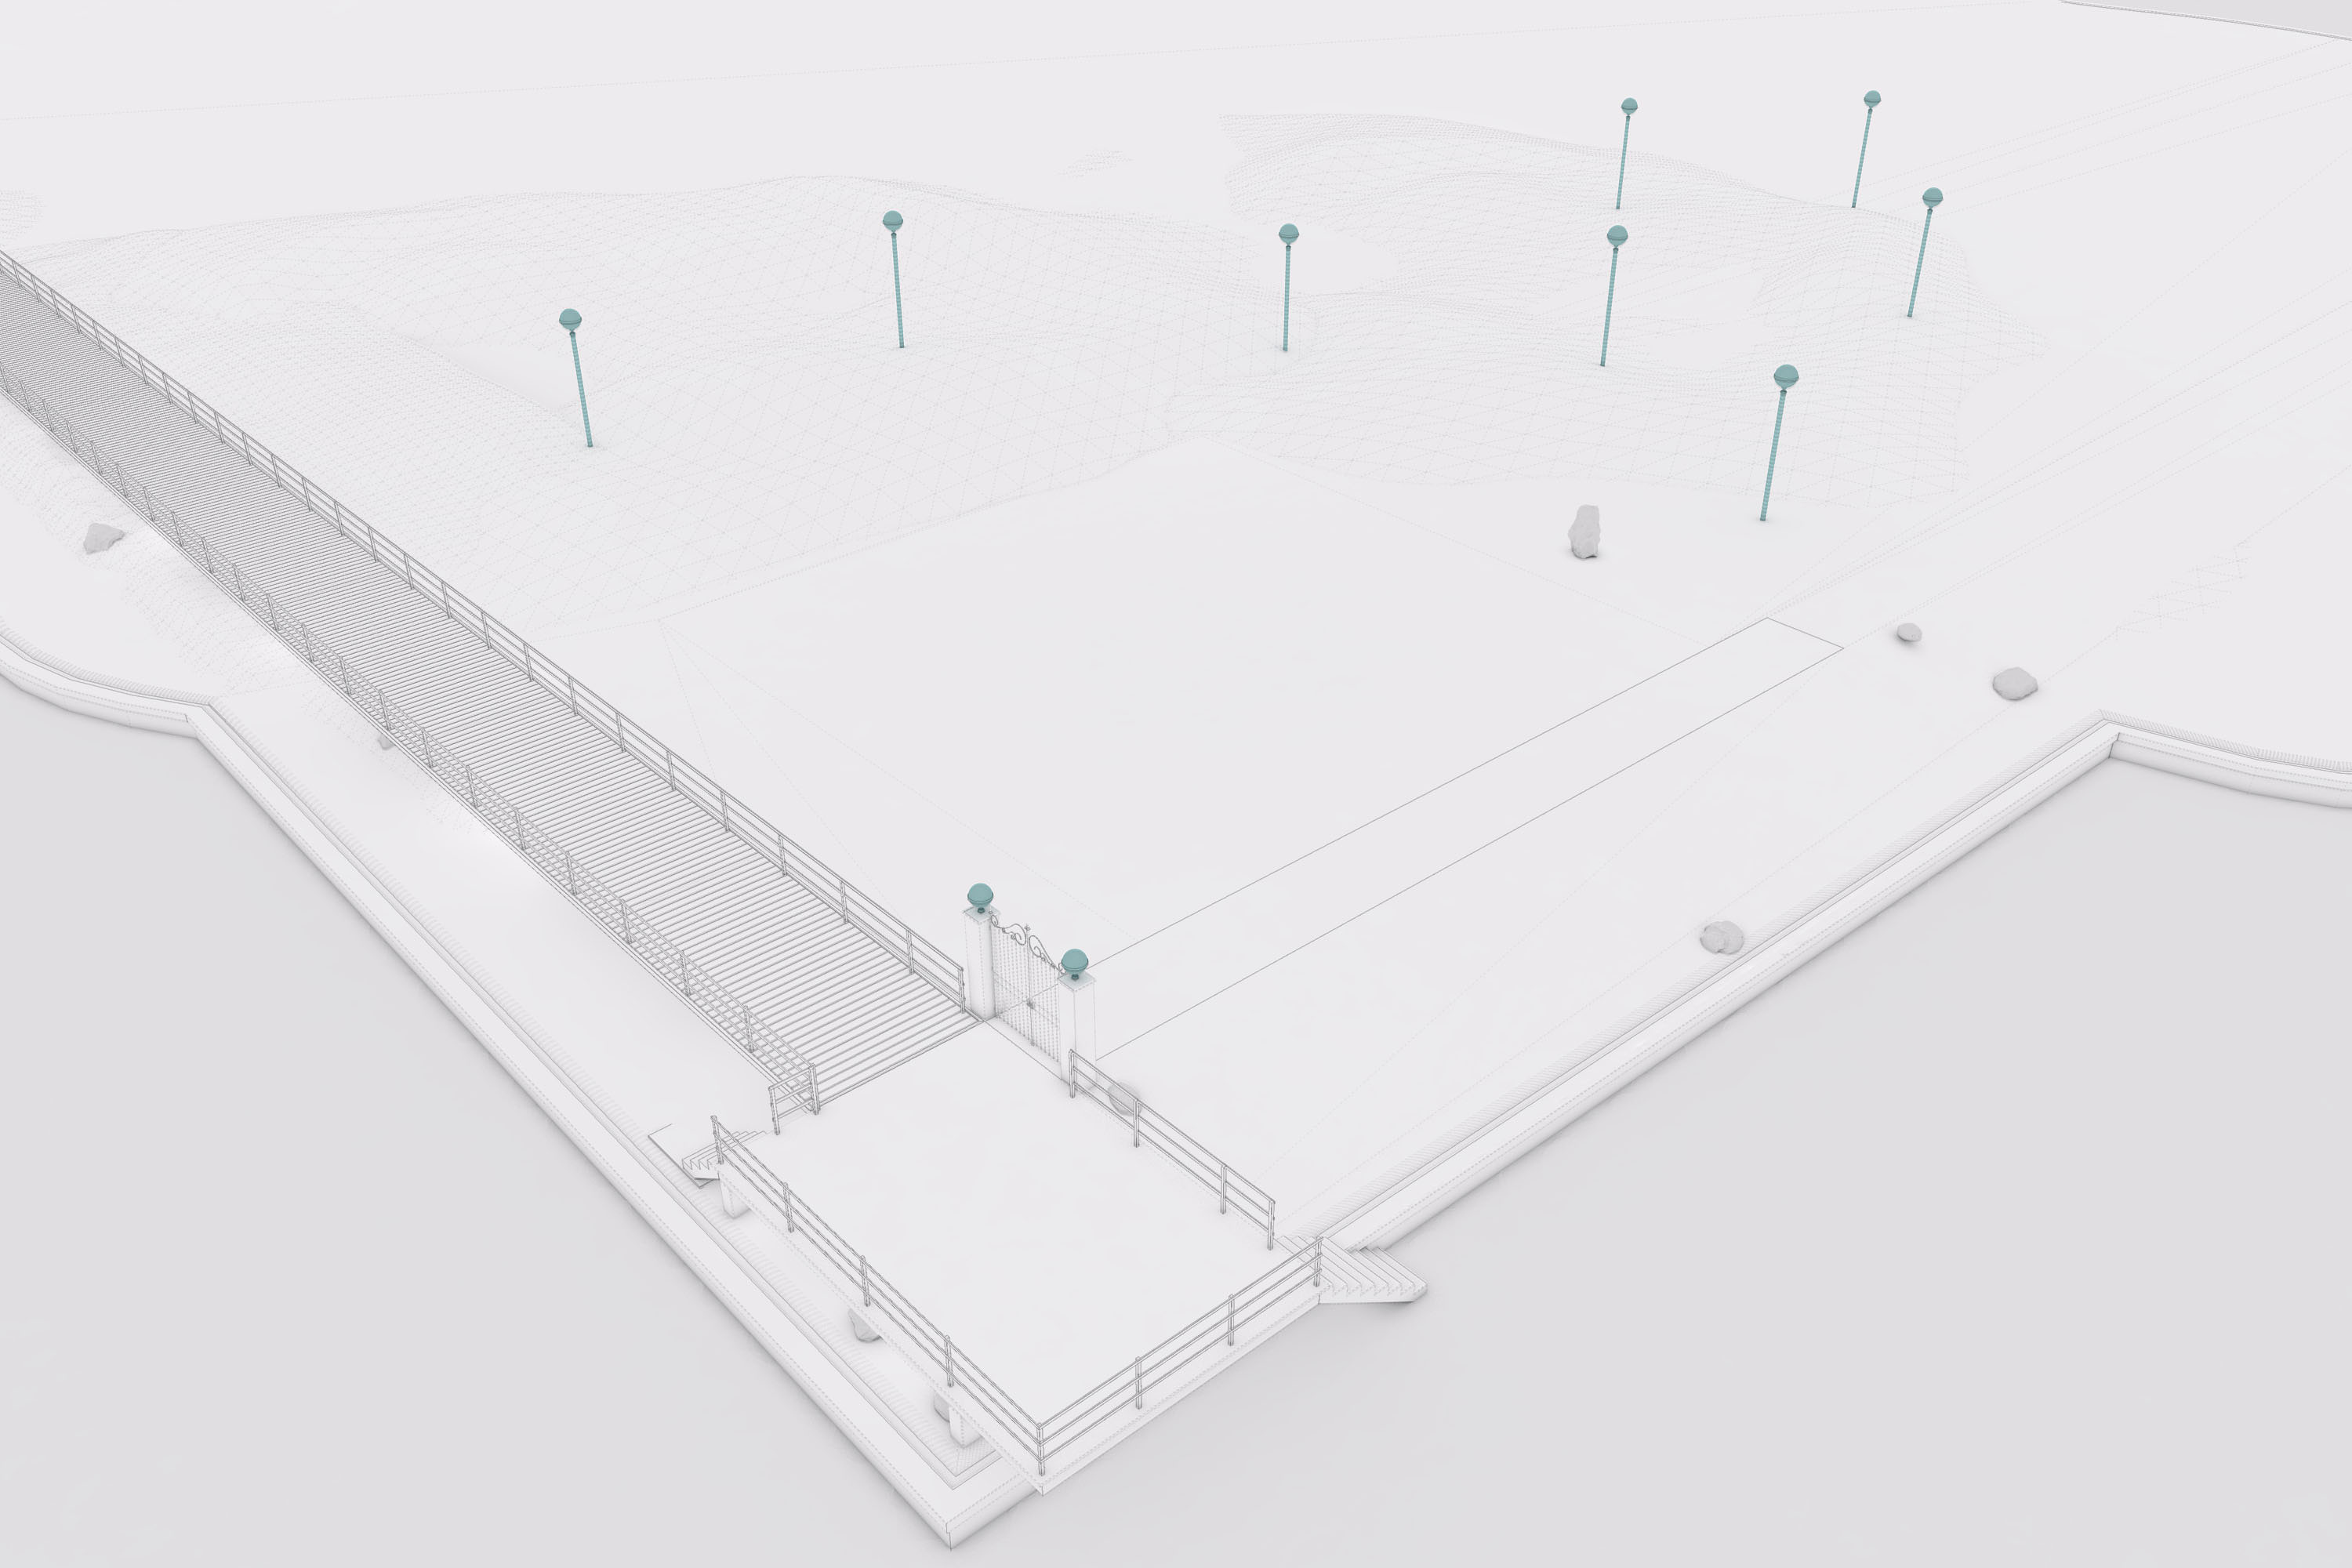
The Exterior Lights
The Internal Bridge
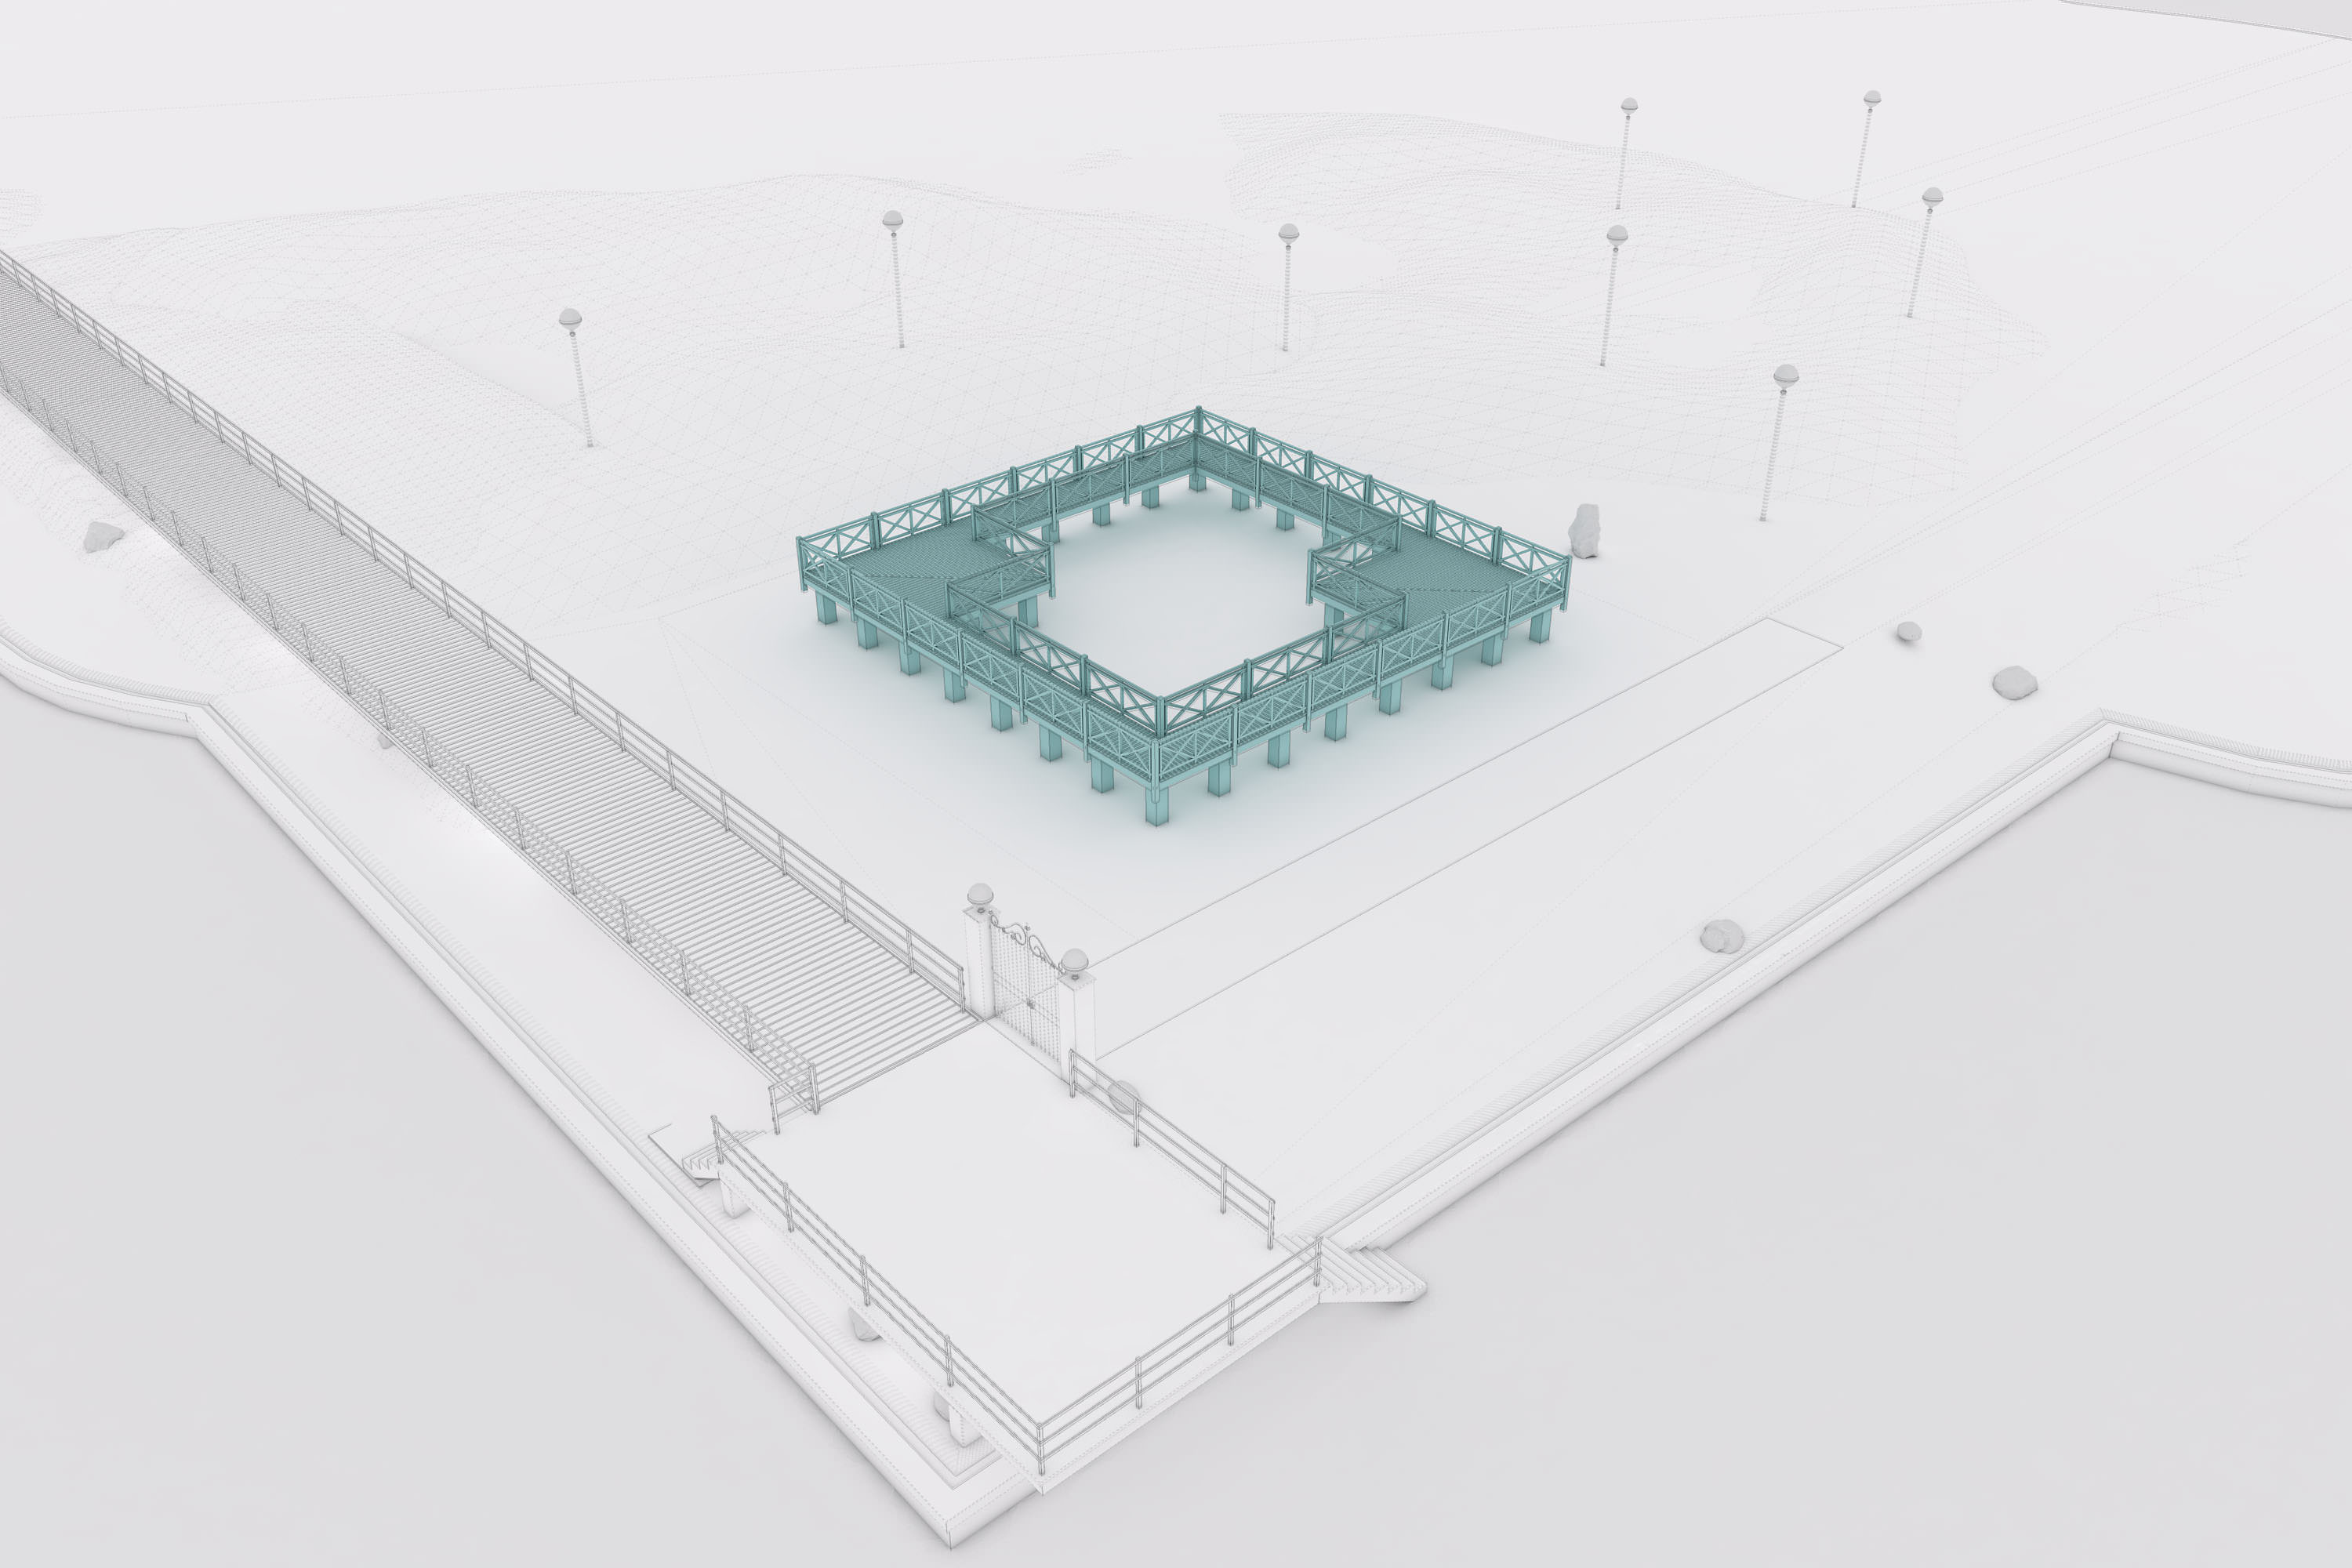
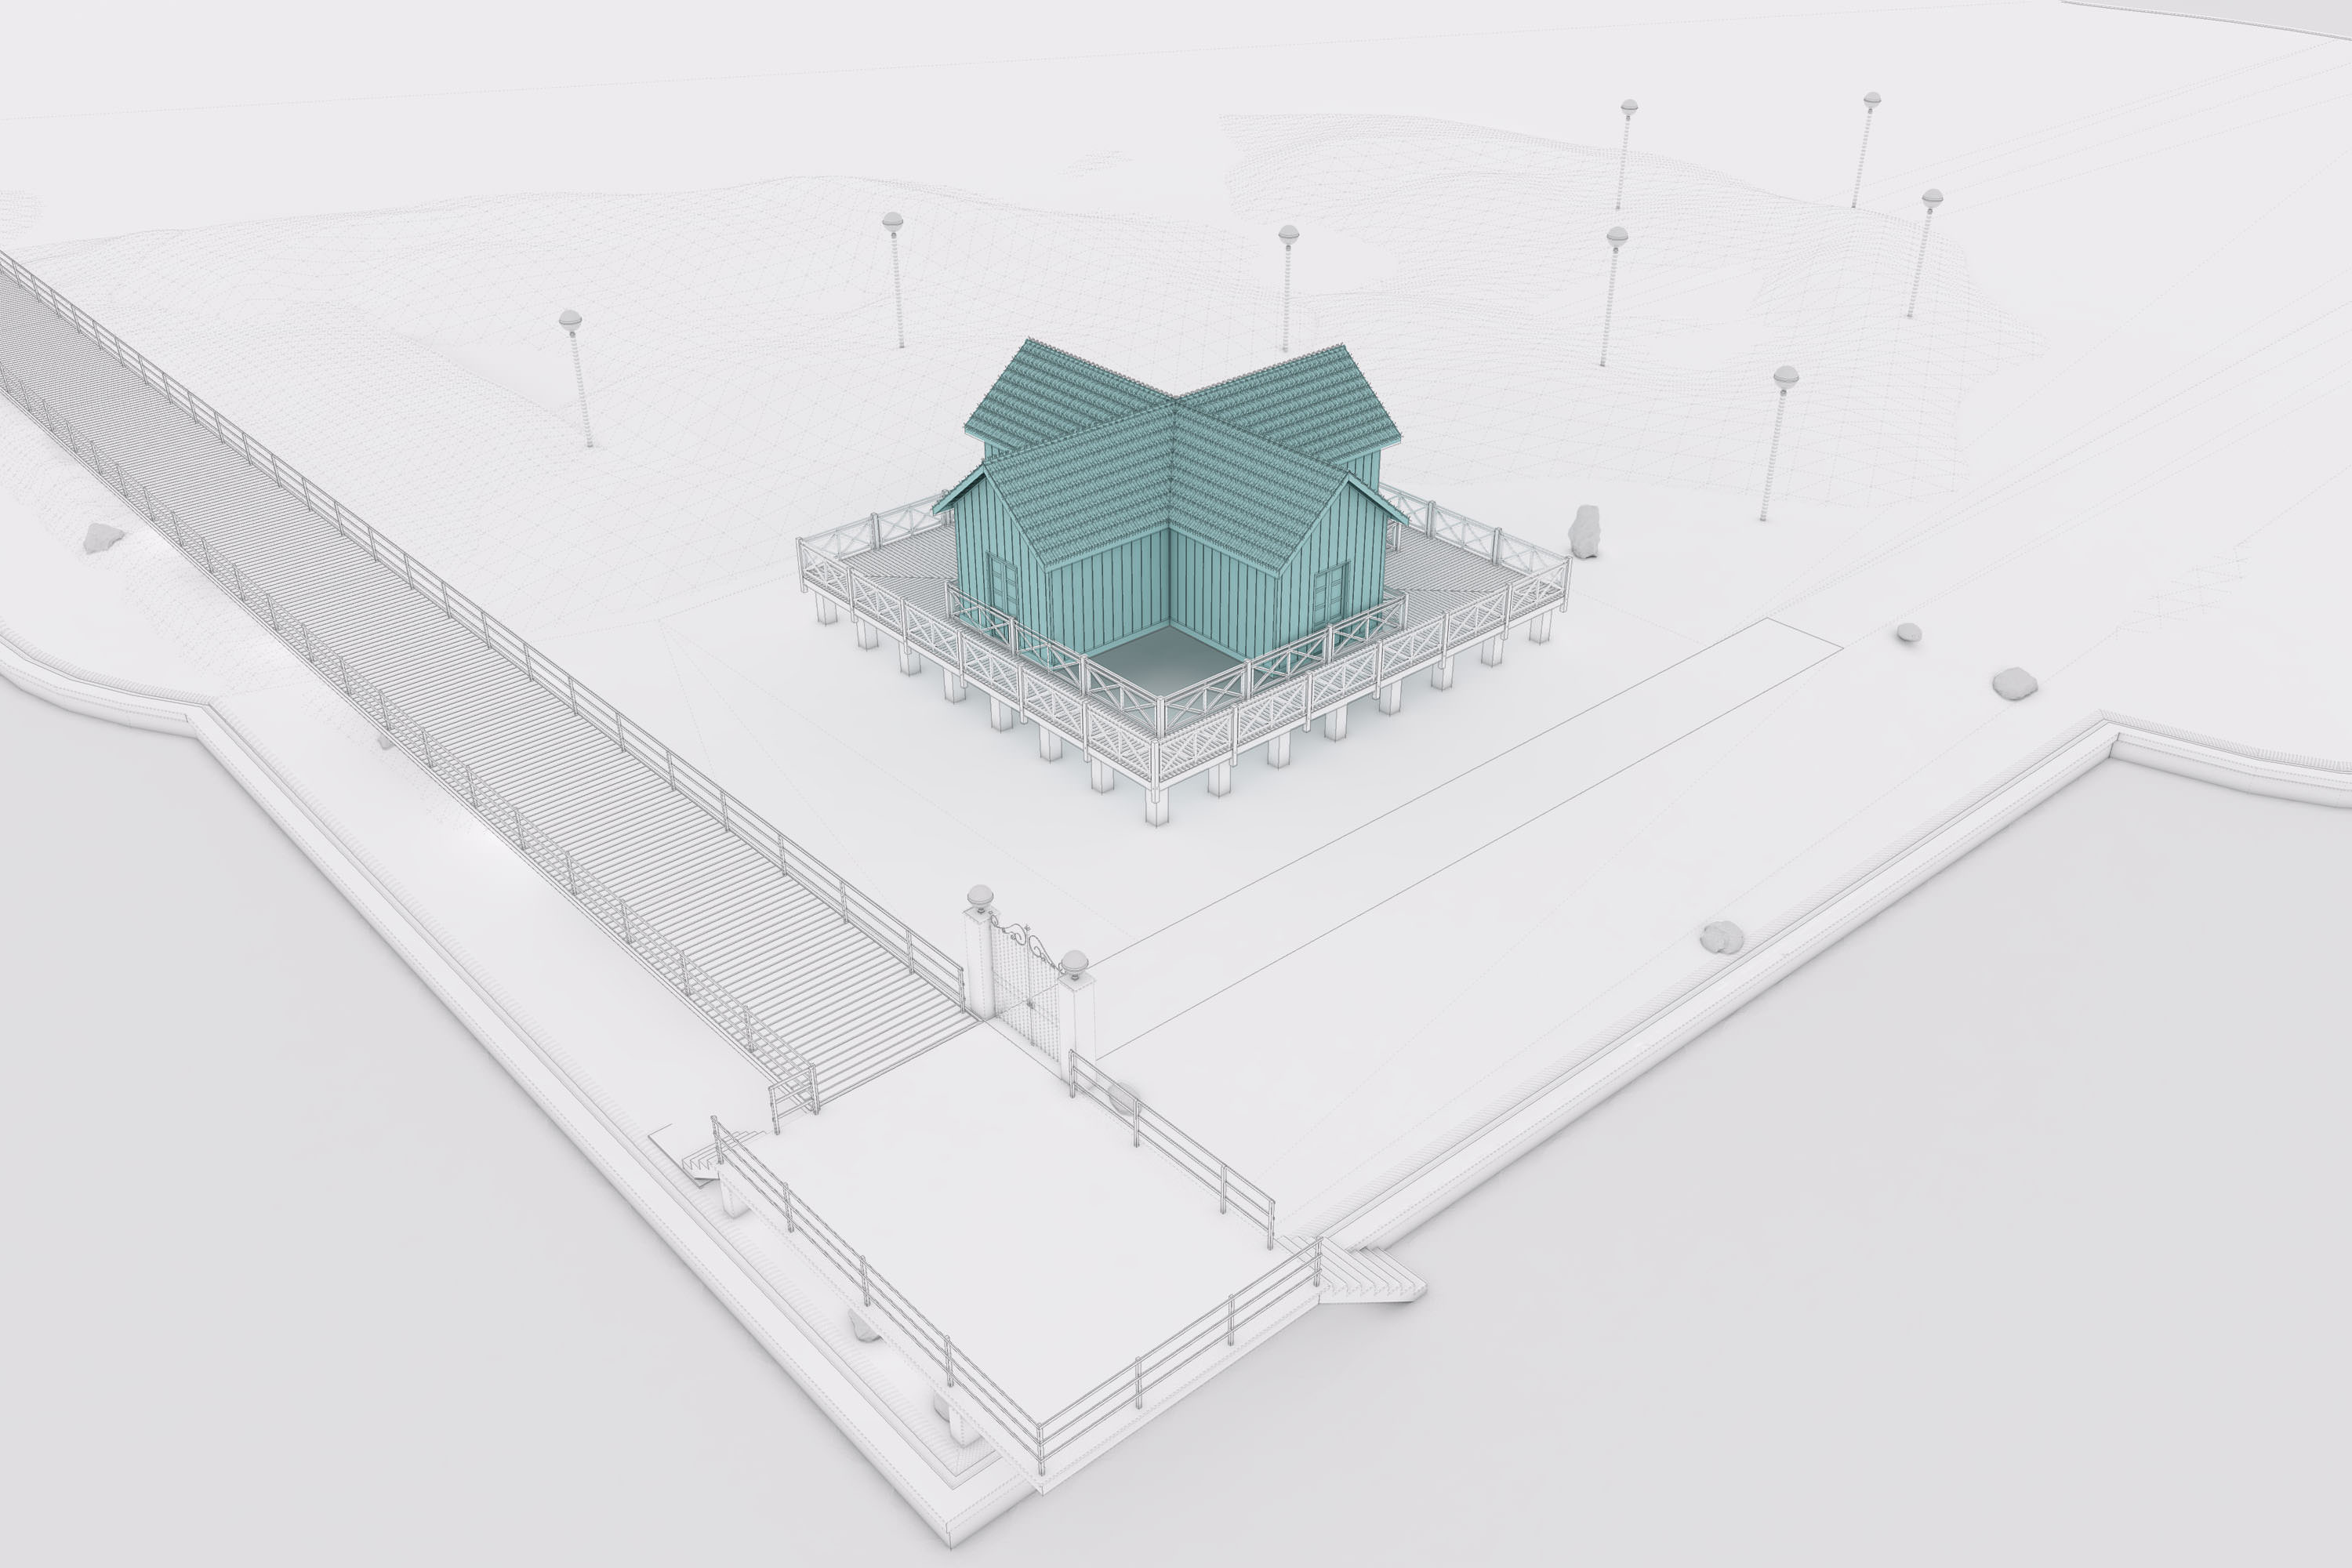
The House
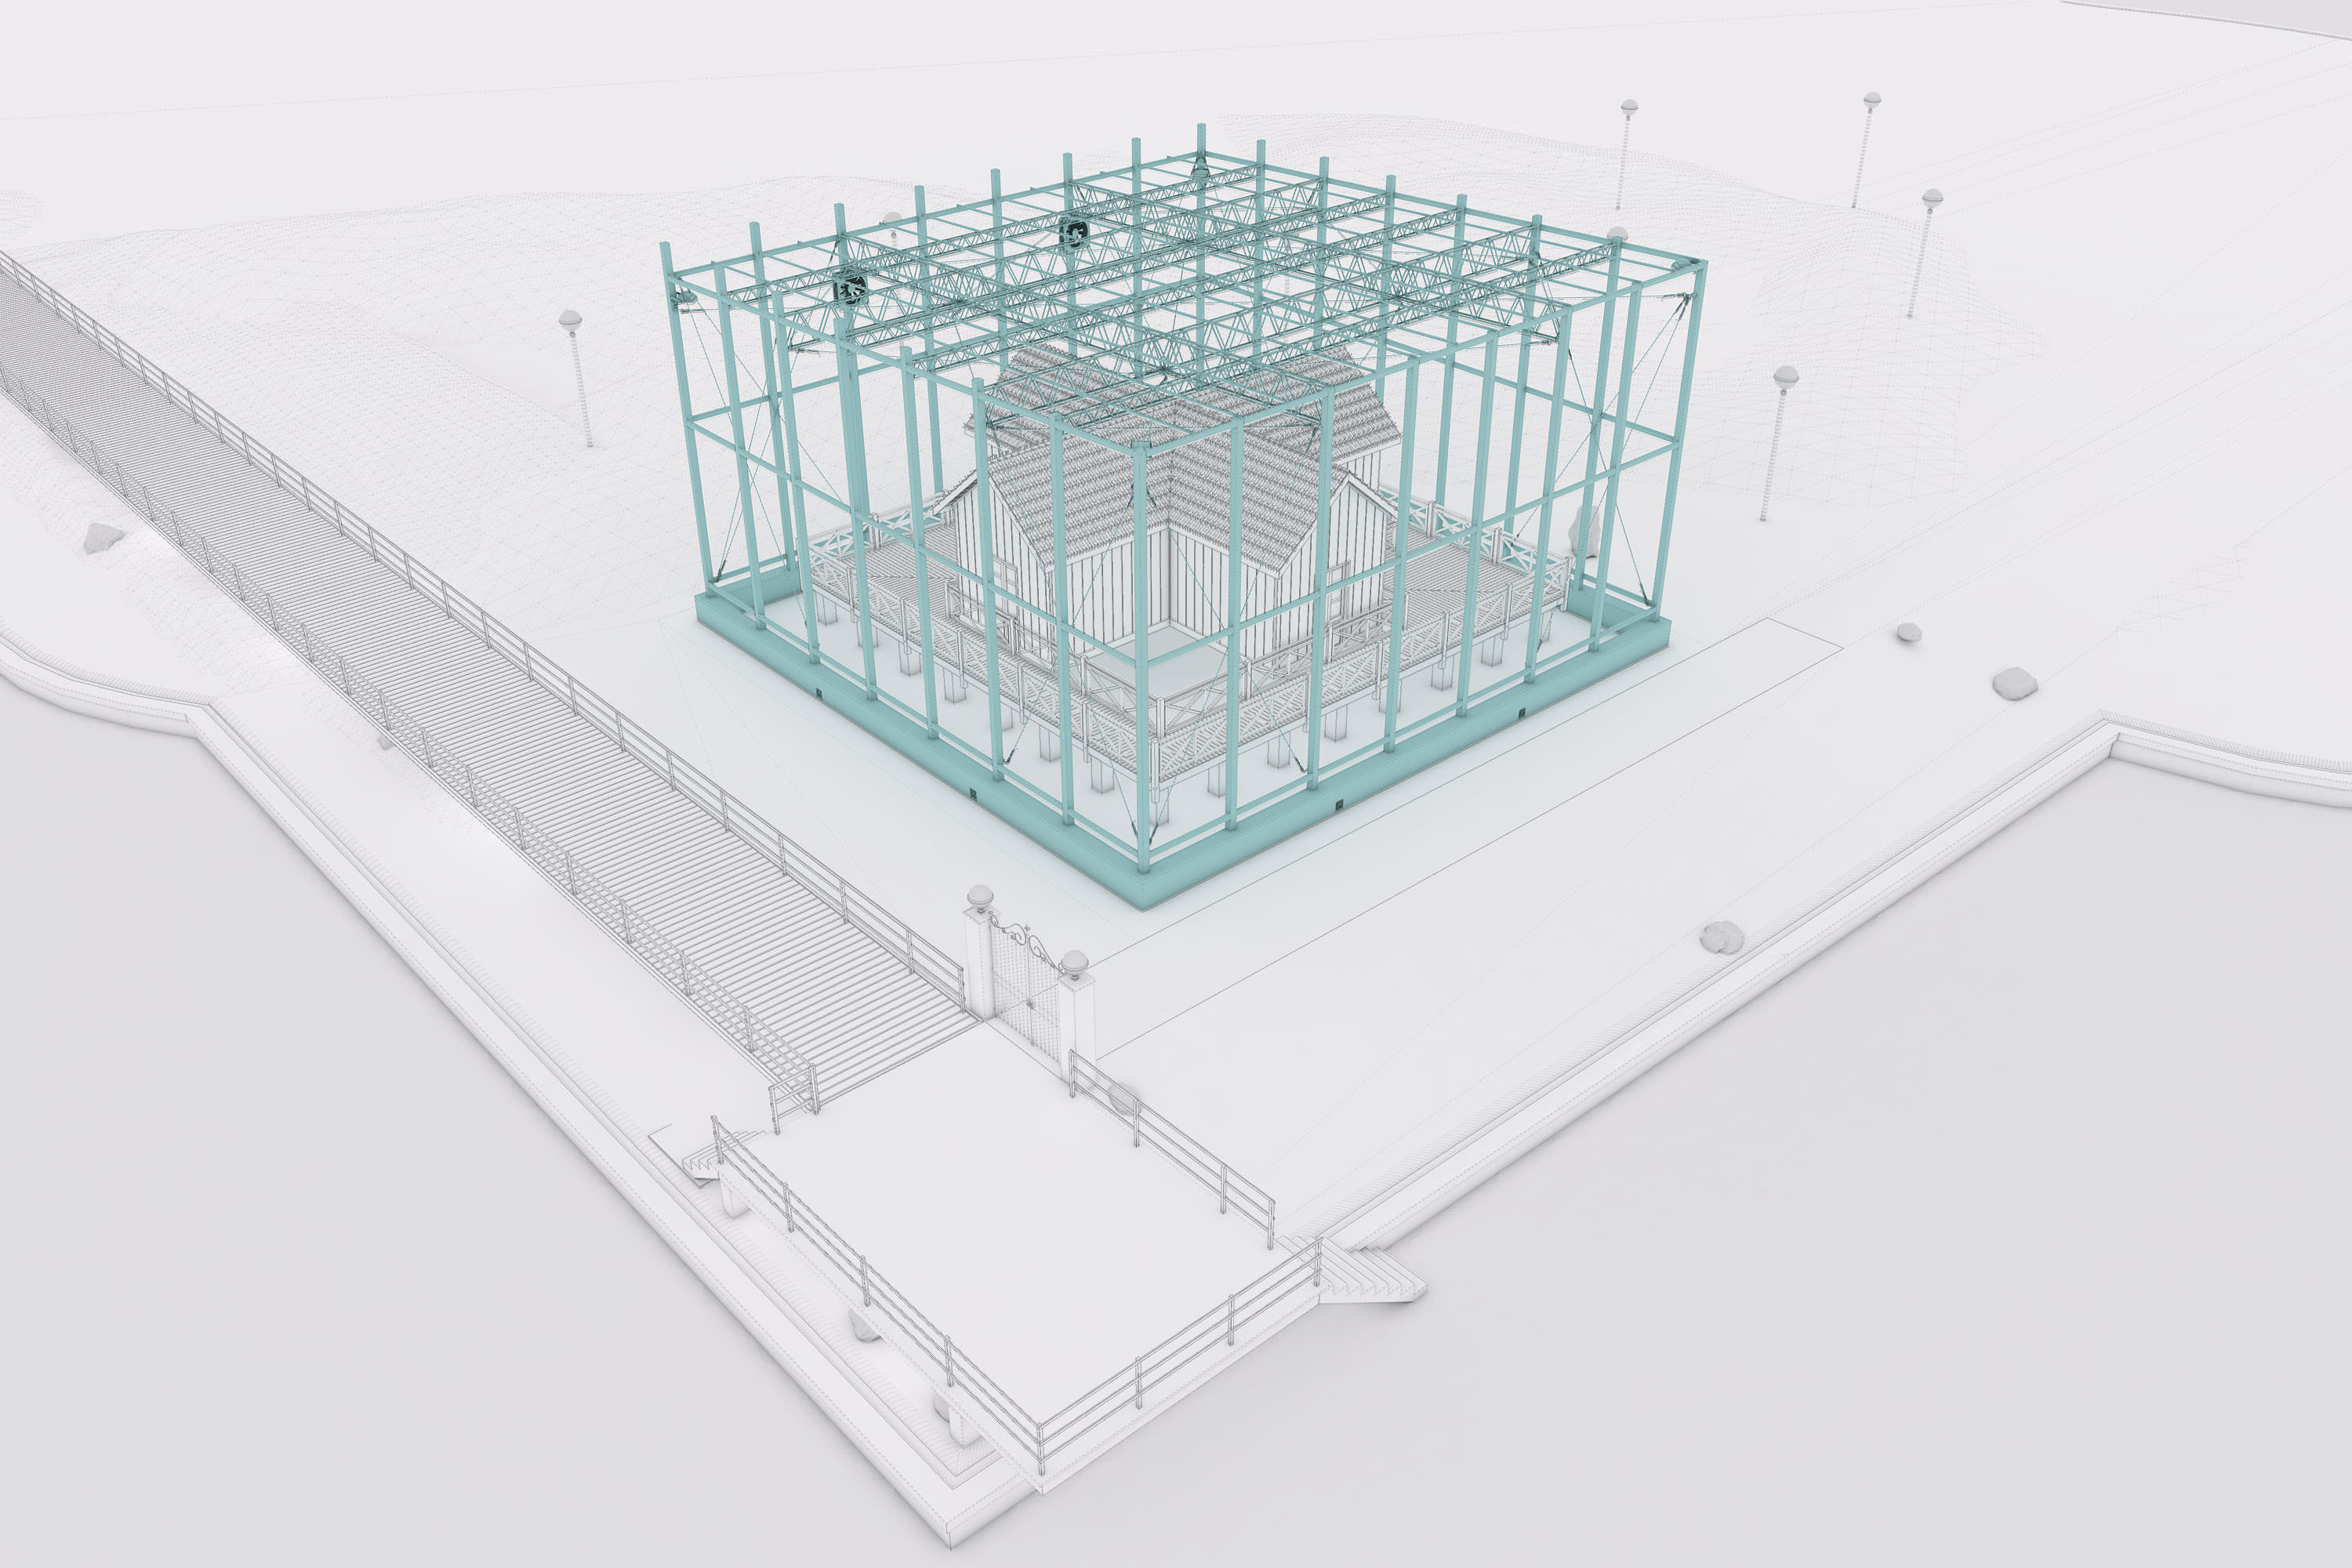
The Exo-Structure
The Glass Enclosure
It is very important to give special attention to the details of the model to make it realistic.


Skatter – The Smart SketchUp Plugin for Scattering
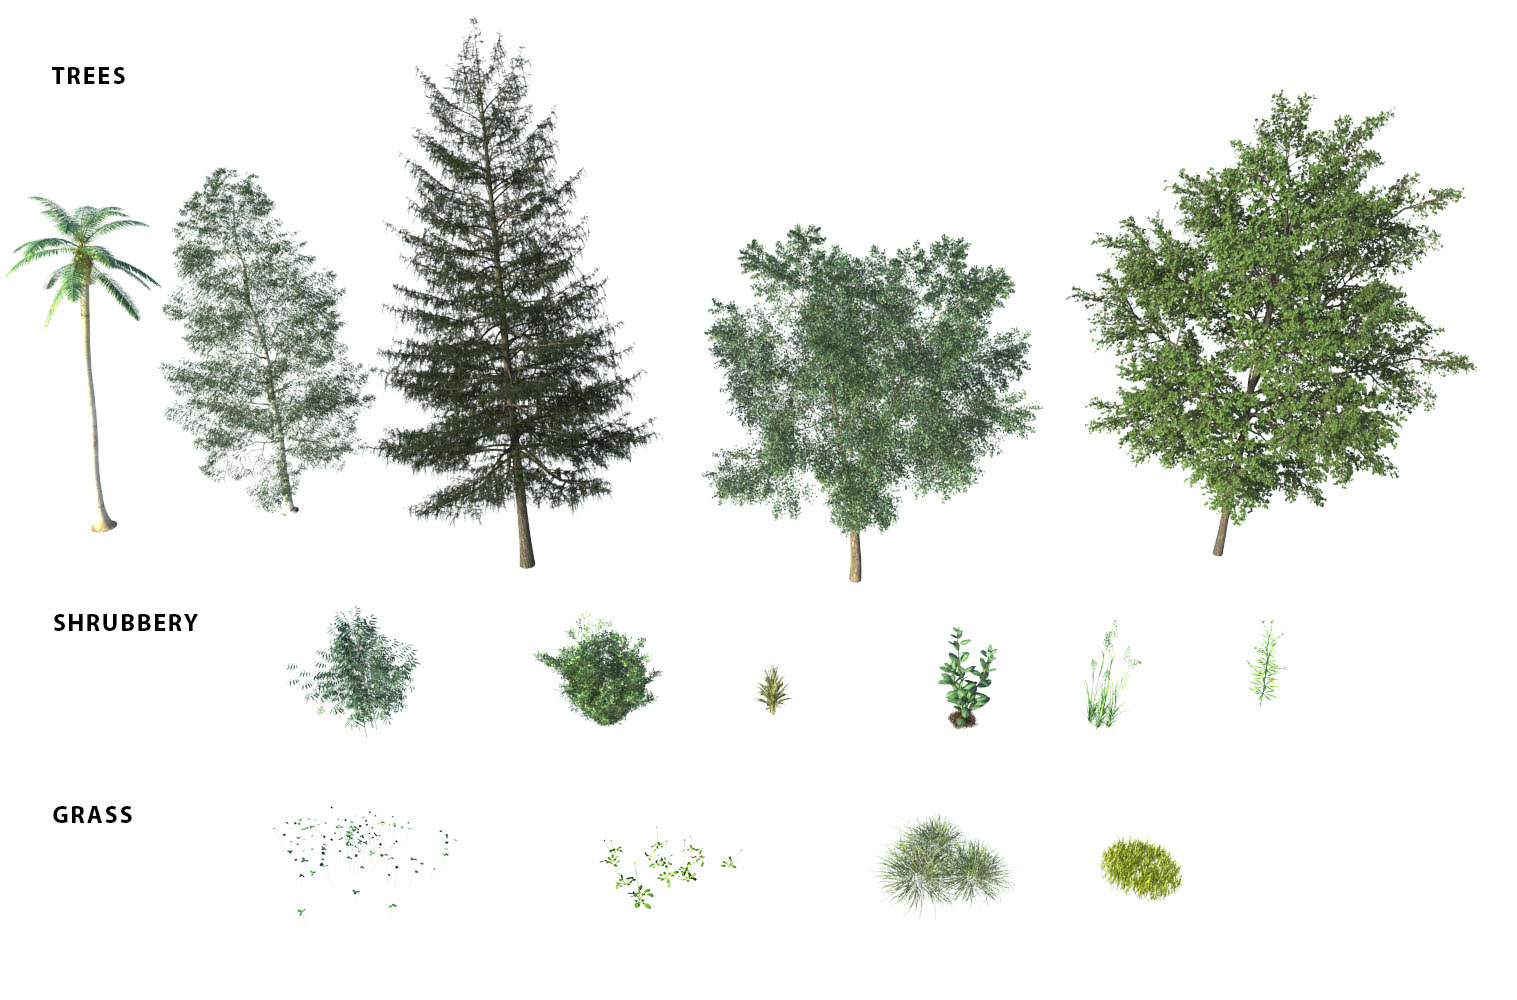
The most challenging step in this project was the incorporation of the vegetation since it was such an important part of the site recreation process.
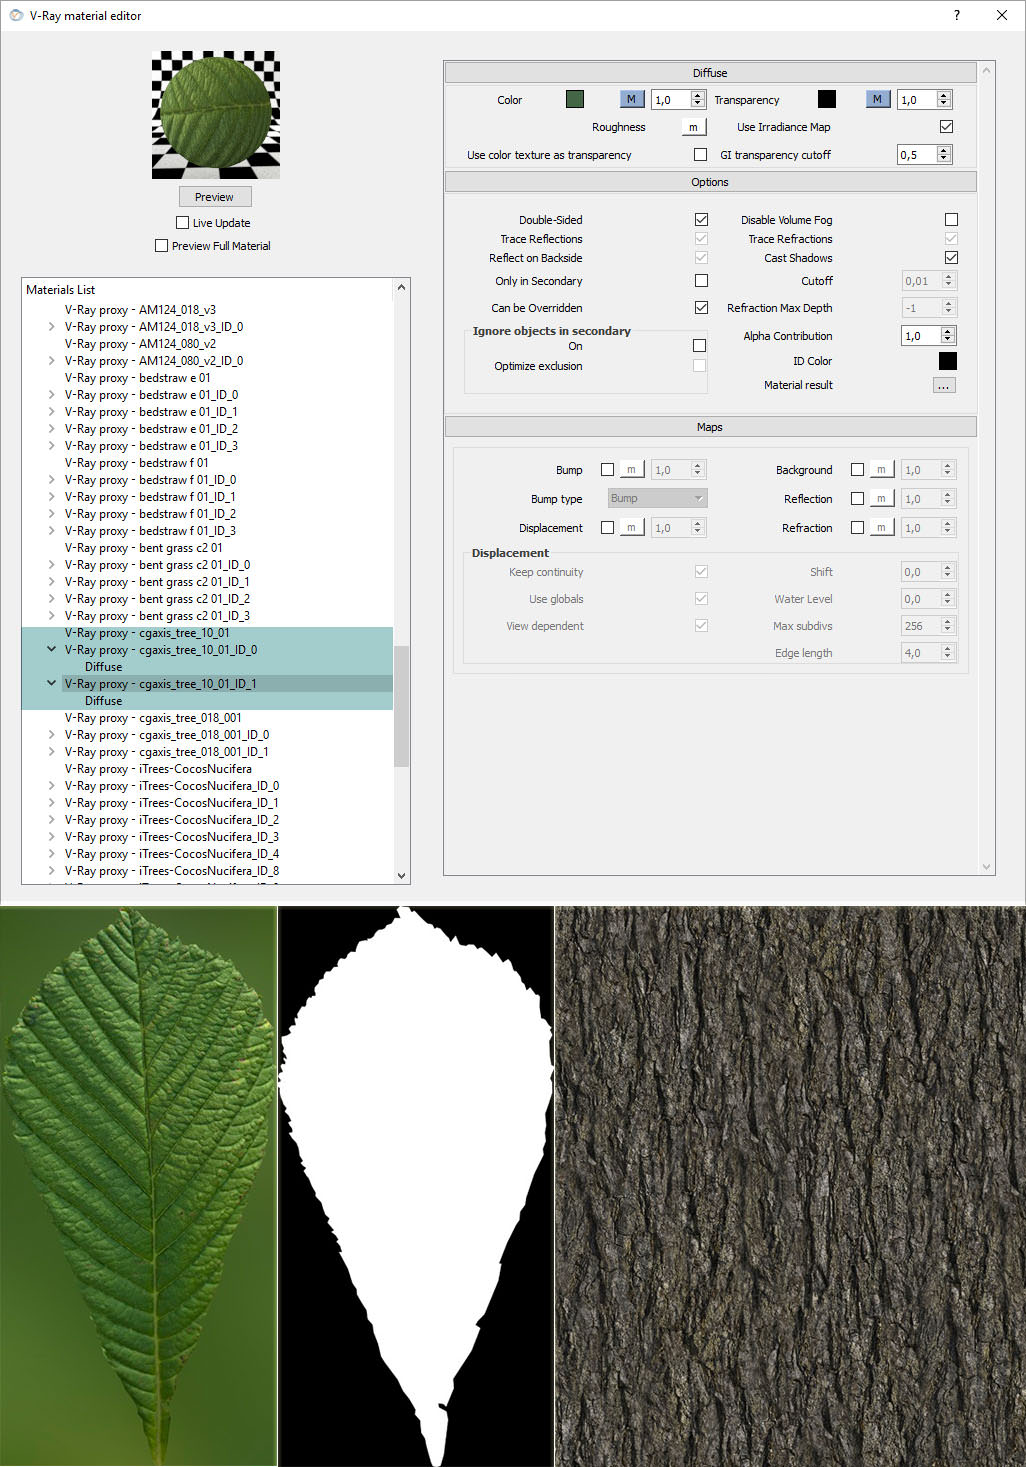
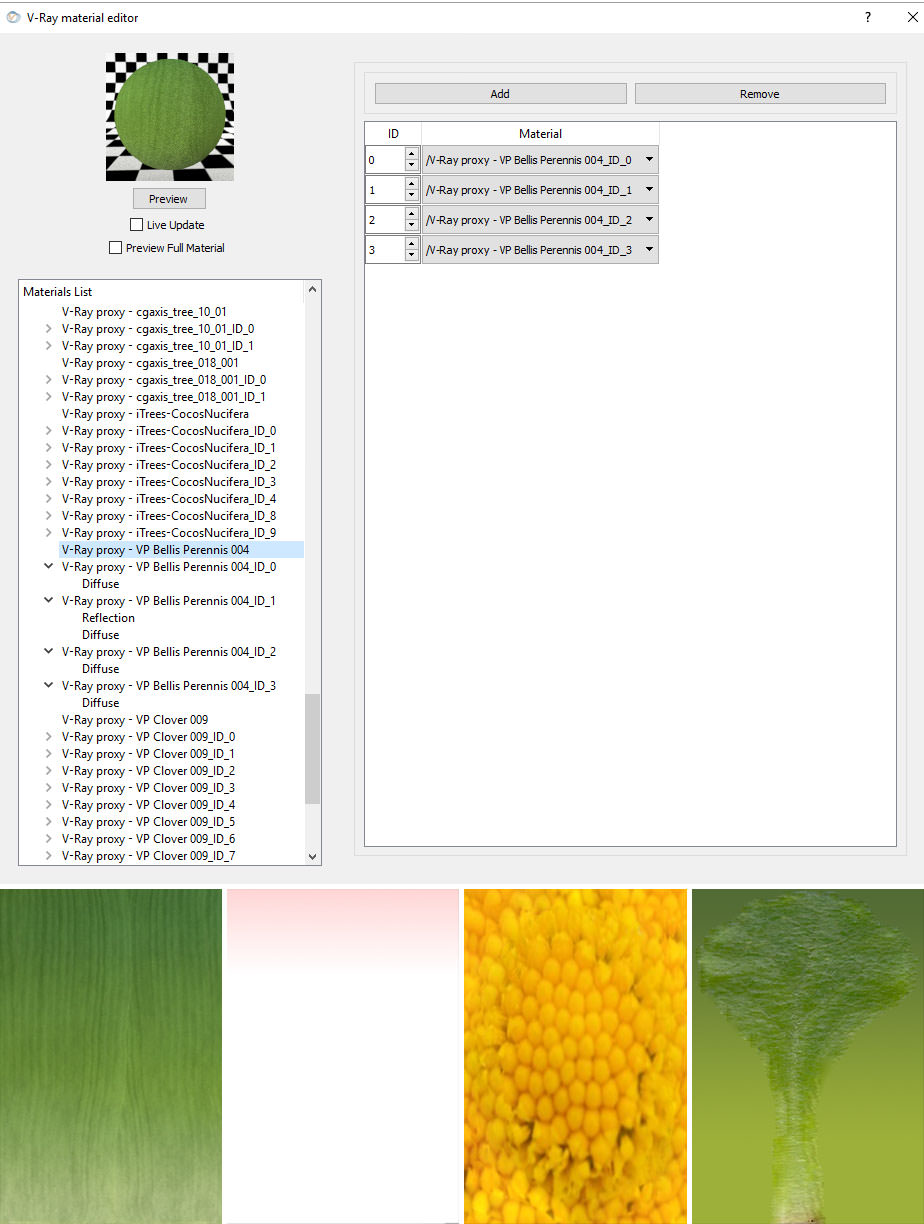
In reference to the type of vegetation that we found at the site, here are the proxies used in the project.
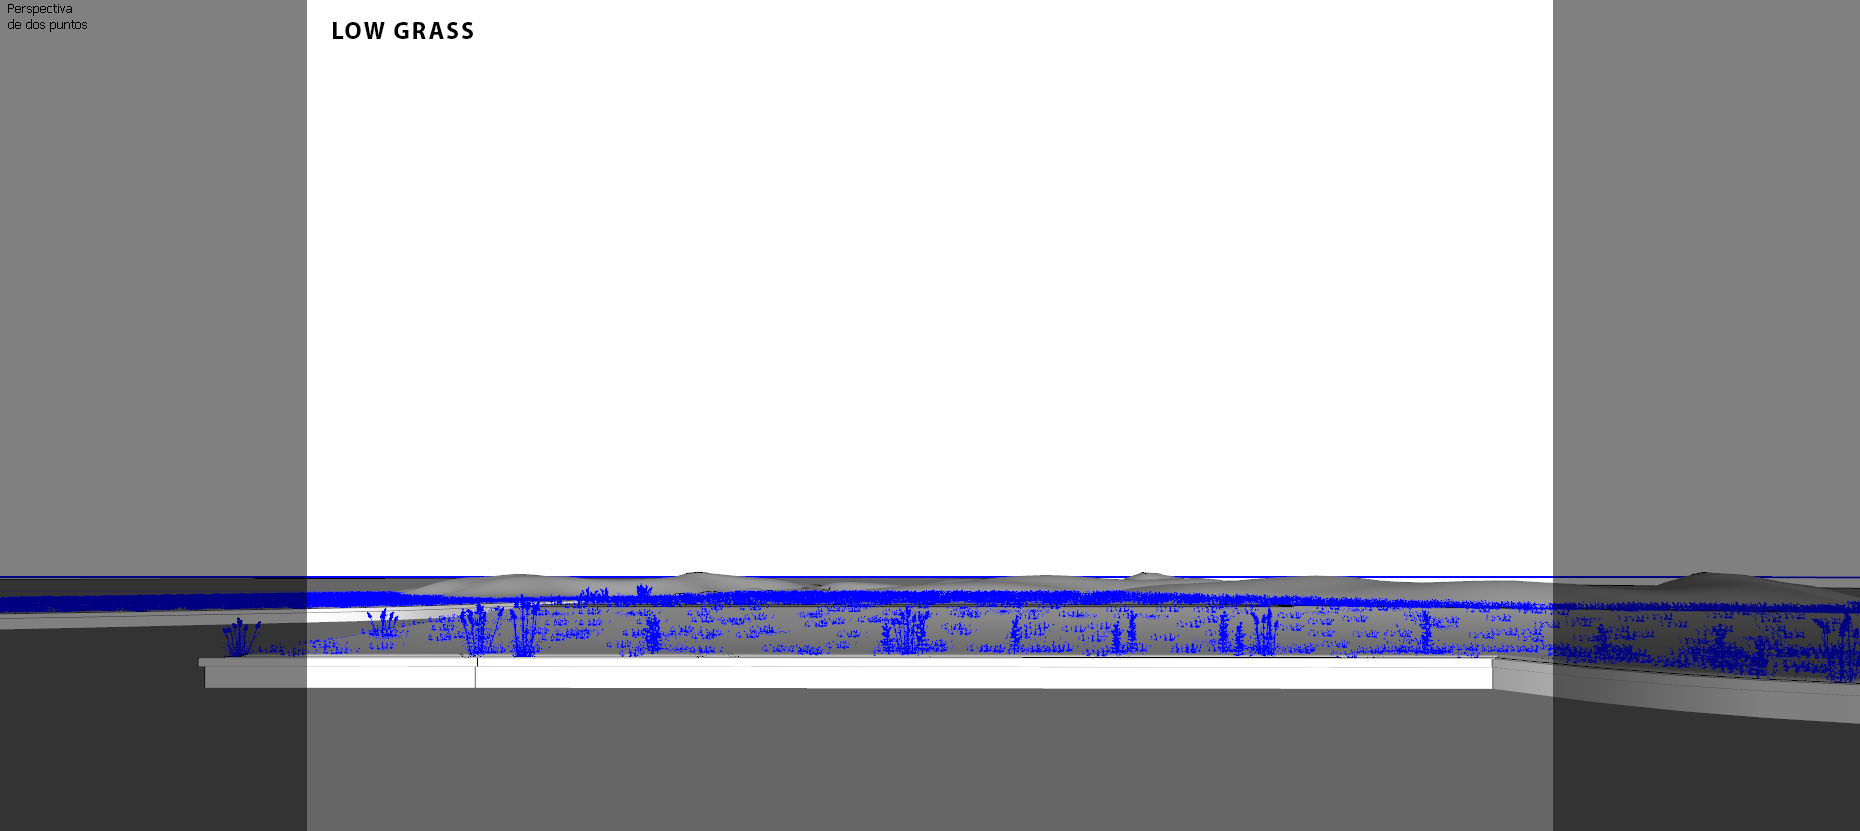
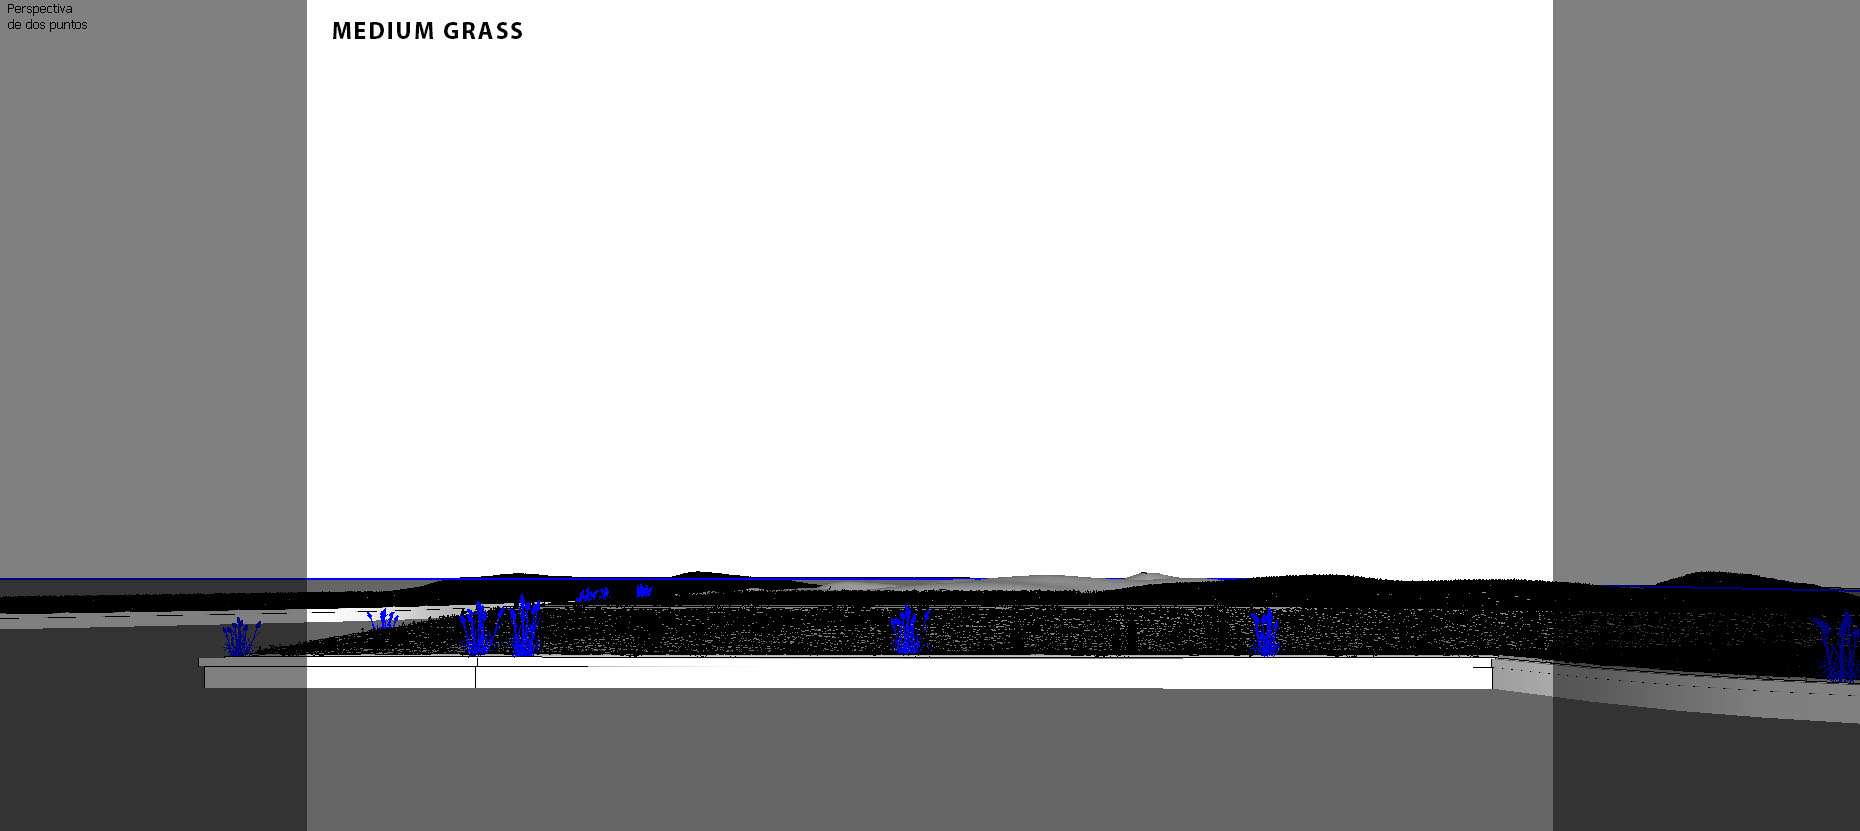
Once we decided on the proxies, we started to find various ways to distribute it and get a dense vegetation.
We divided the process into three steps :
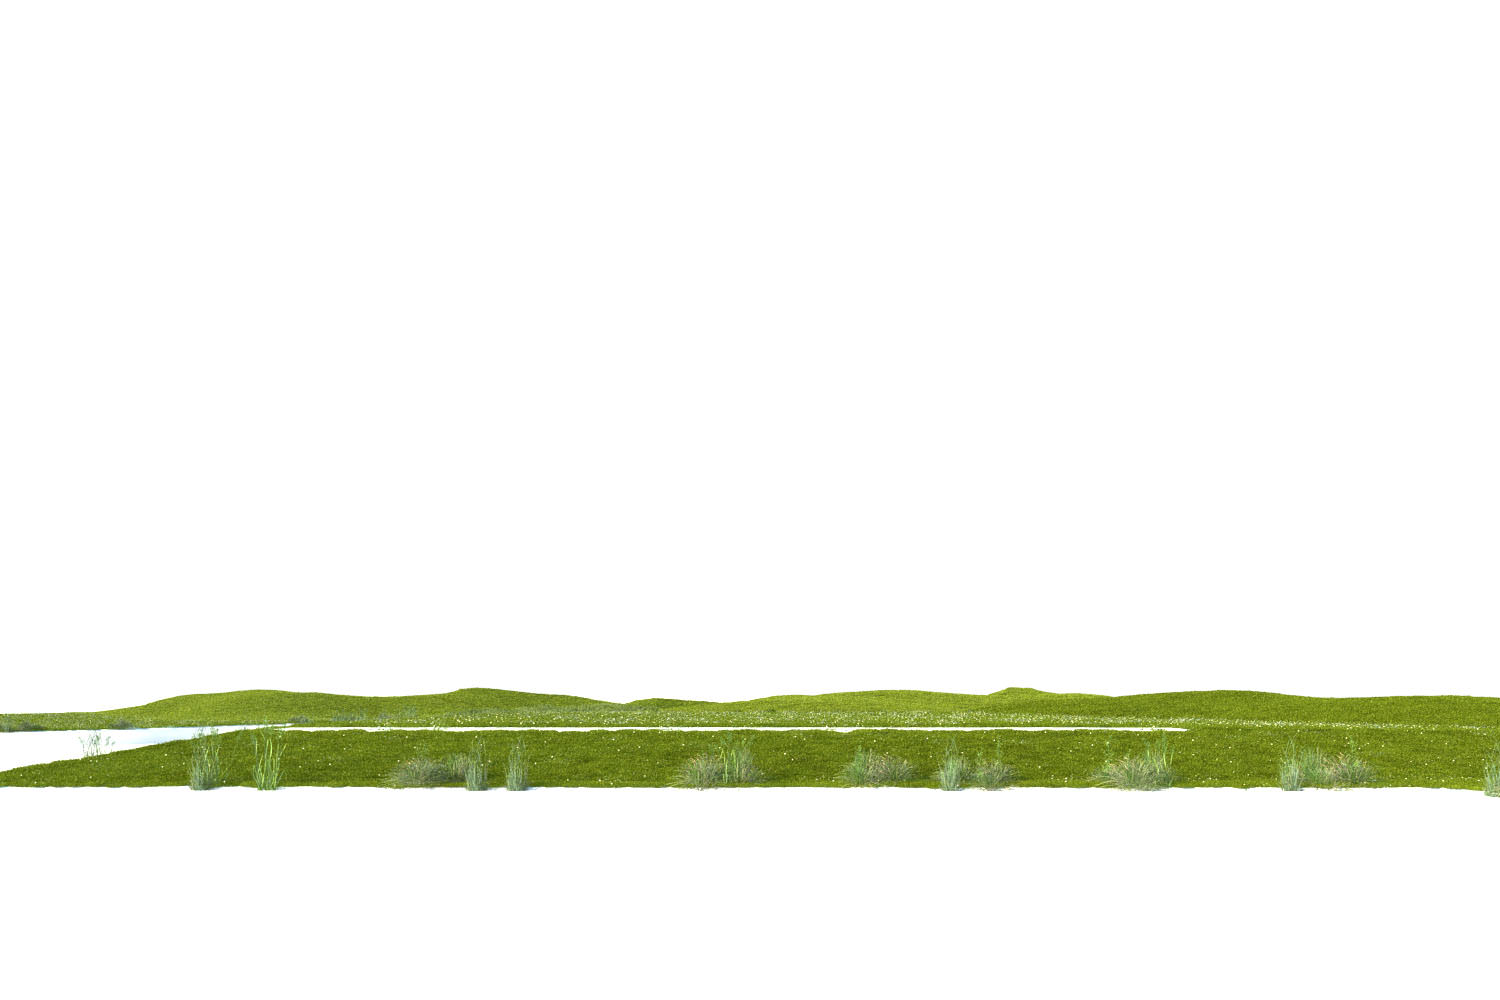
Ground Coverage
Shrubs
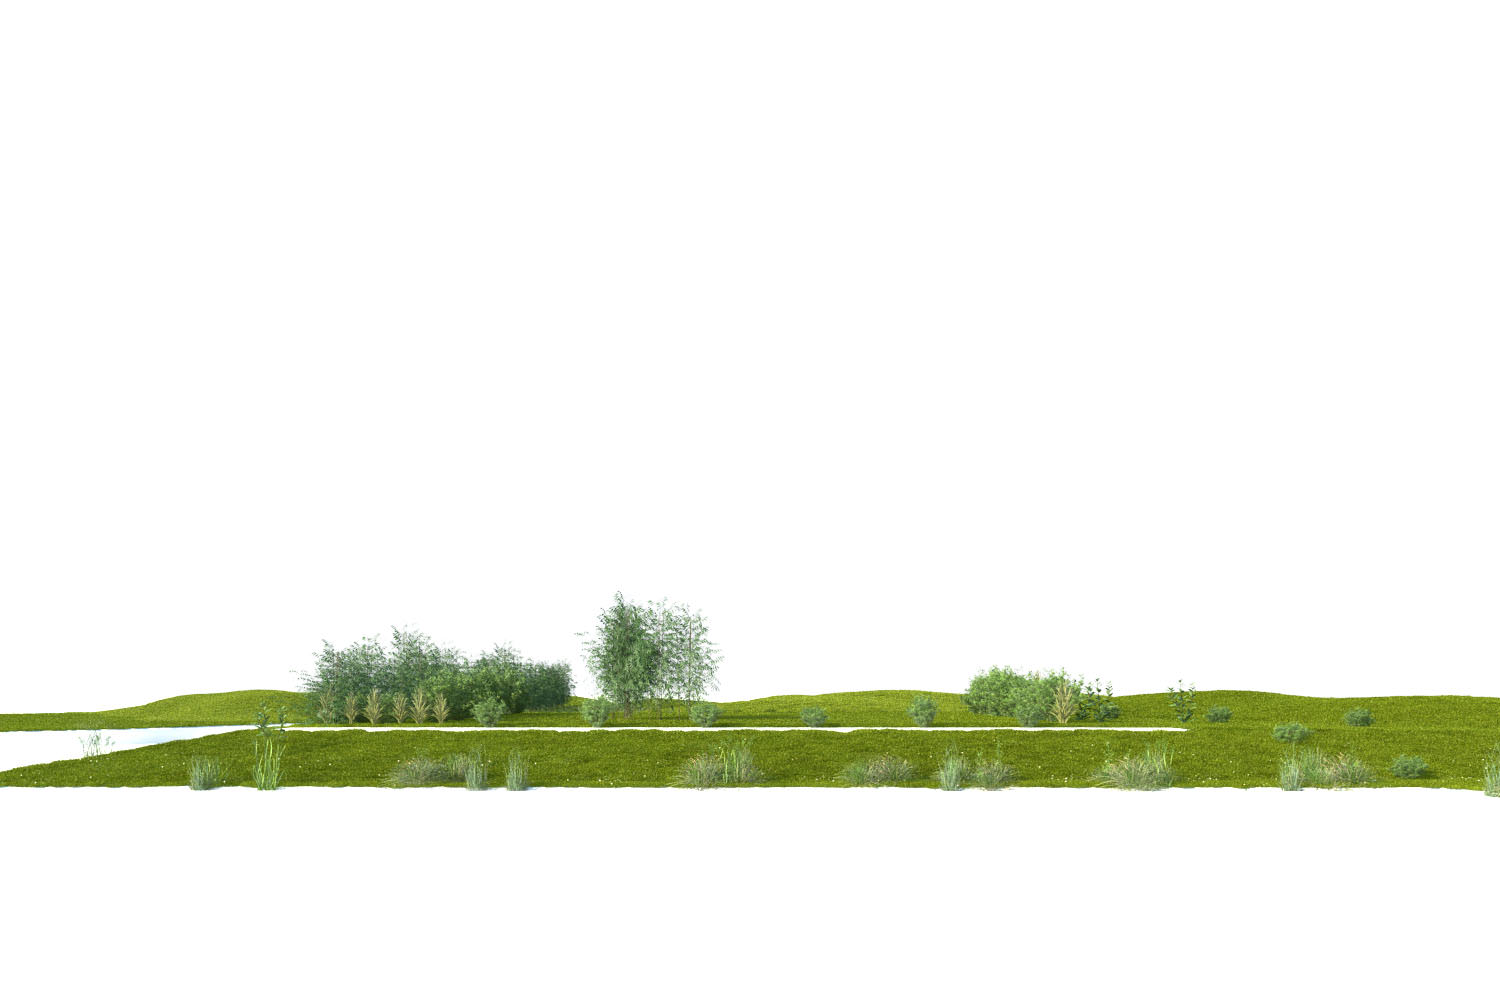
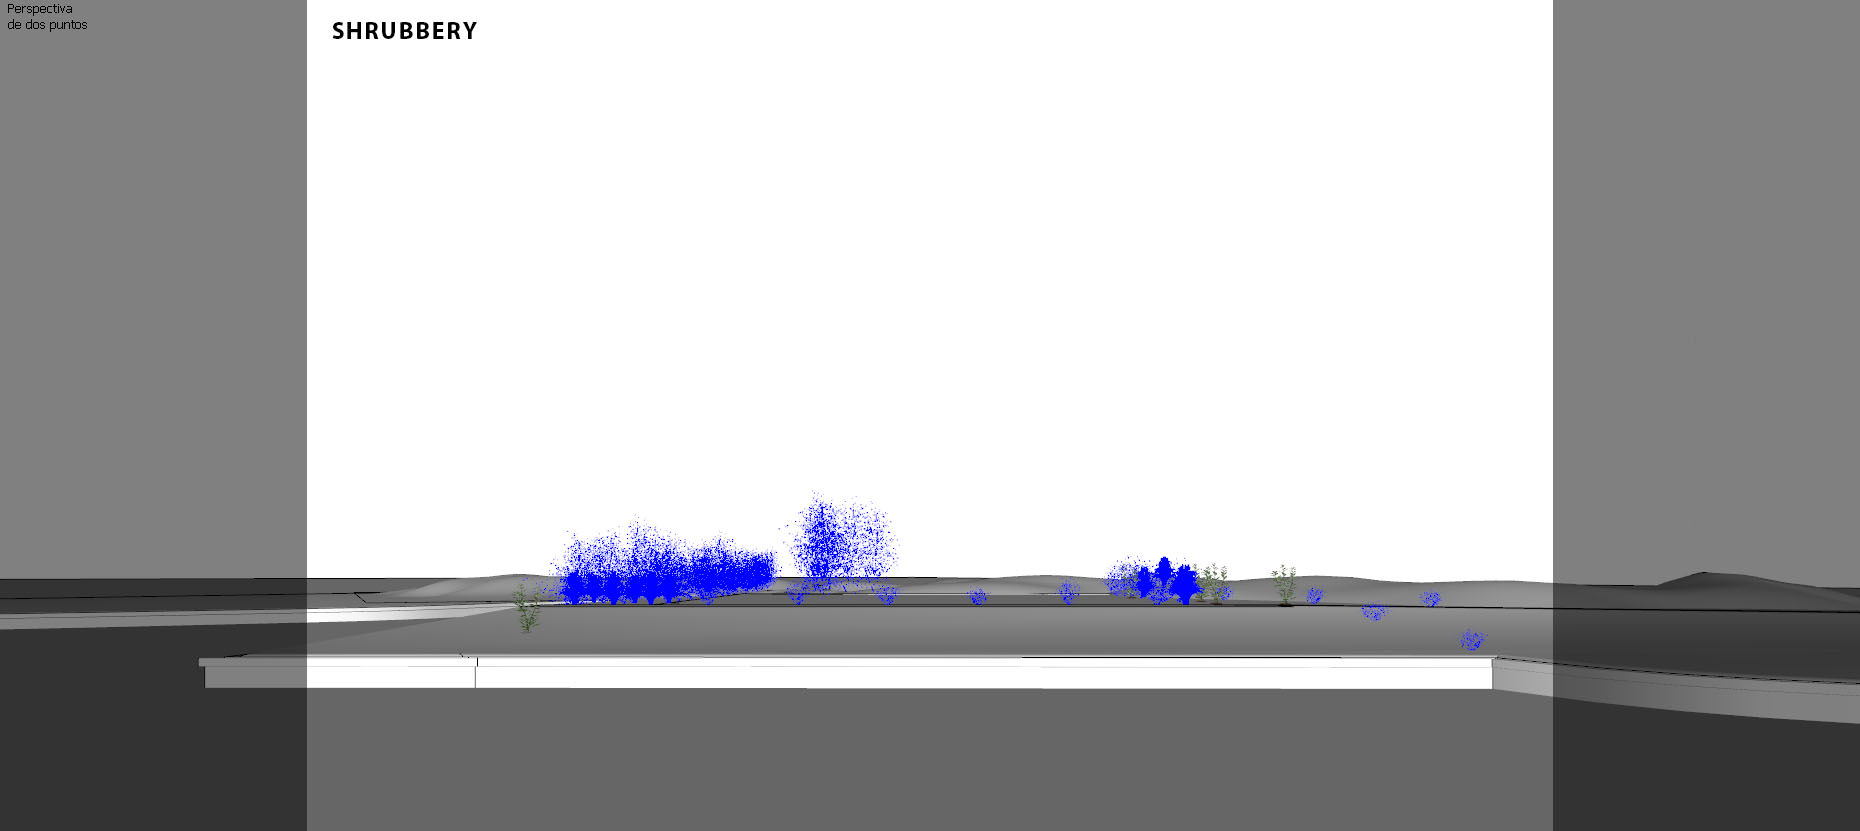
Trees

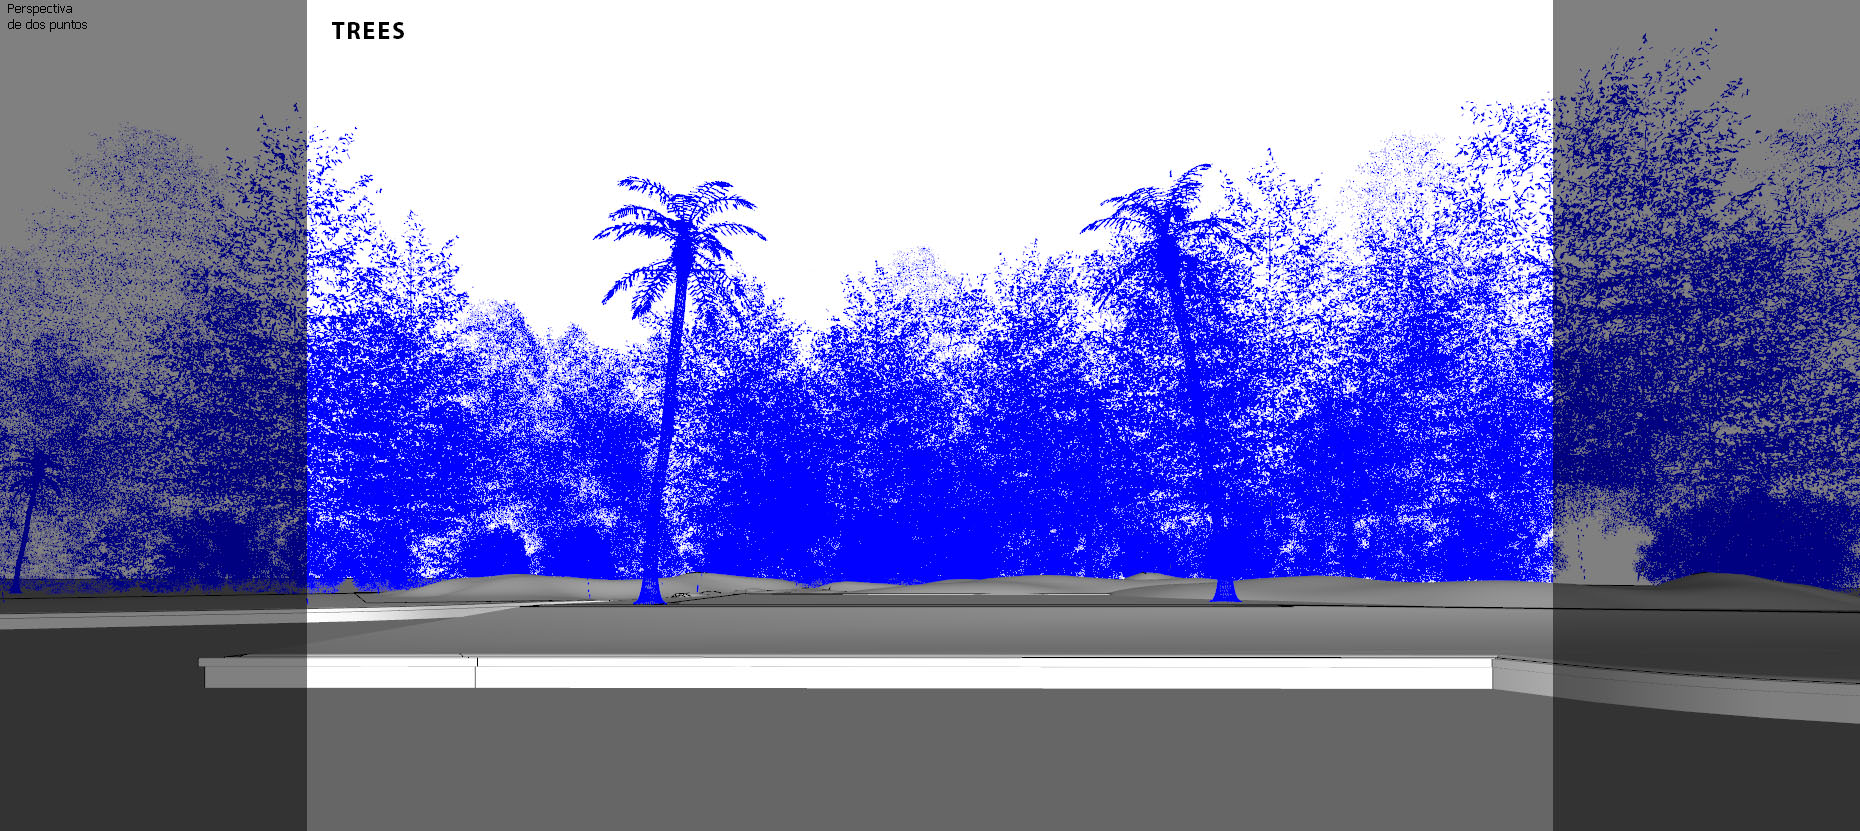
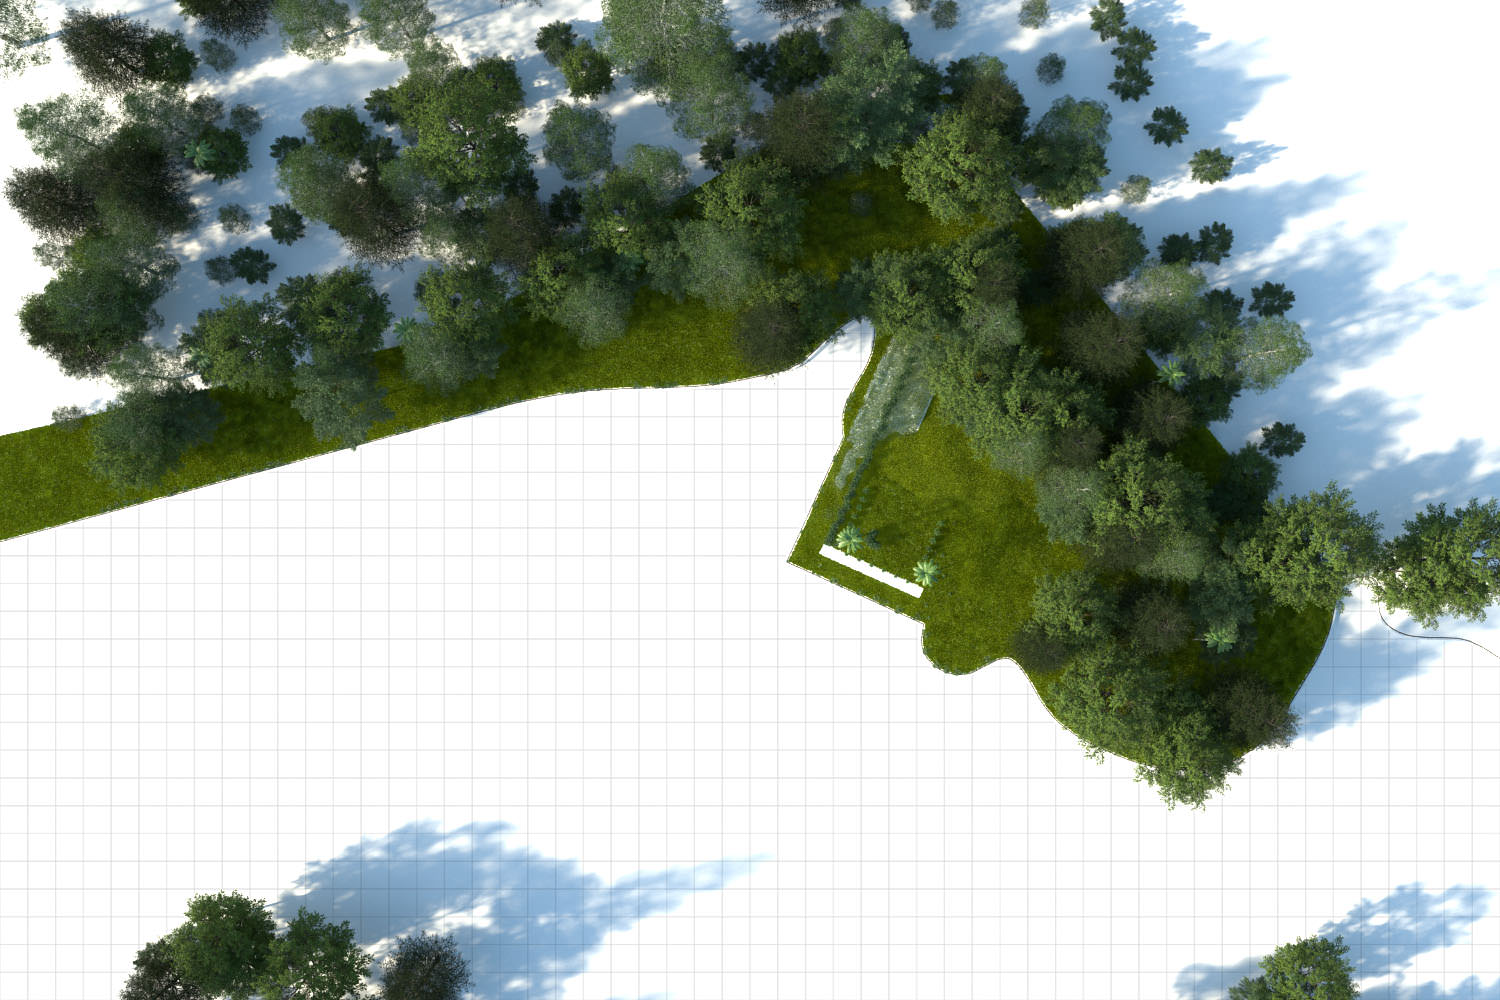
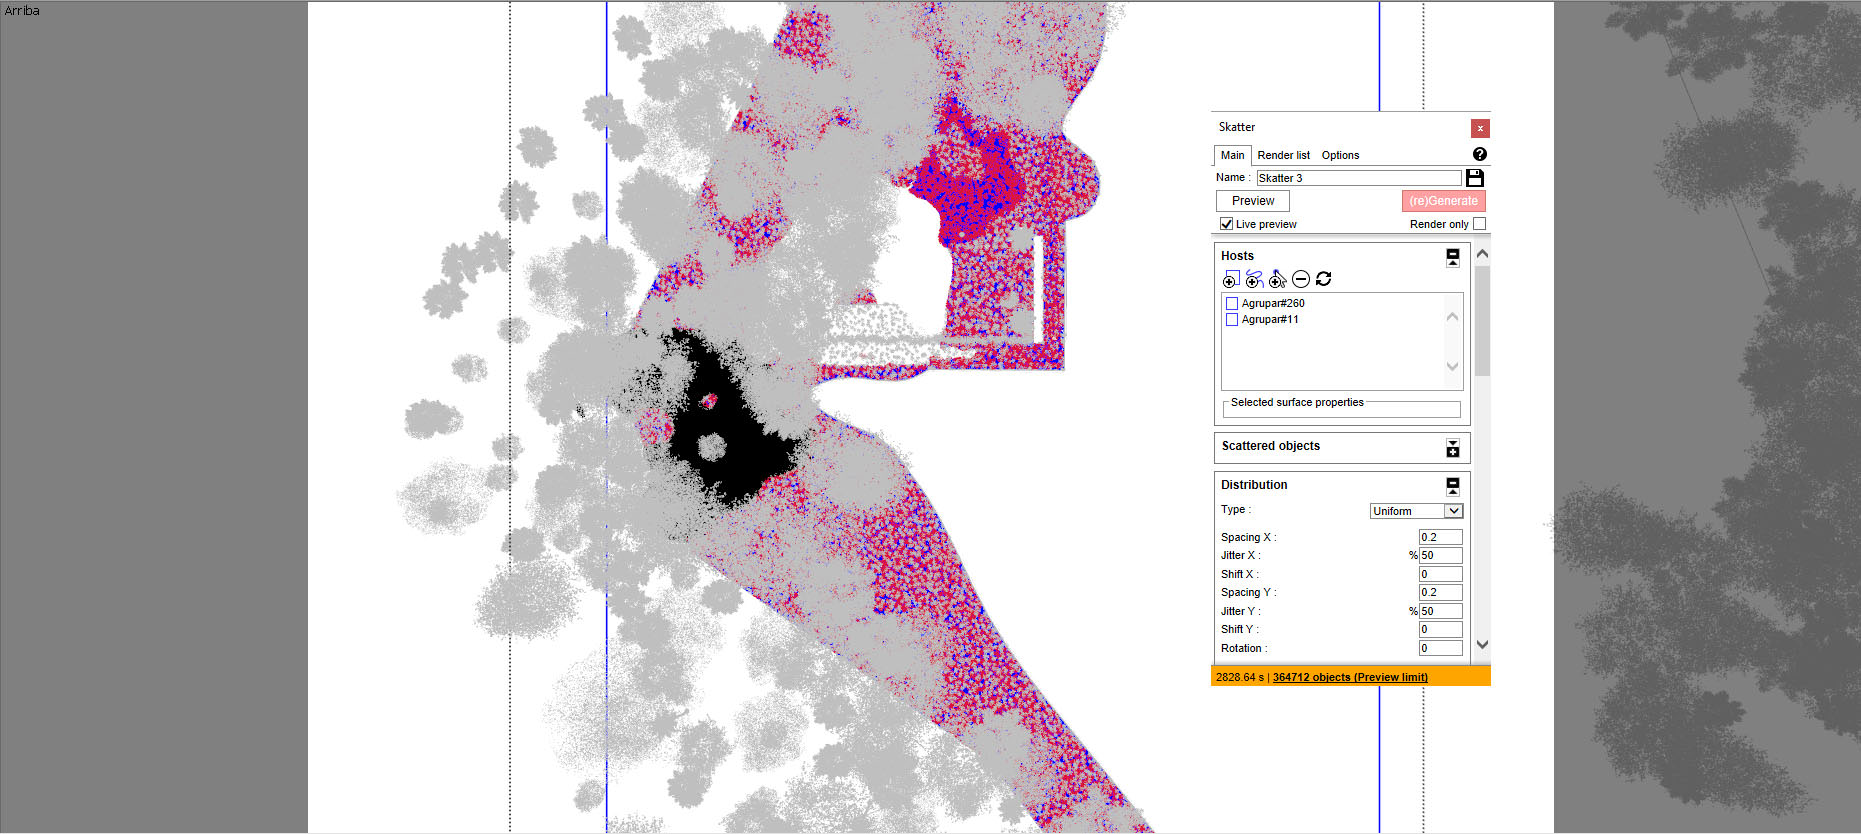
Here´s a top-view of the tree types of vegetation as placed in the scene.
The tool we used the most to distribute the vegetation was the Skatter plug-in as we mentioned before. Here are some settings used for our process.
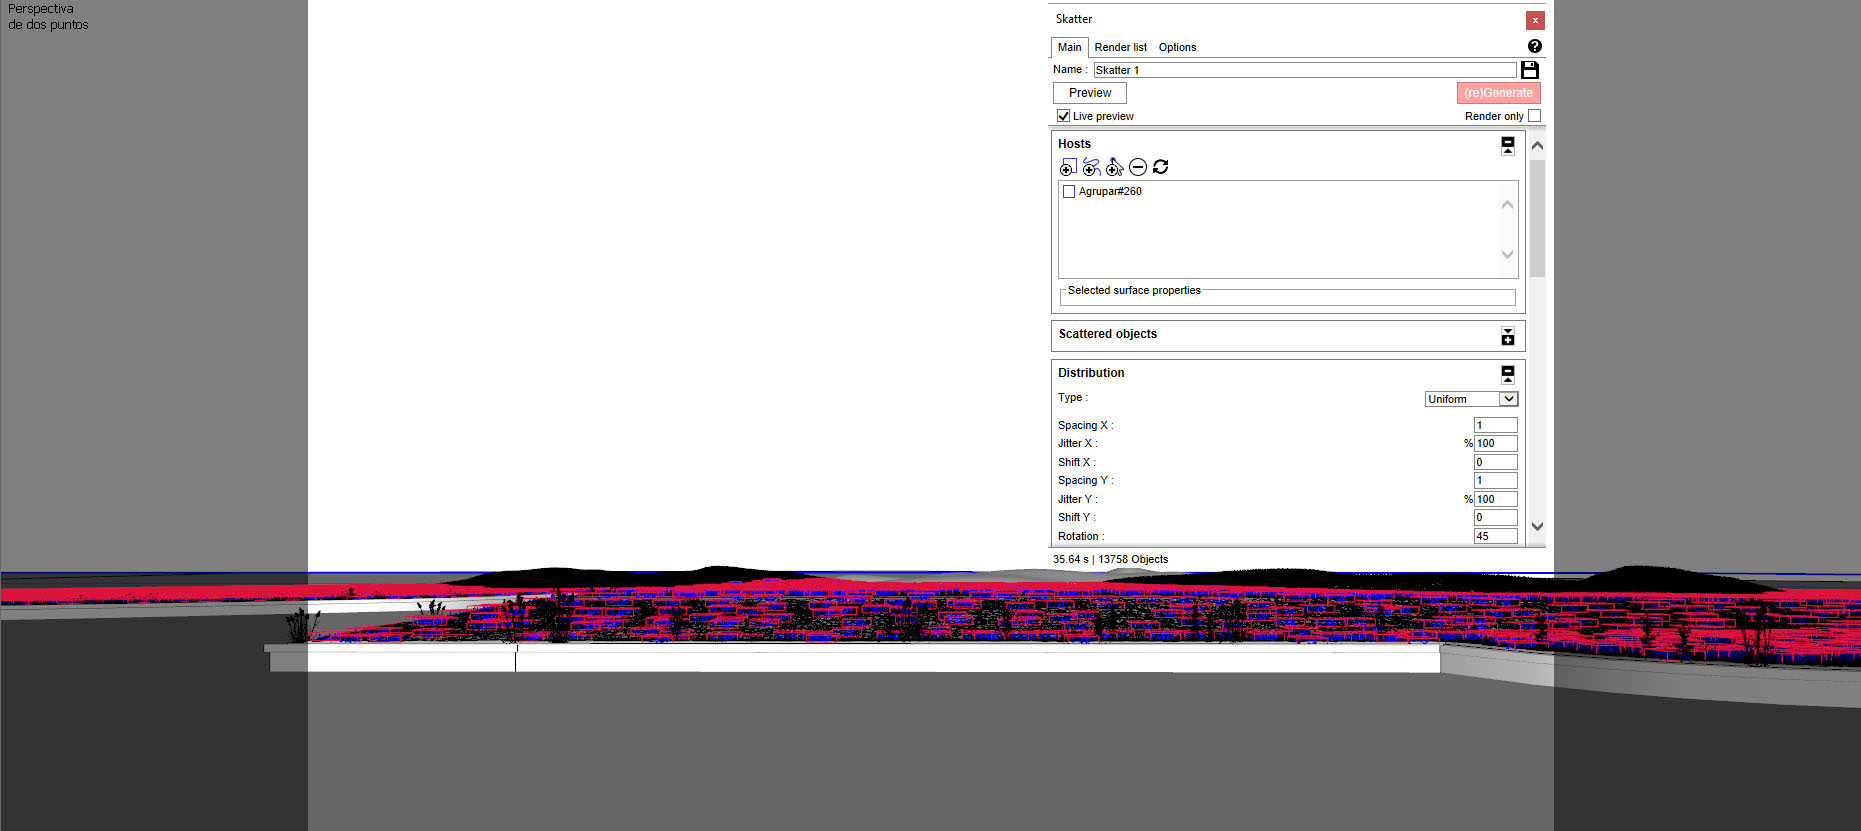
Proxy materials are different depending of the type and general layout.

Materials
After we´ve finished modeling the next step is applying materials.
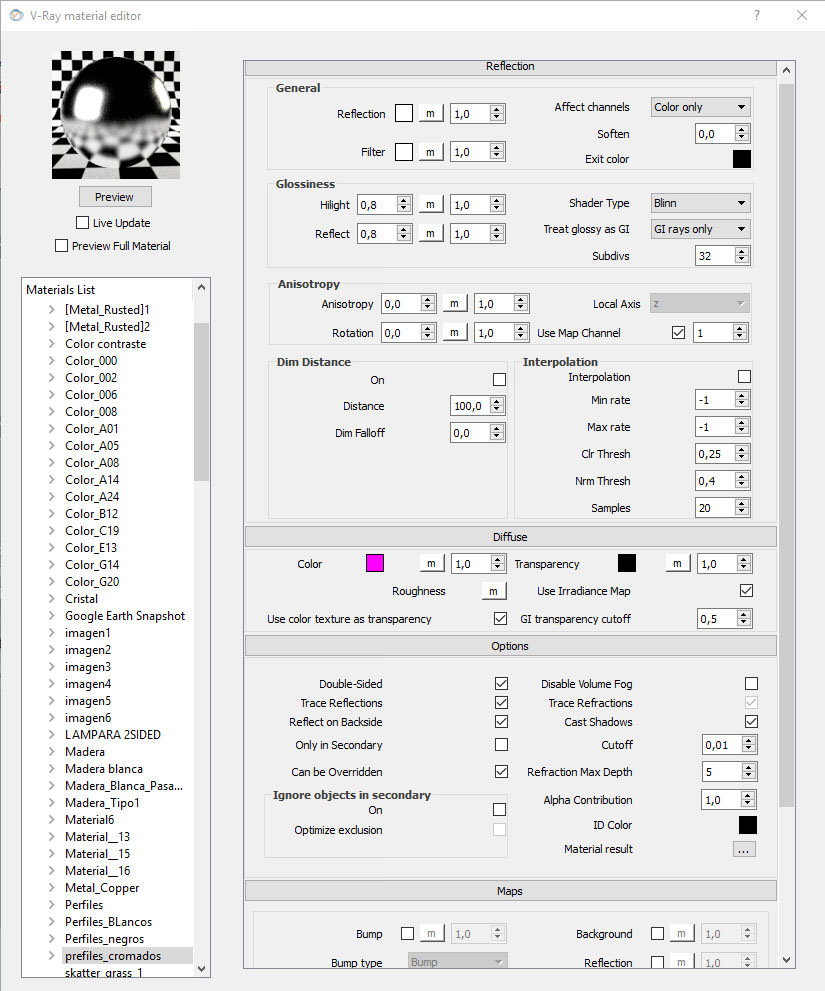
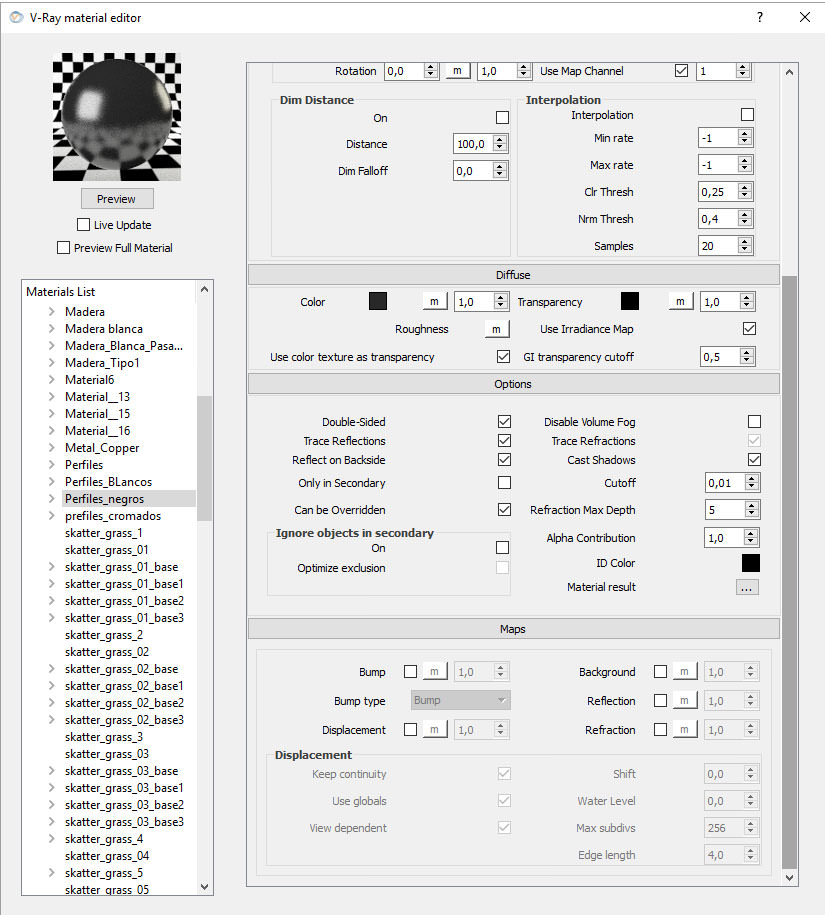
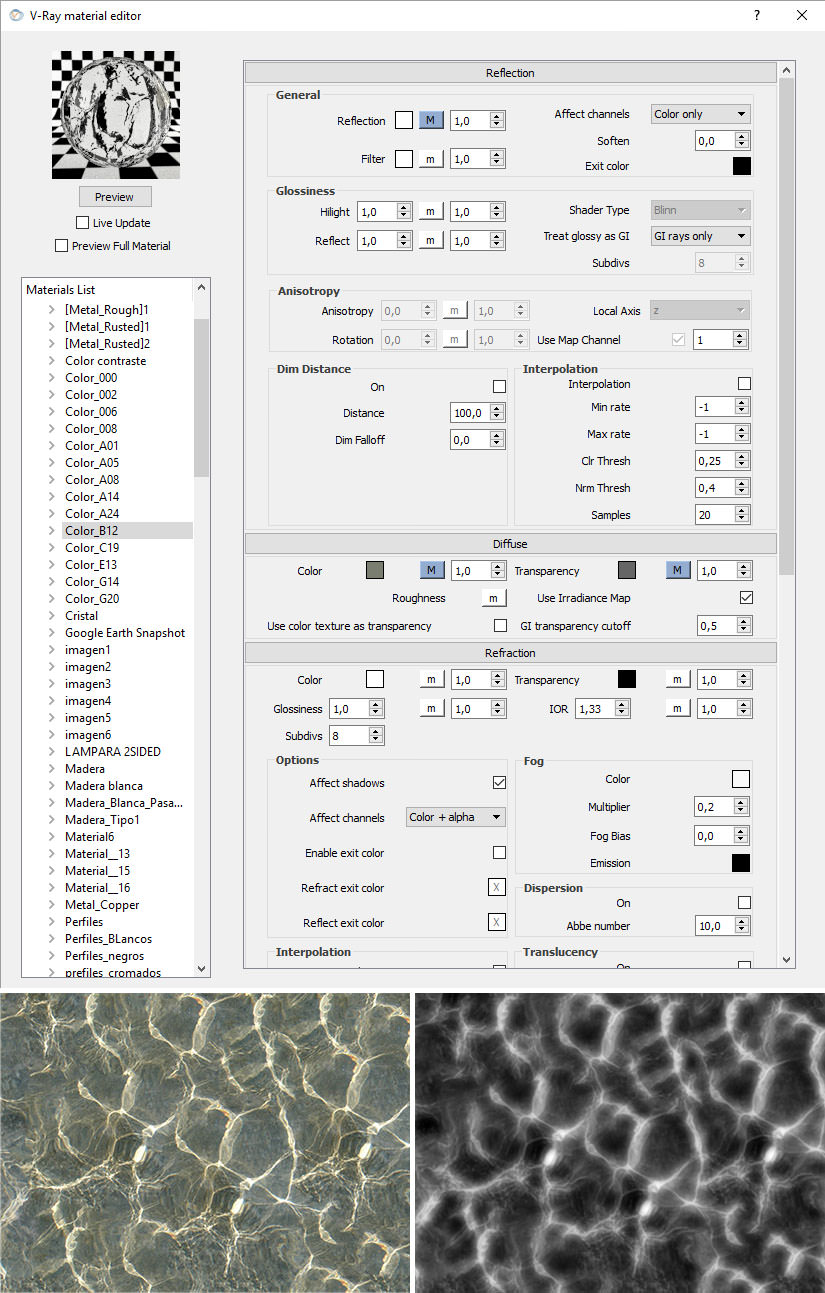
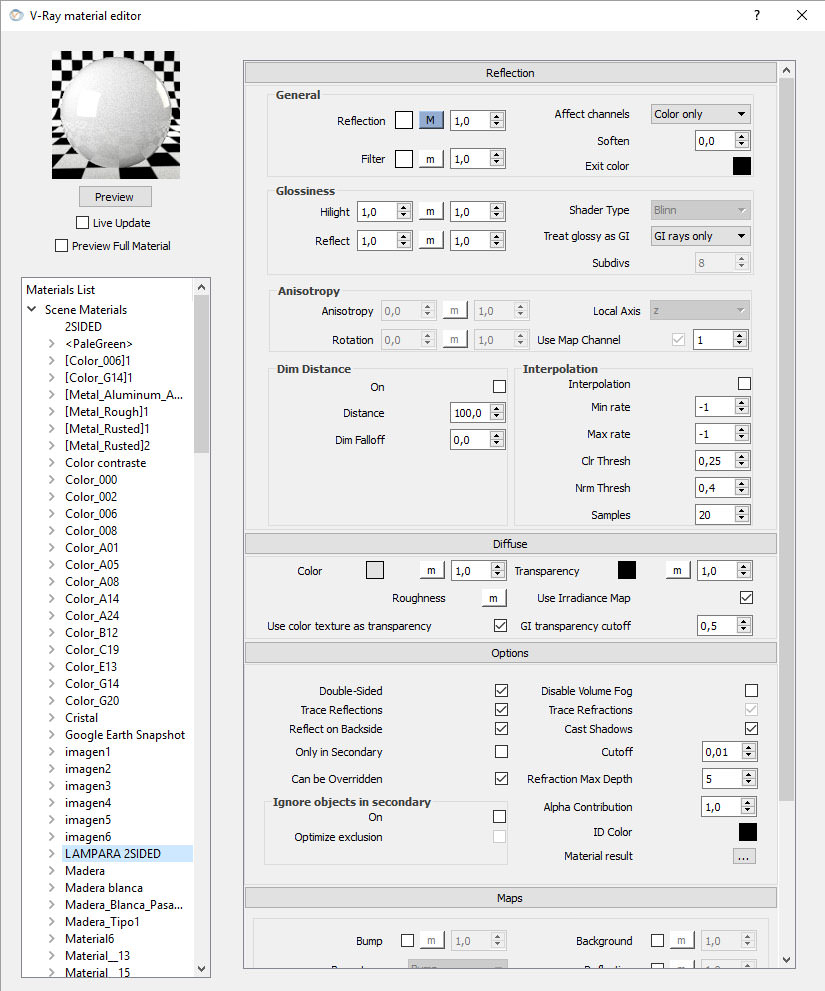
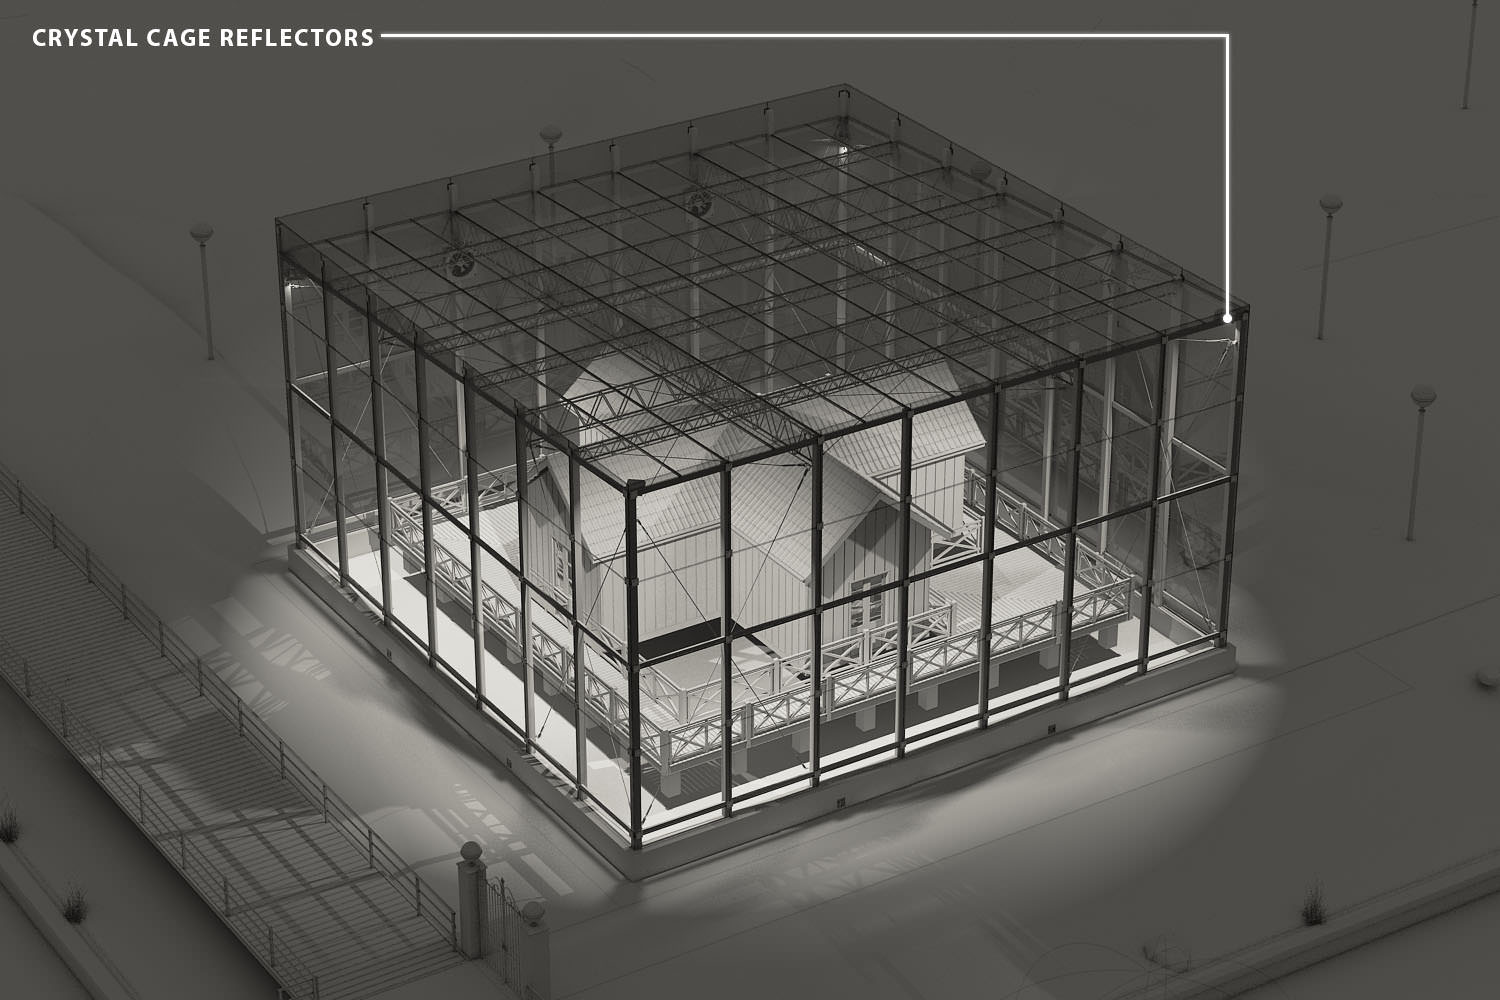
The Crystal Cage materials are basically standard materials with a reflection layer.
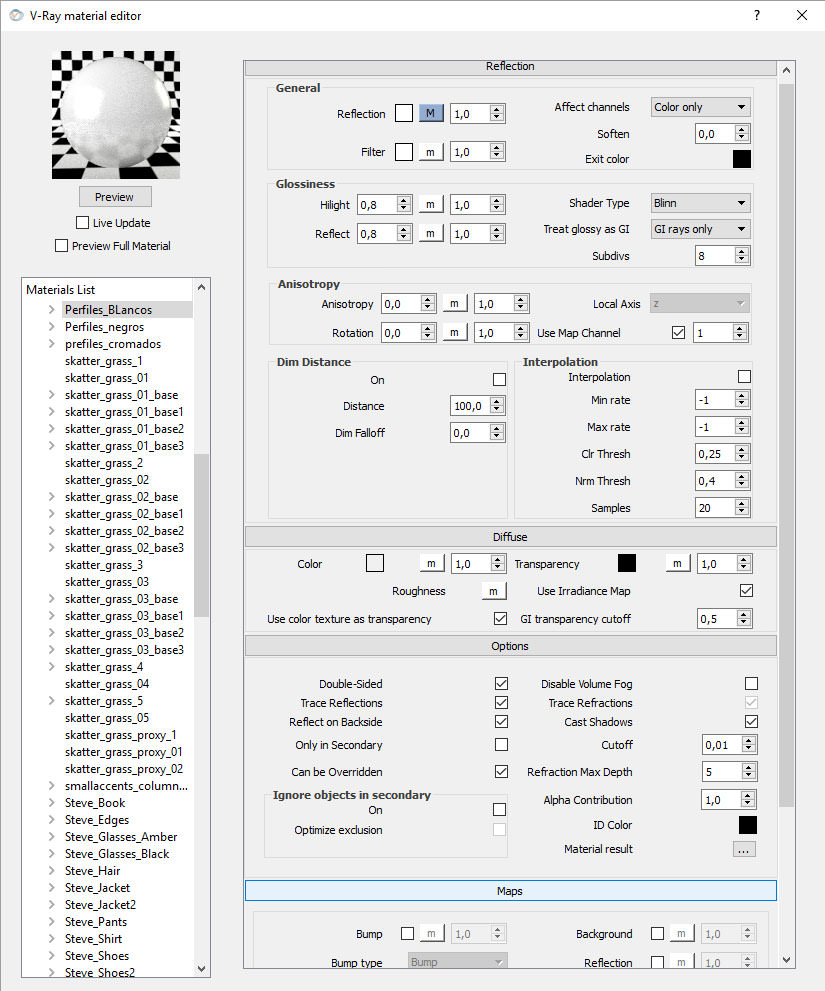

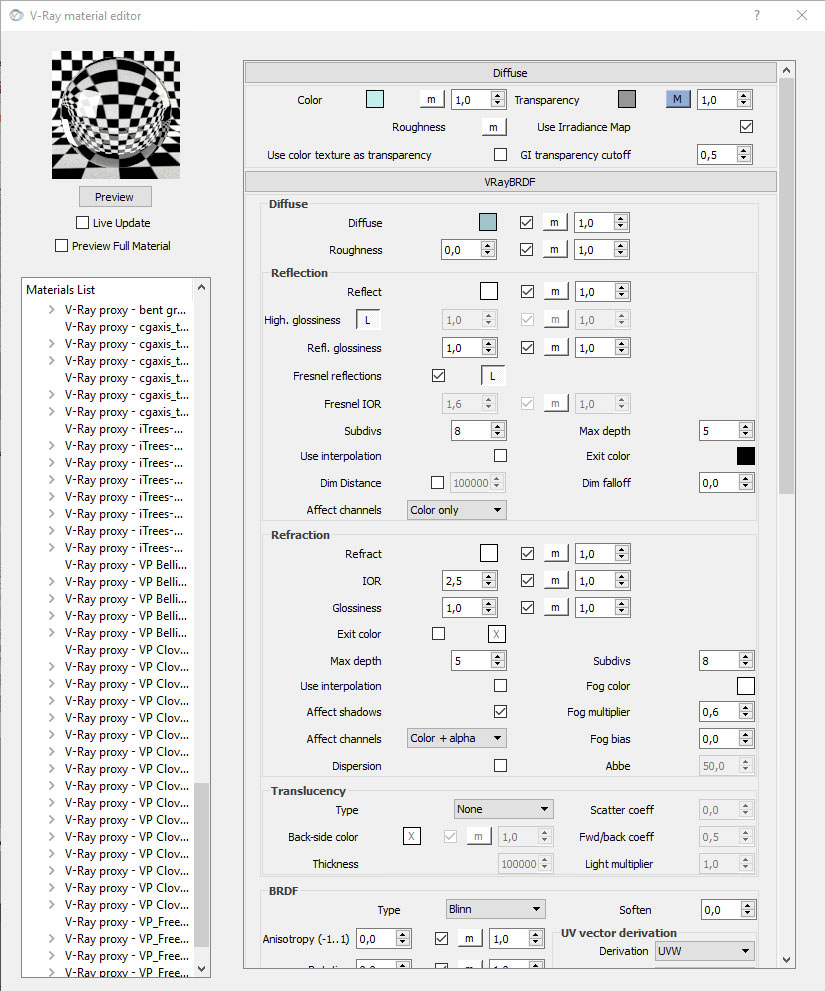
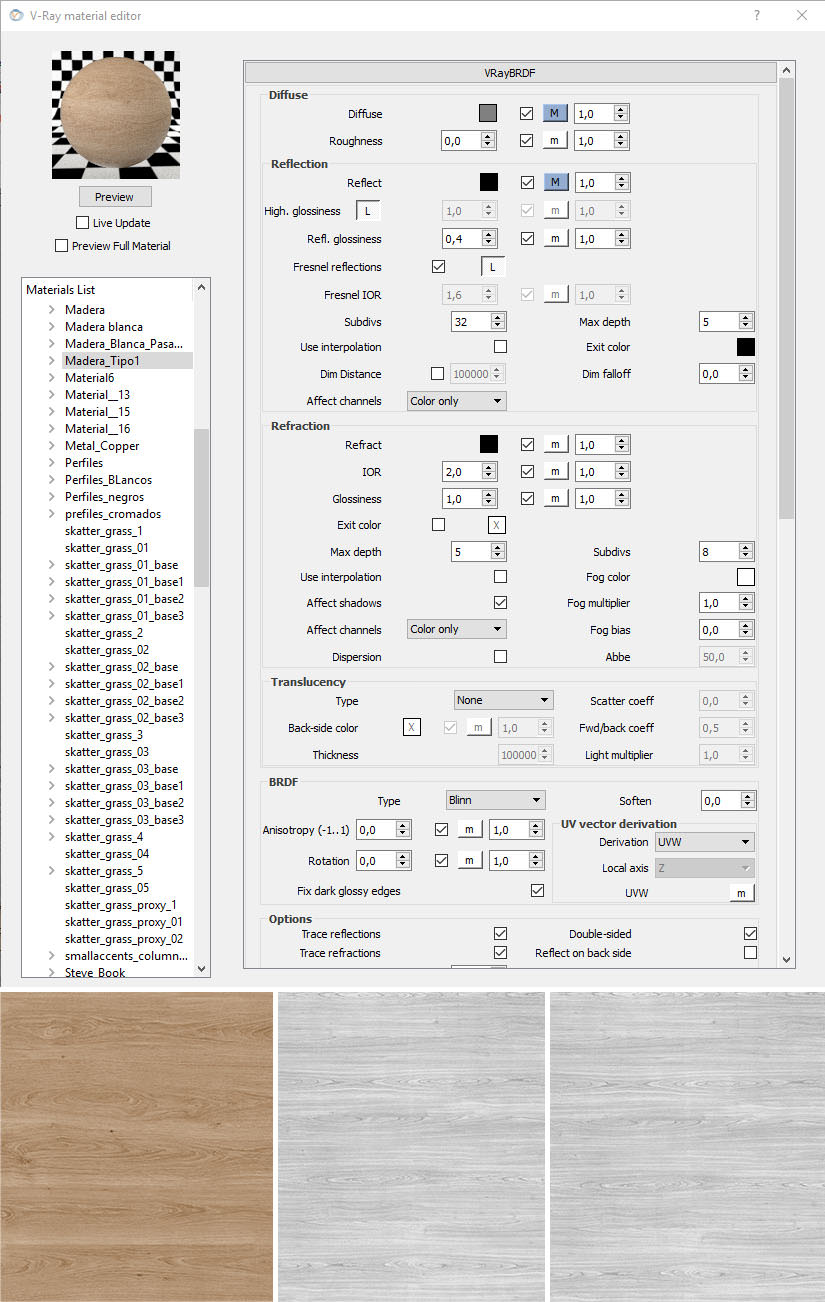
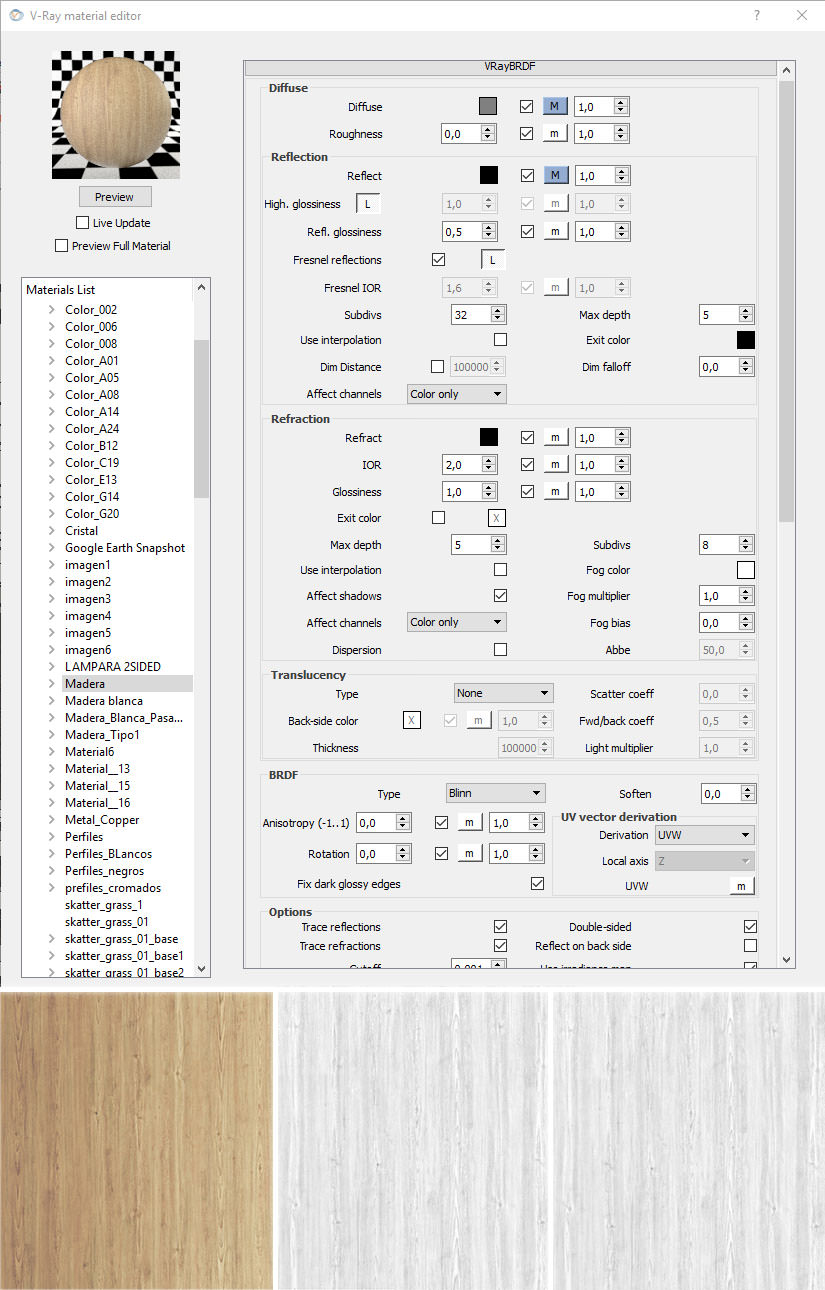
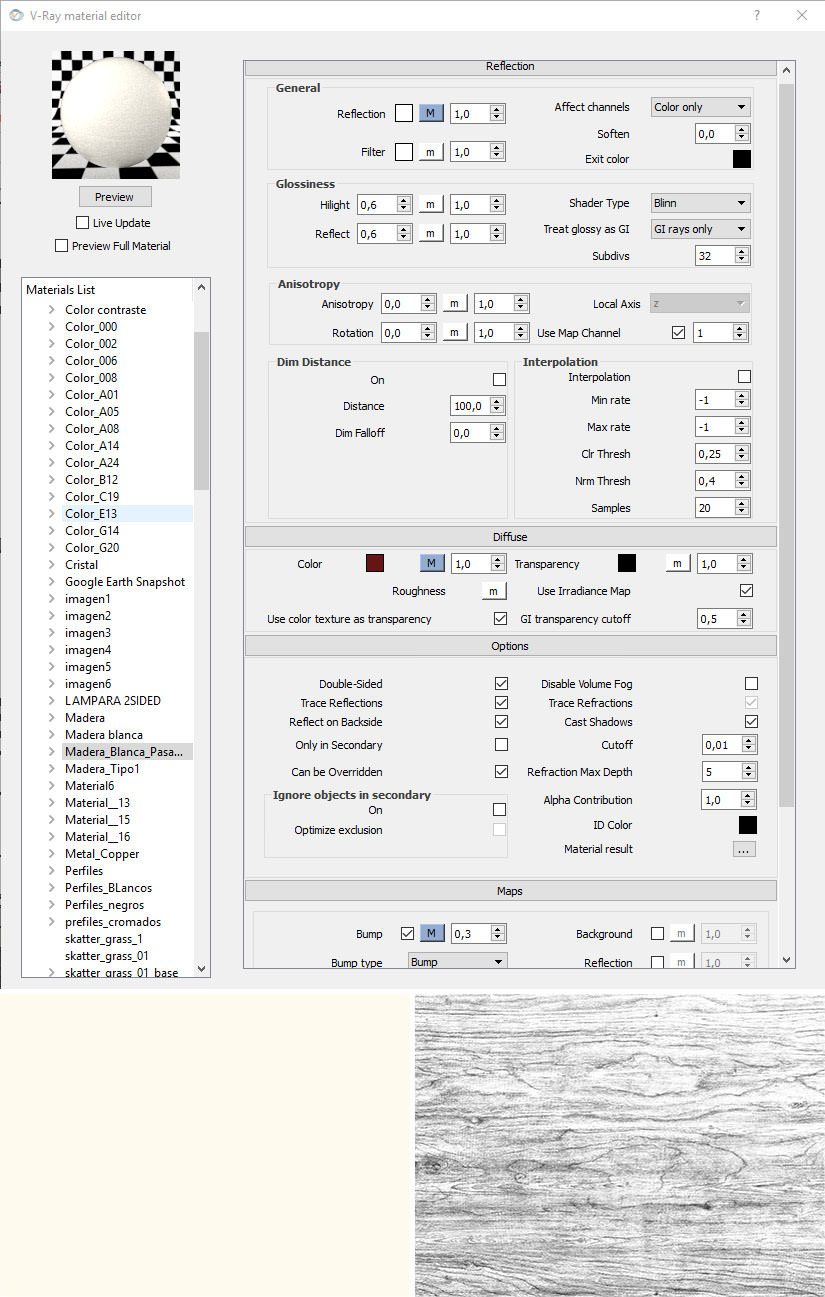
The Wood is a mix between BRDF and standard material depending on the detail it requires.
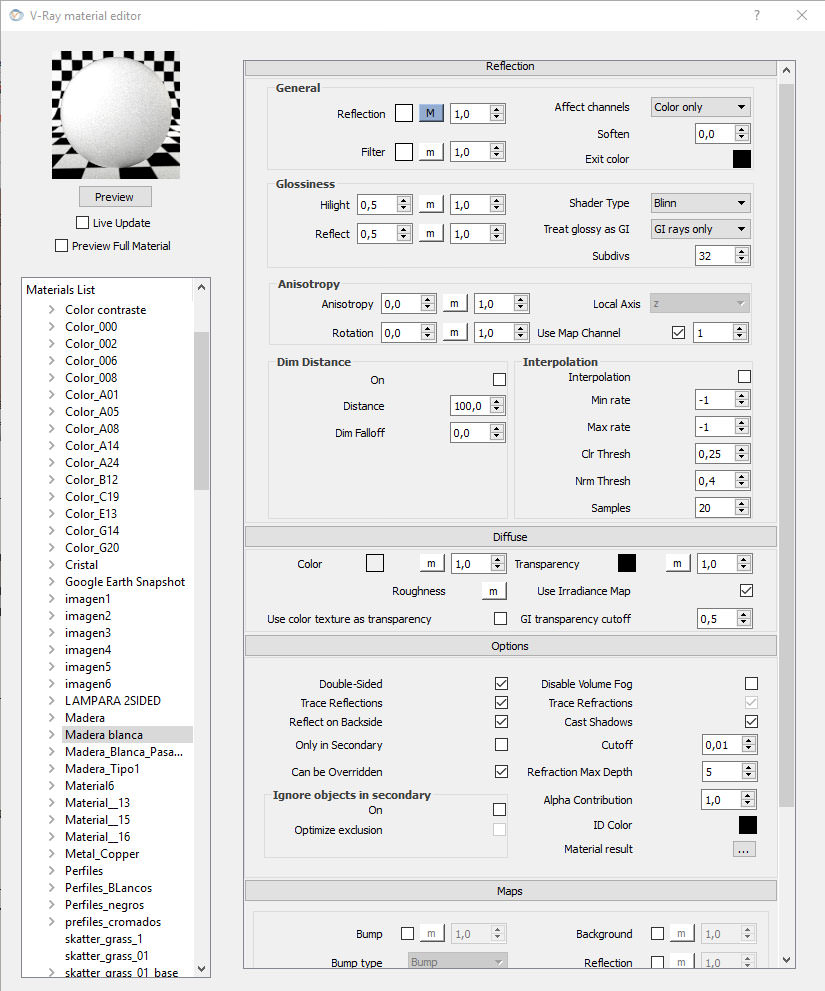
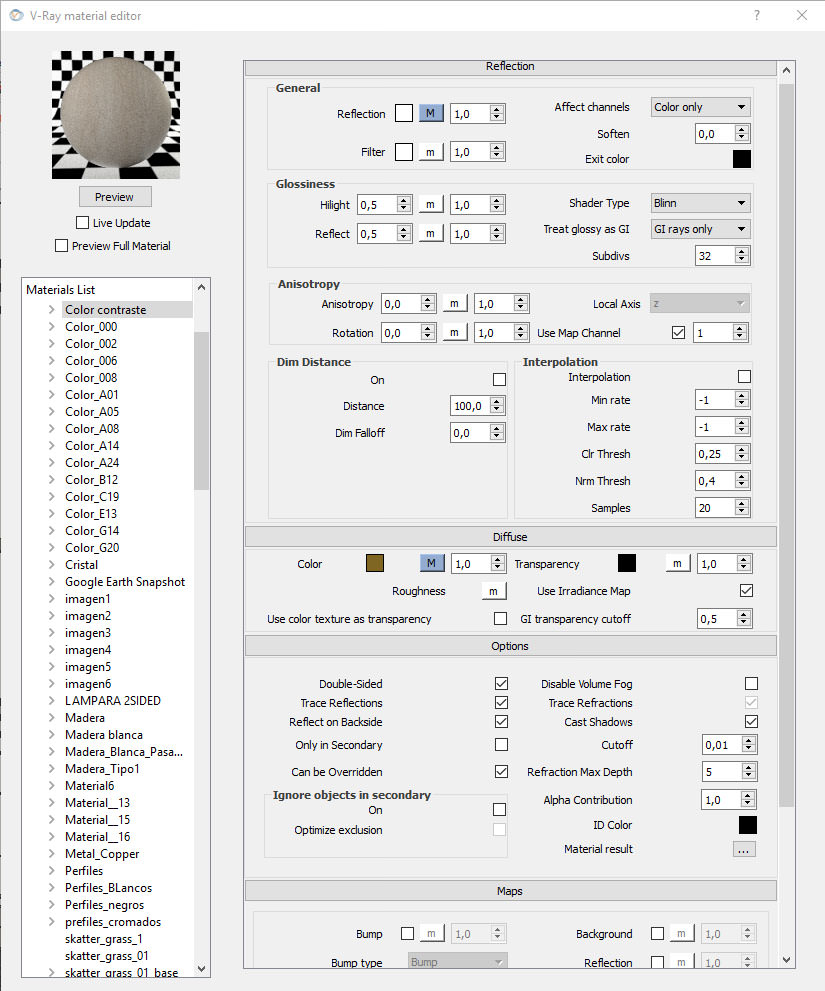
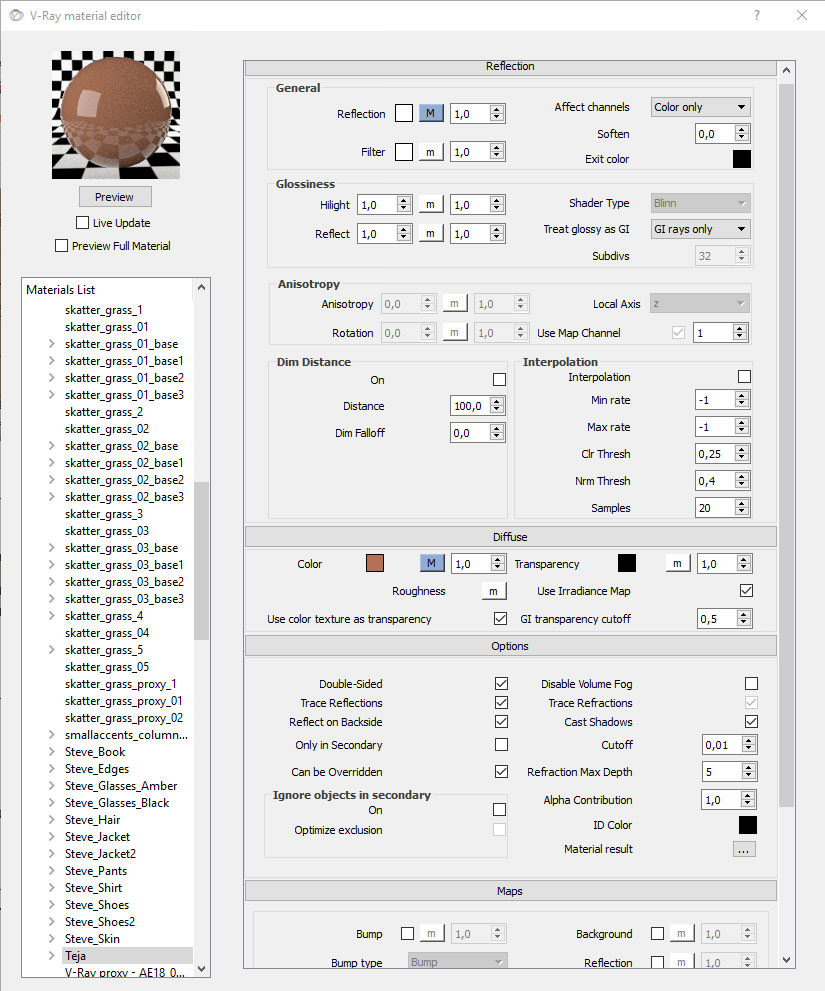
The Stonework is composed of a BRDF with various levels of detail.
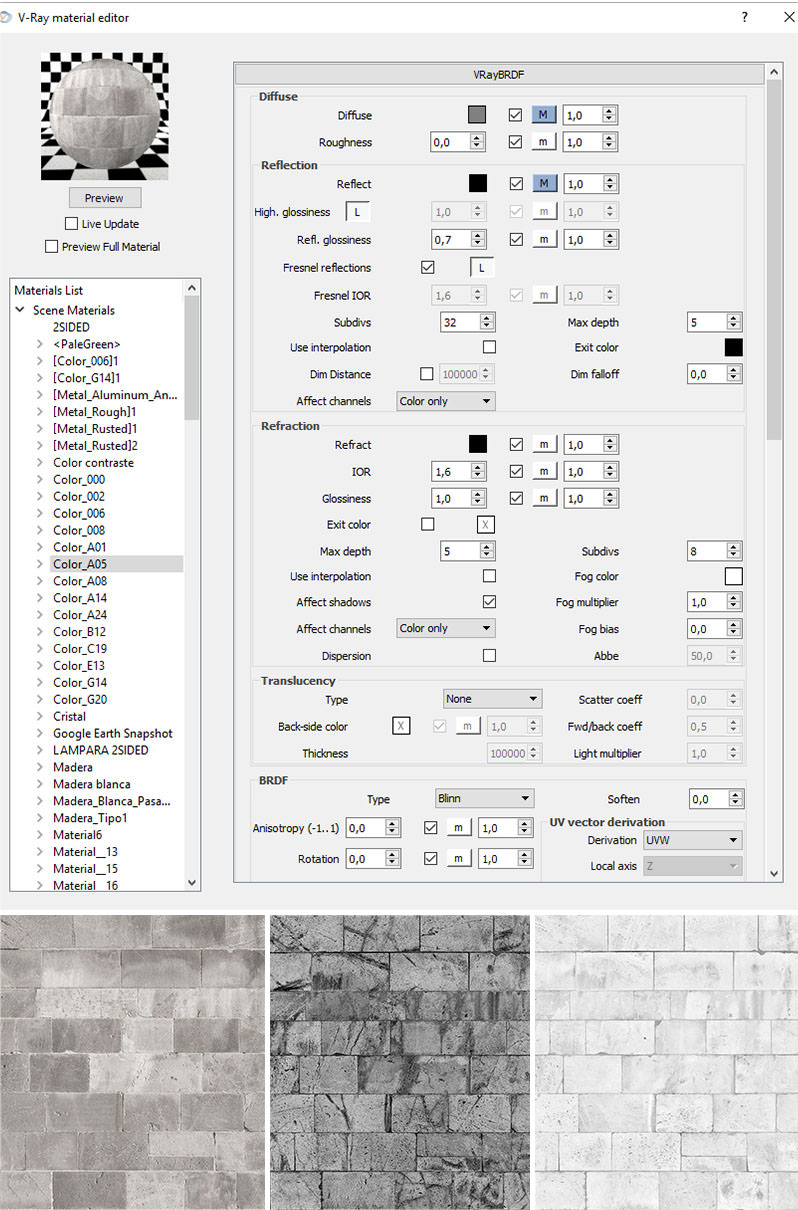
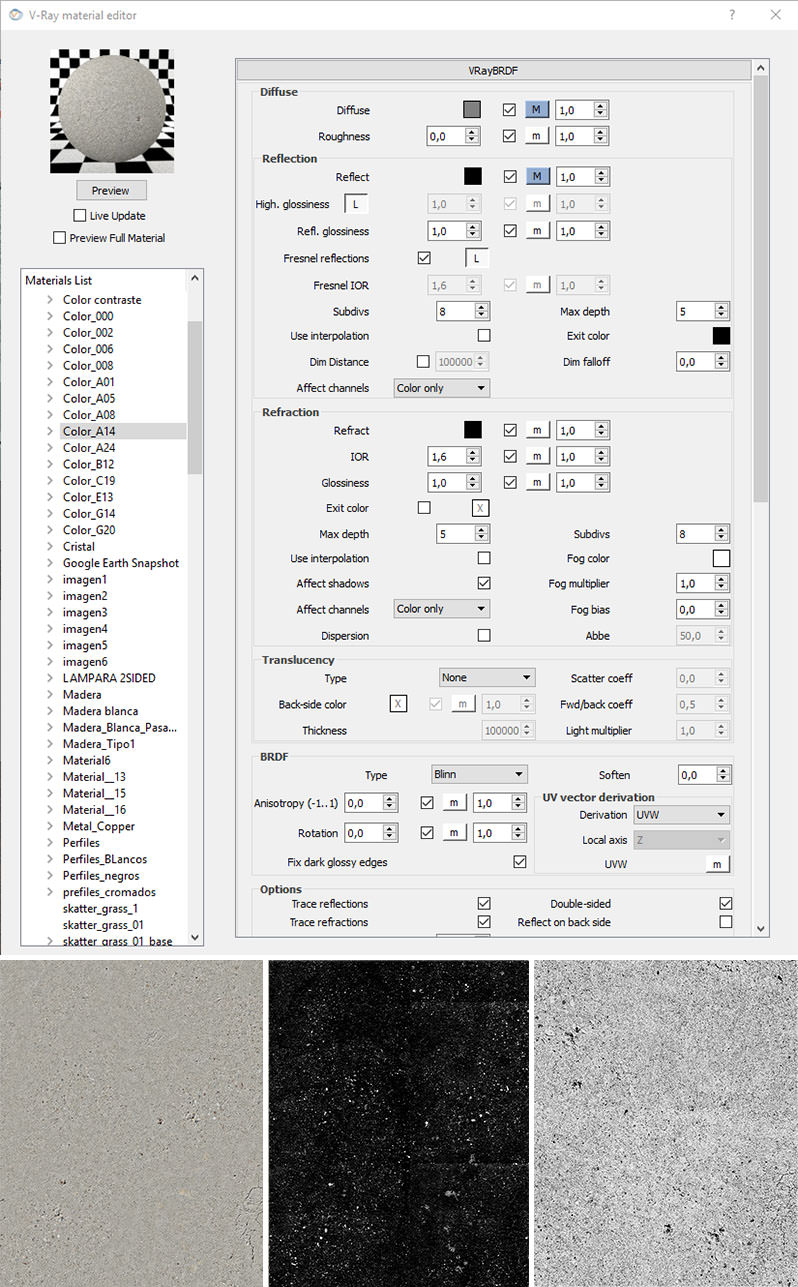
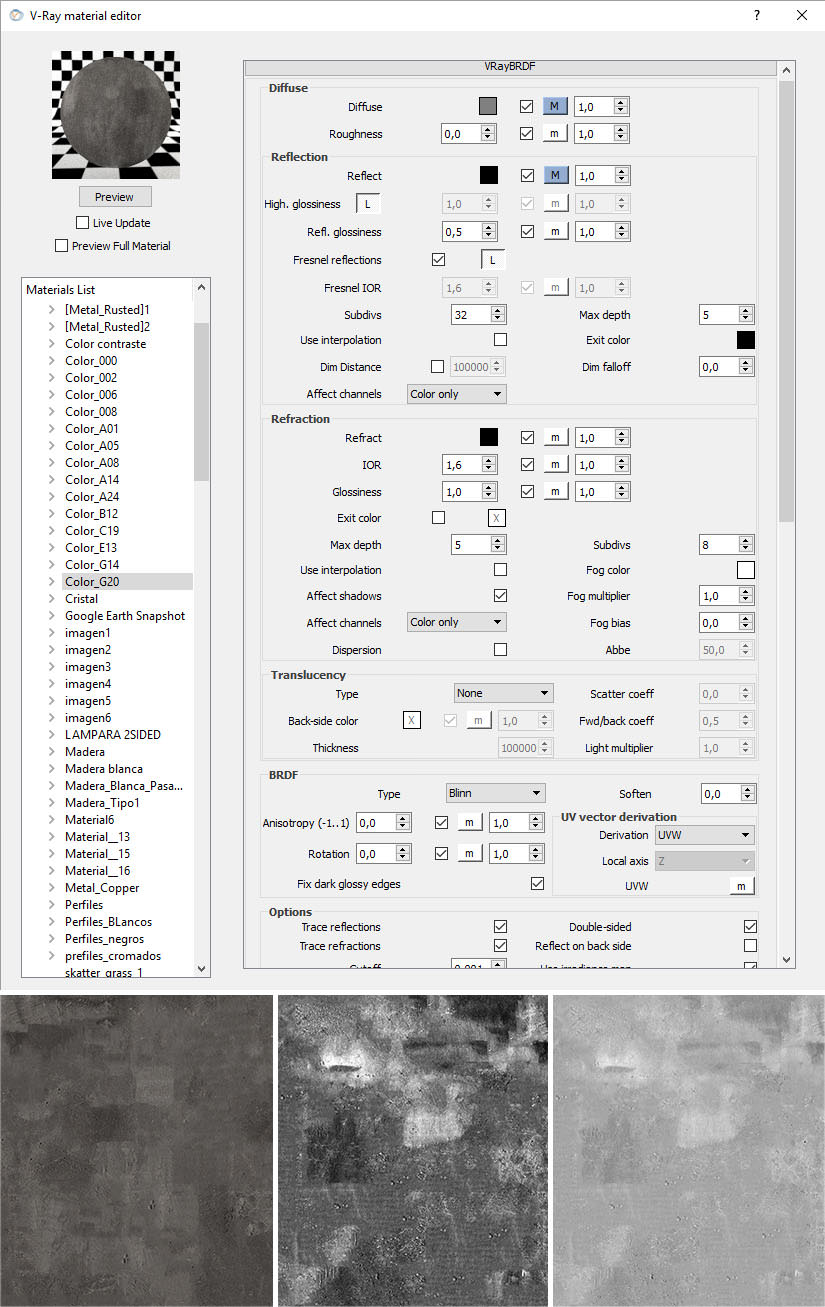
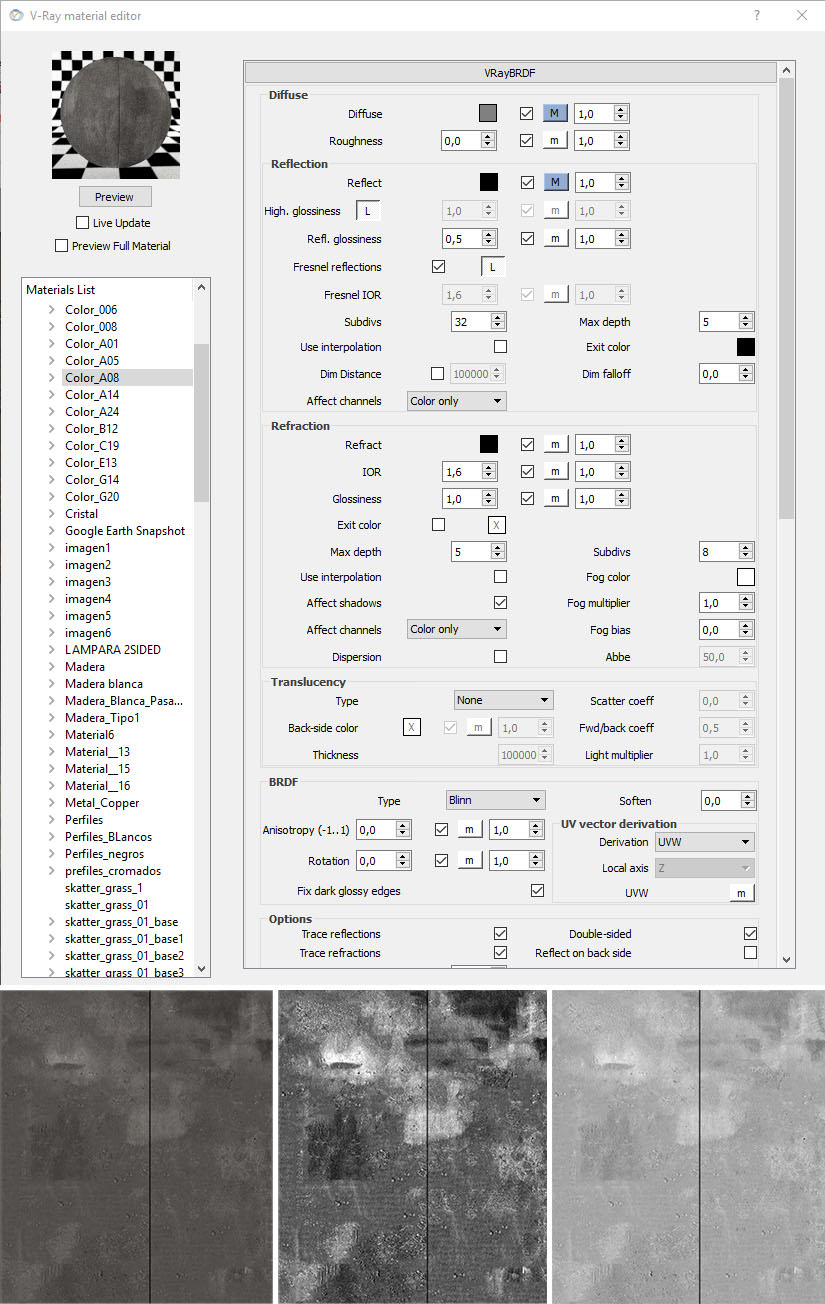
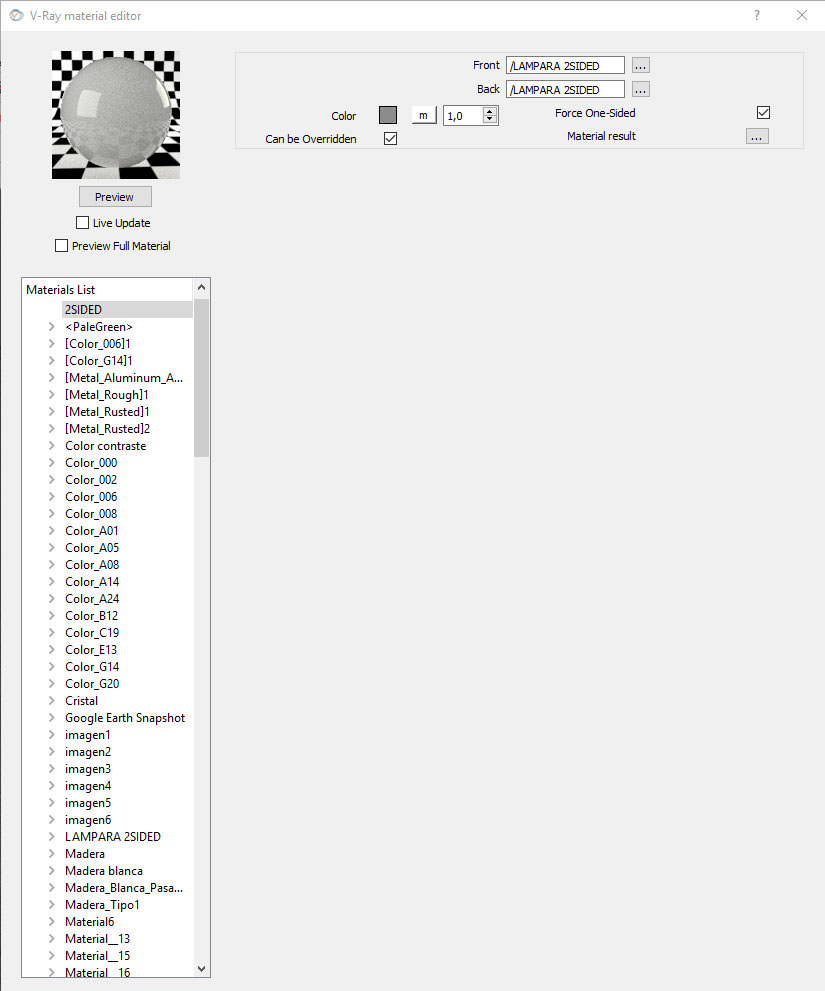
Other materials used are 2 sided materials for exterior lamps, roof tiles, and water.
Lighting
The lighting process also has three important steps :
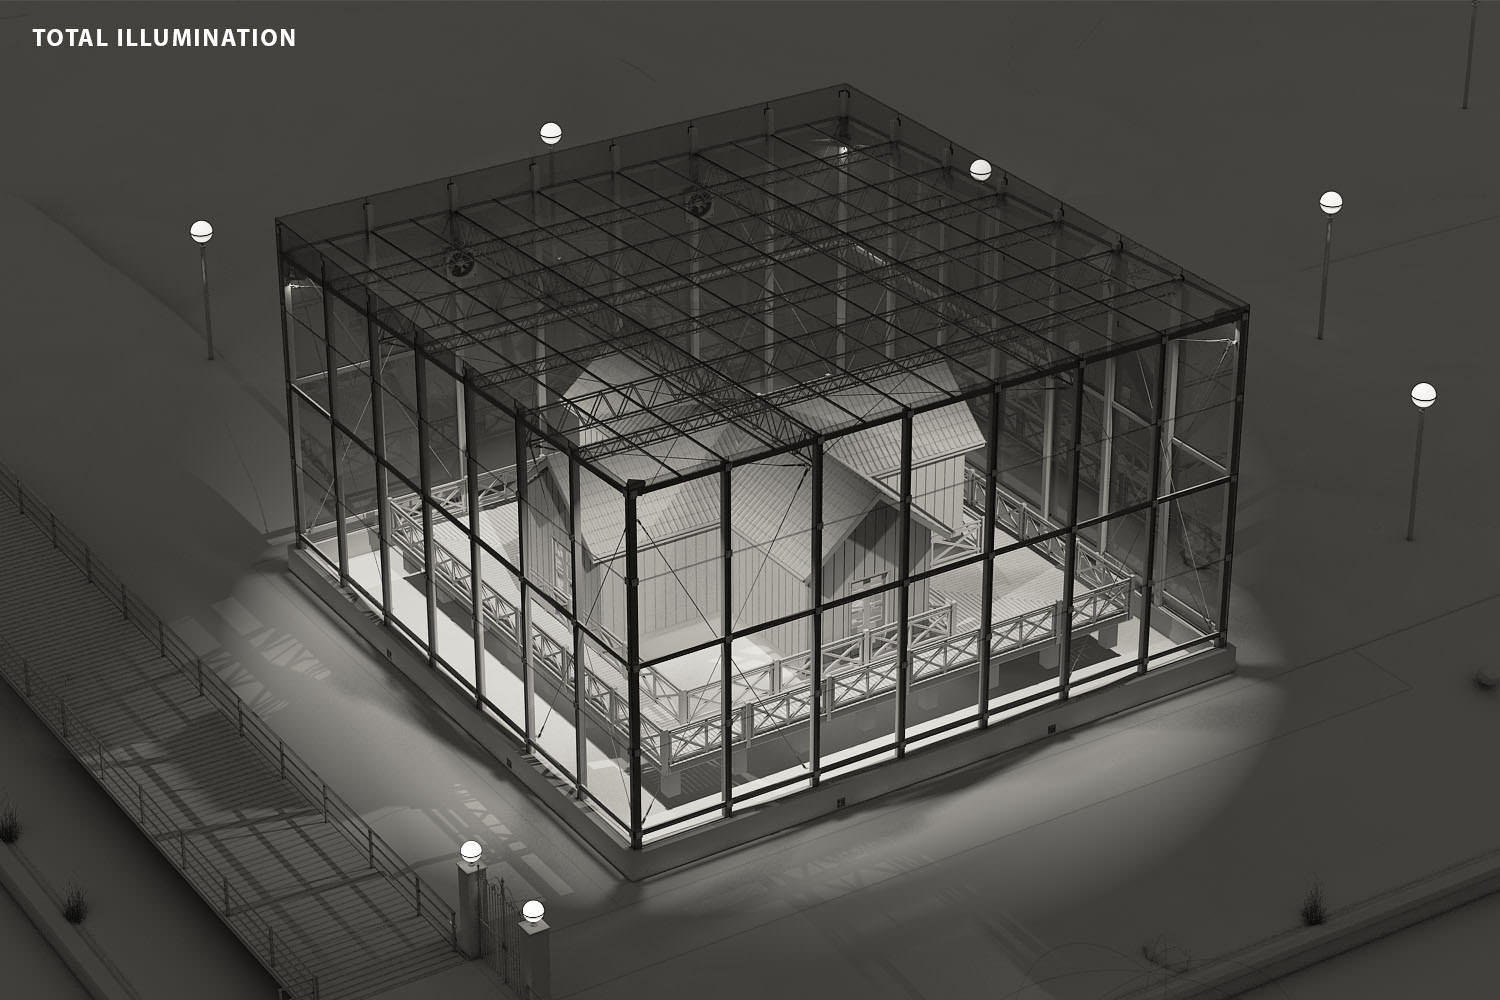
Exterior lighting is basically small globe lamps, with a two-sided material and a sphere light on the inside of them. Two of them are placed in the entrance and the rest are randomly placed in the model.

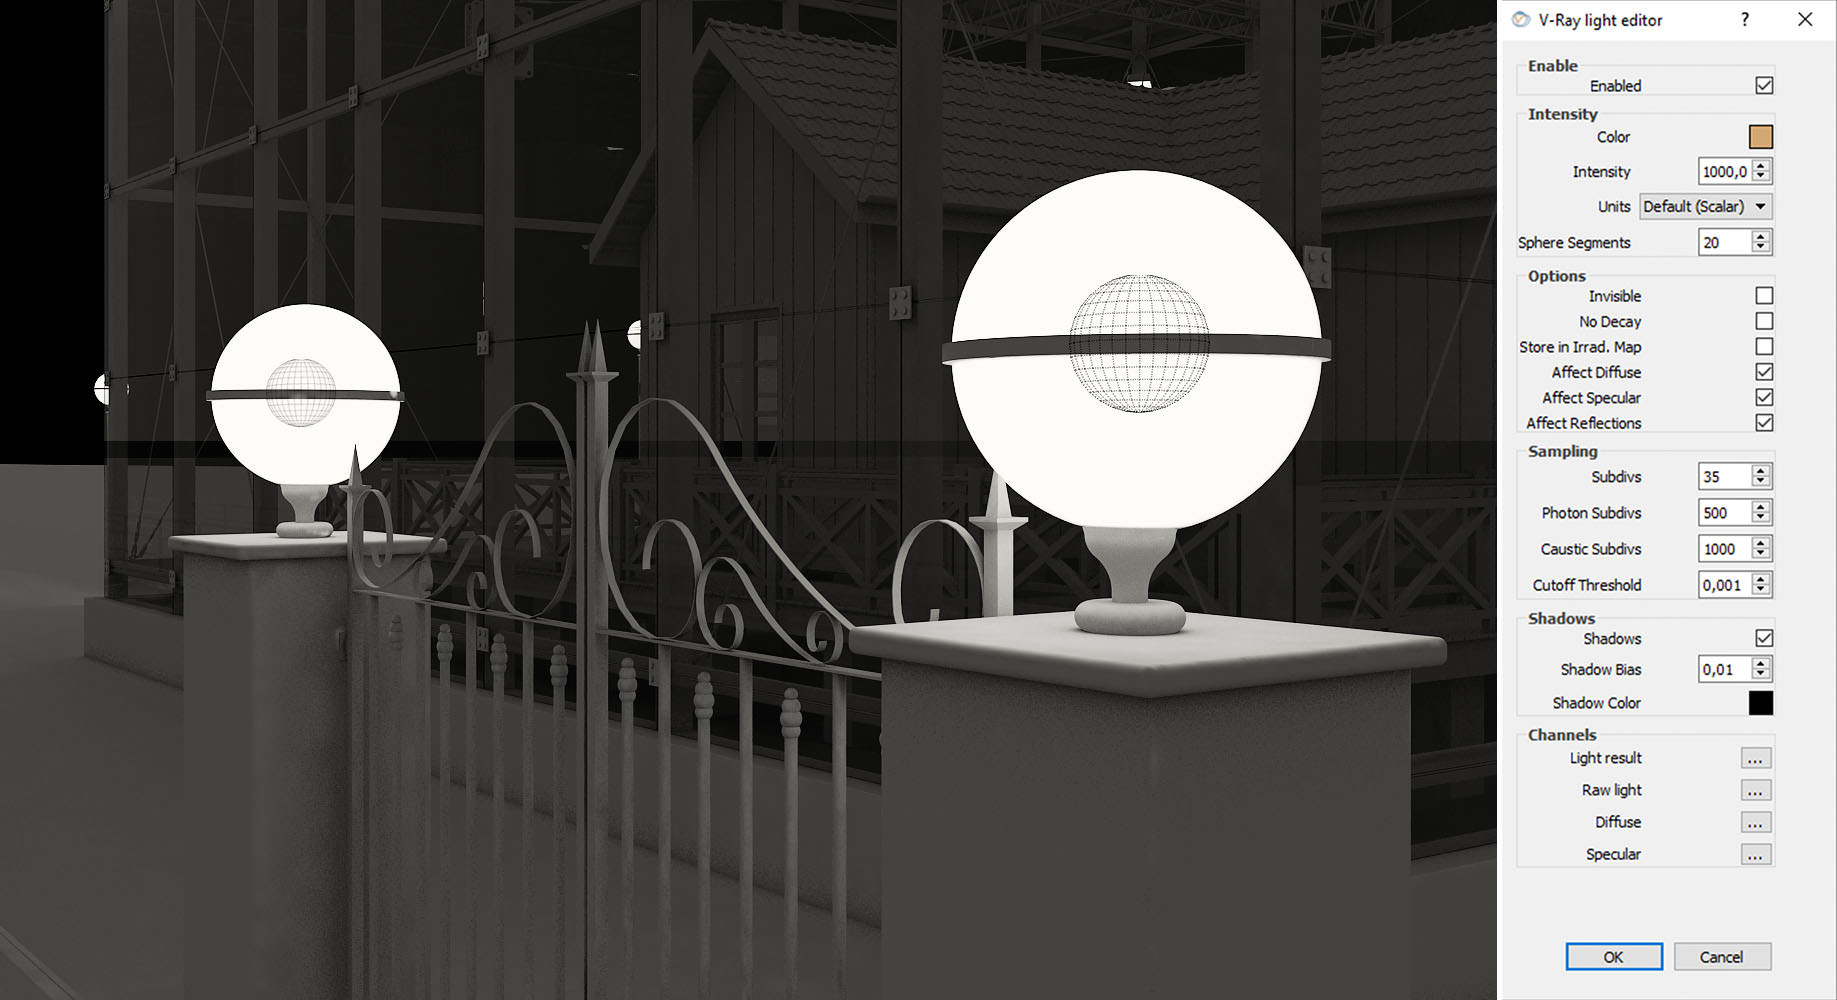
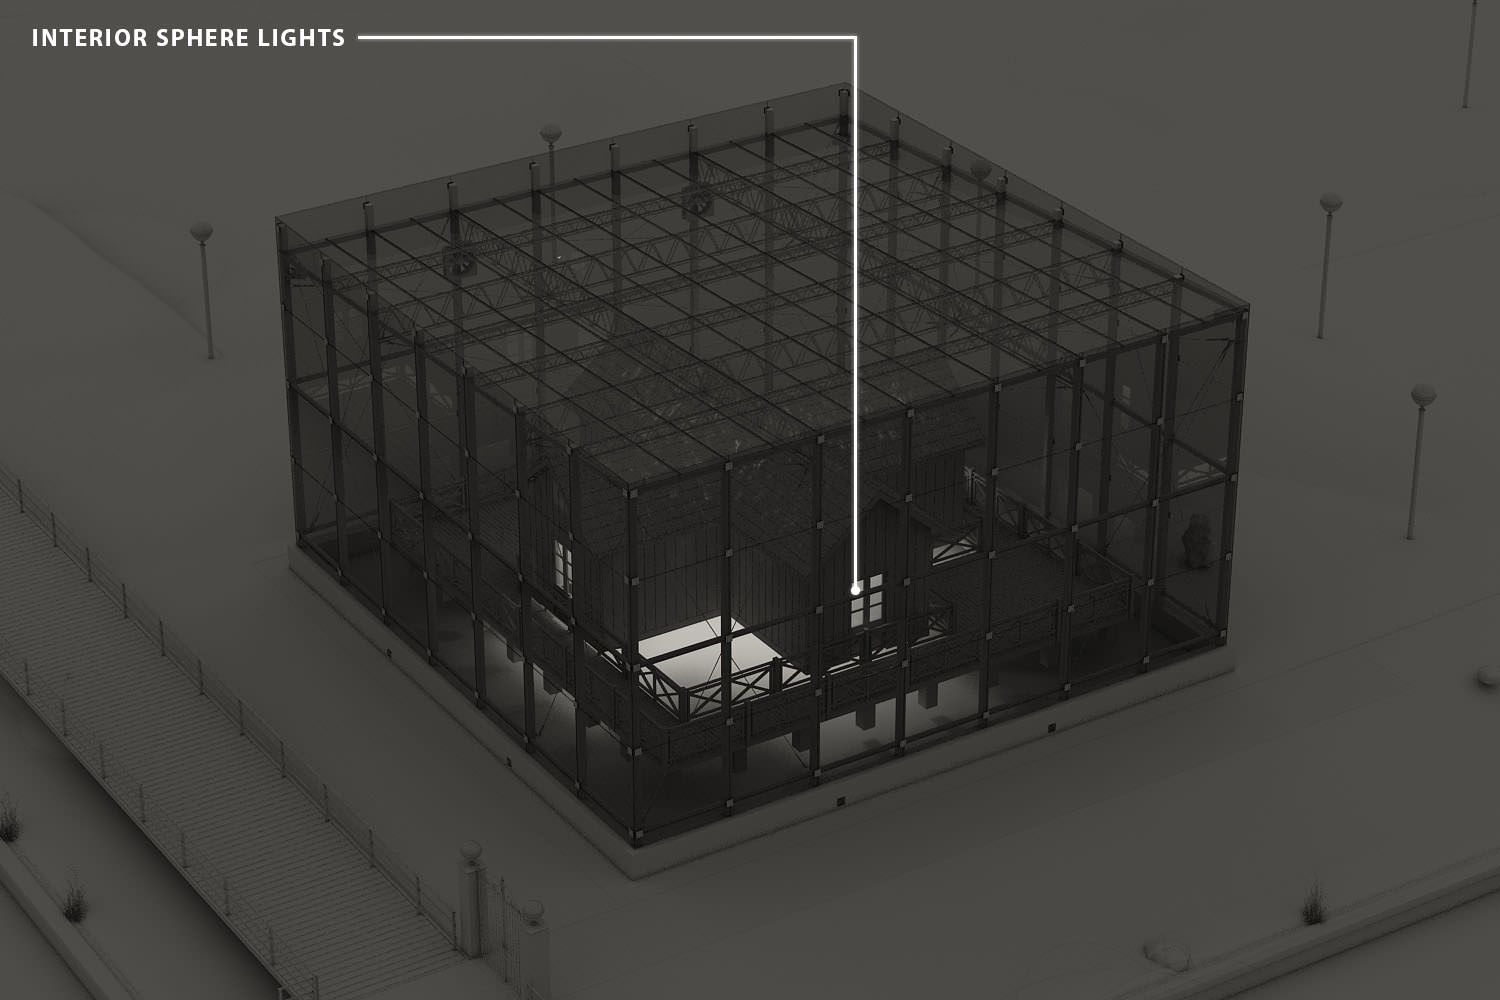
Interior lights are mainly sphere lights.

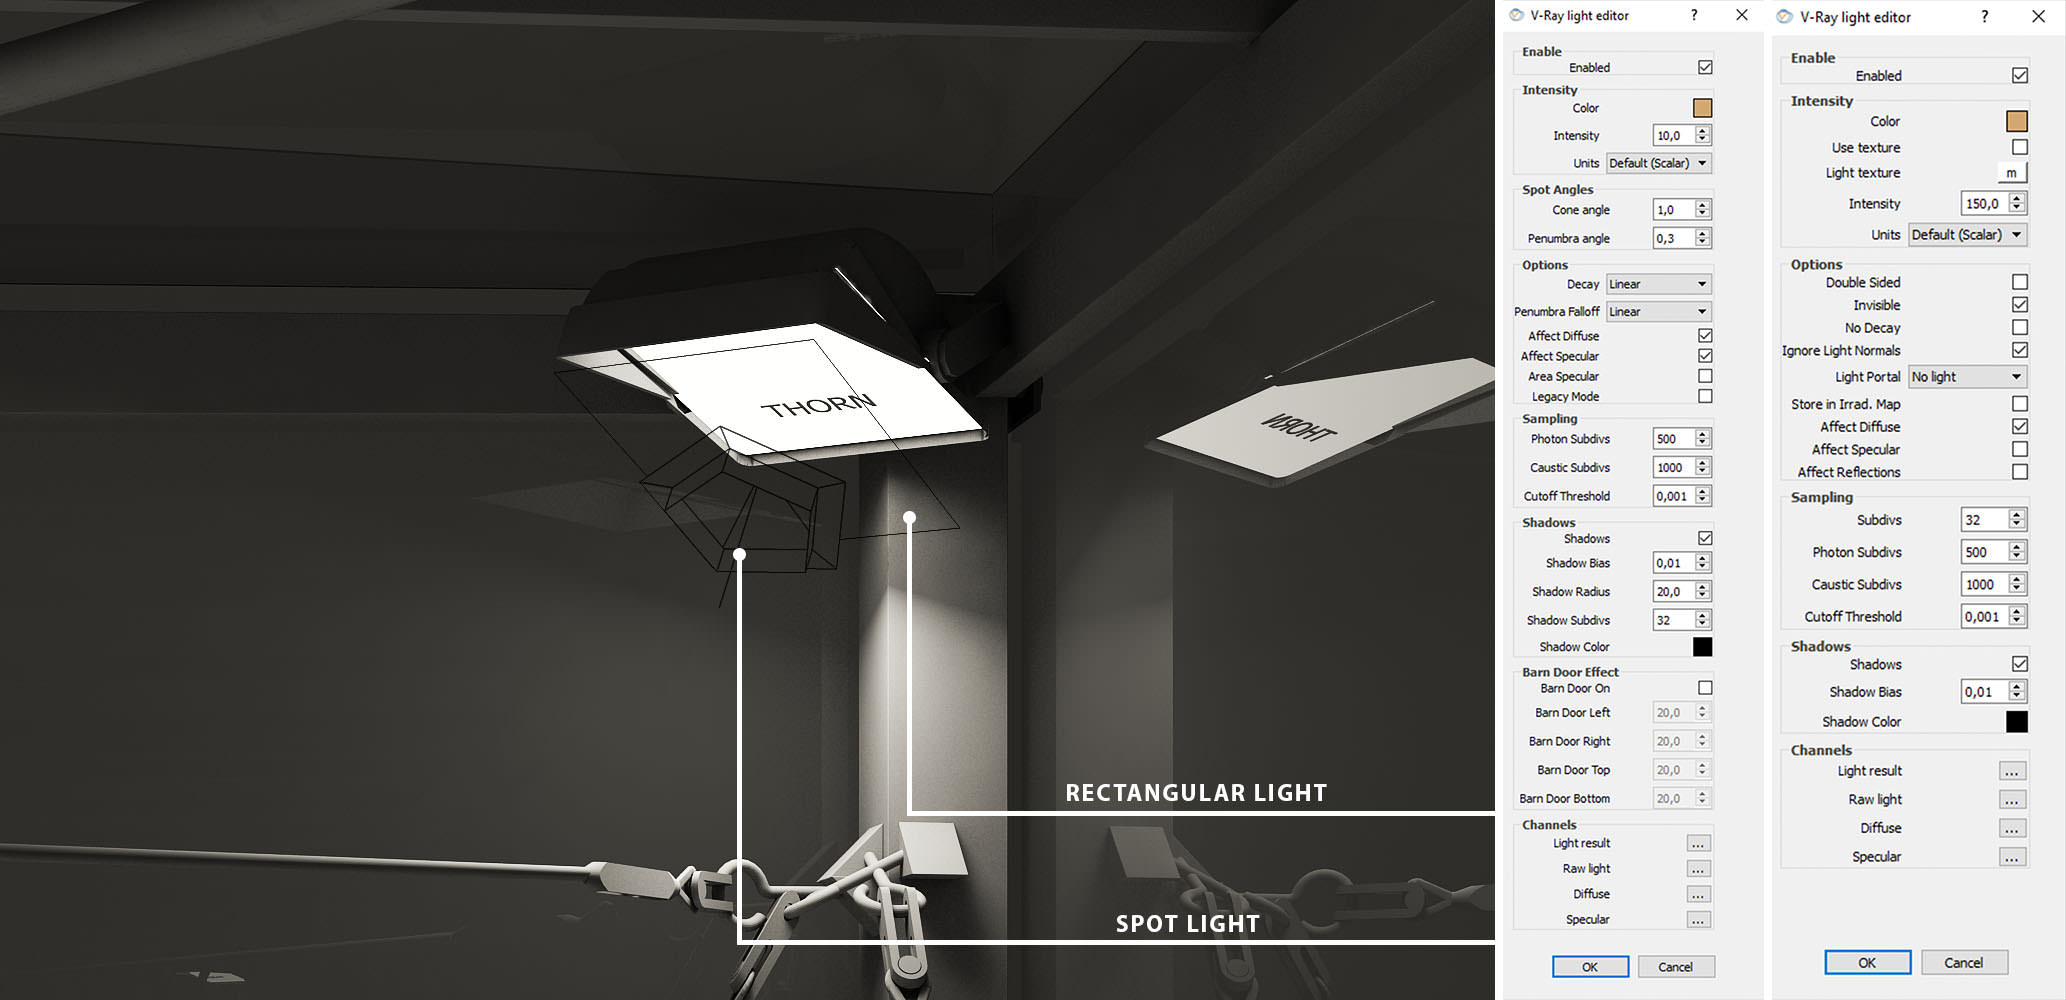
The reflectors lights that are inside the crystal cage are the main lighting of the scene. They are a mix between Spot Lights, Rectangular Lights, and Emissive Material.
Final lighting setup…
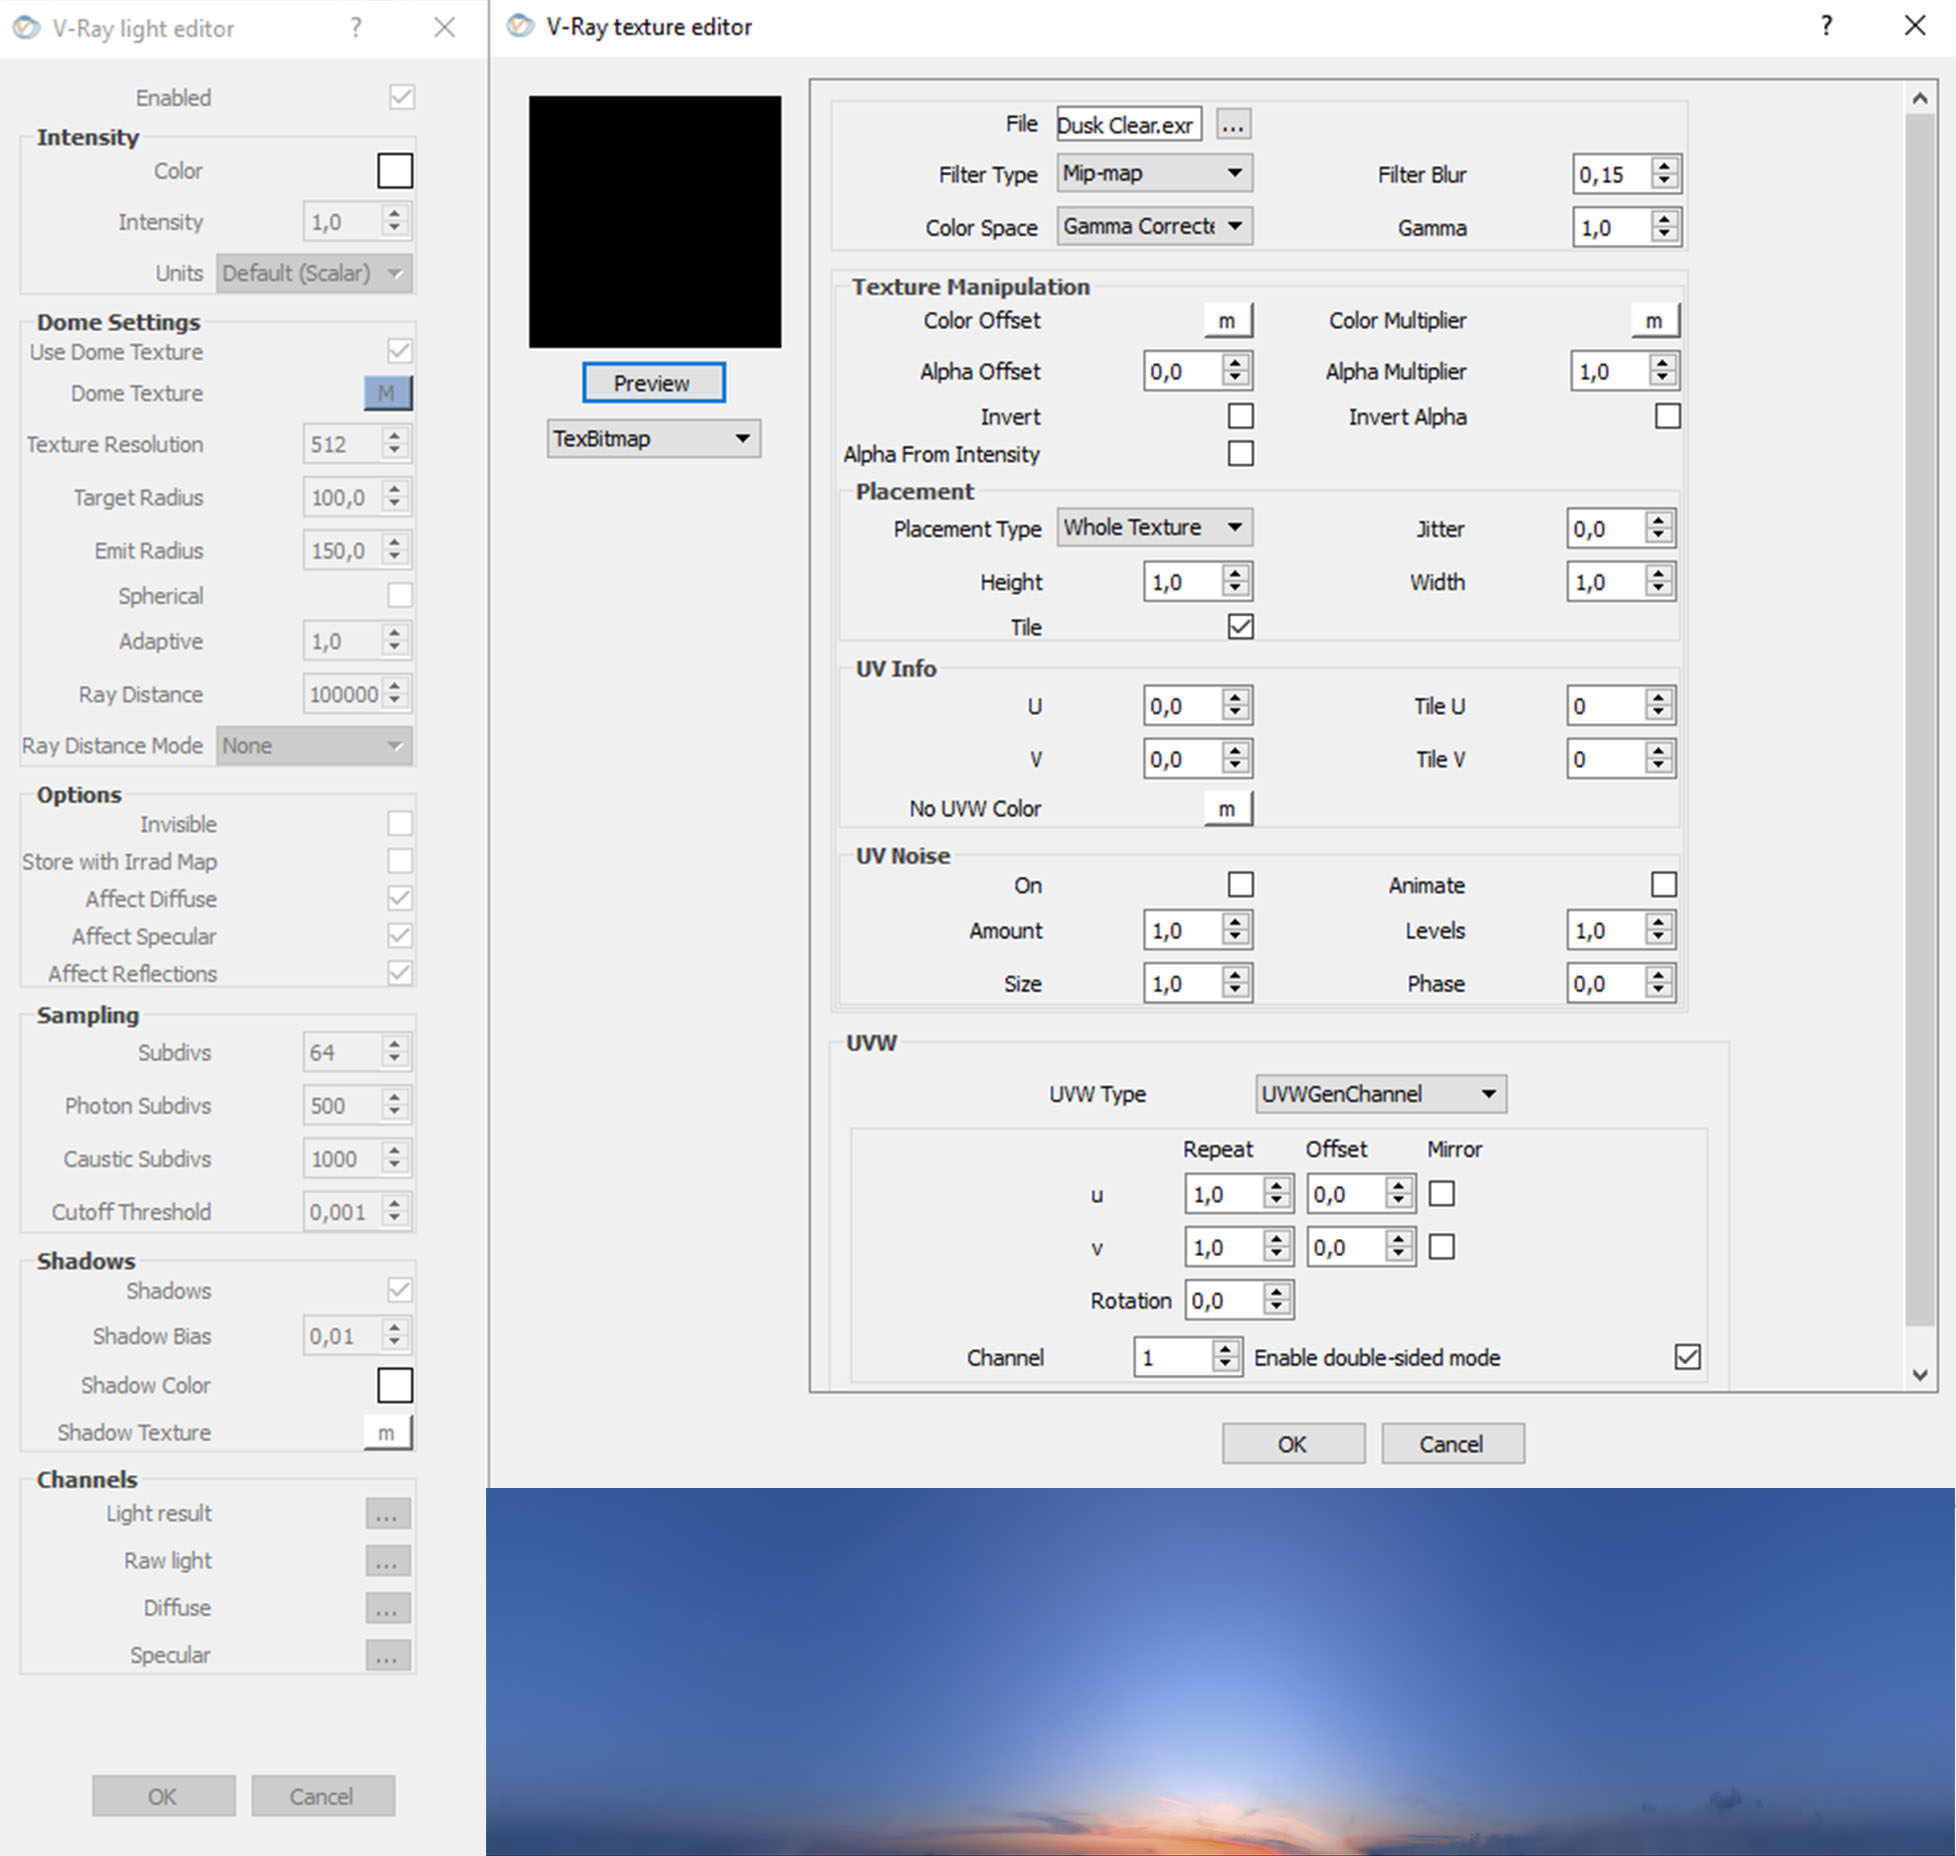
Global Illumination is achieved with a V-Ray Dome Light loaded with an HDRi (1957 Dusk Clear by PETER GUTHRIE)
Composition and Rendering
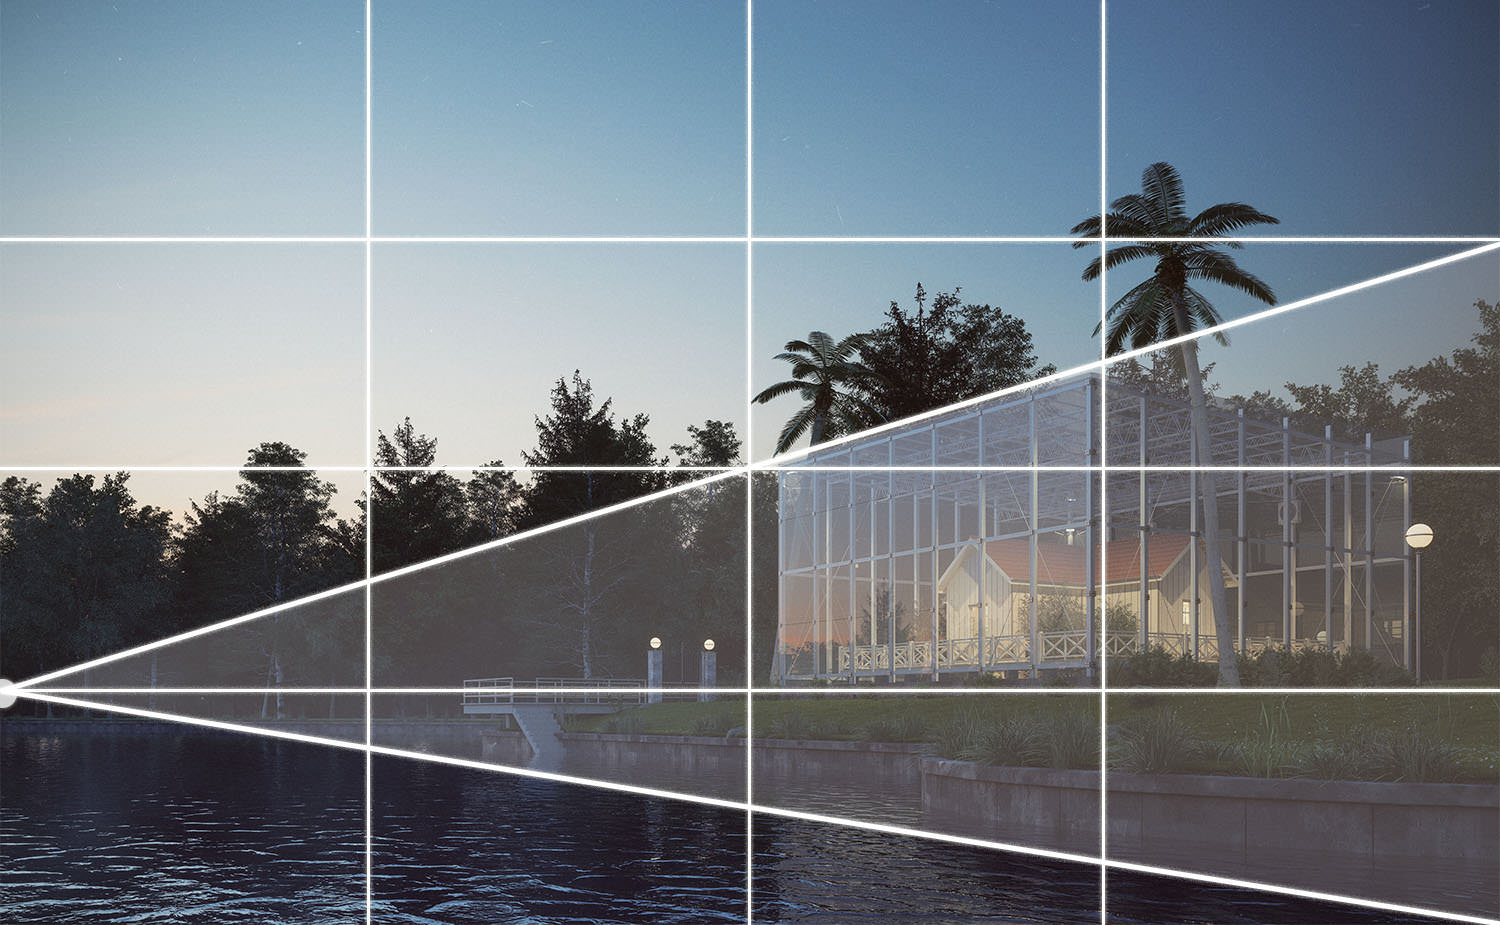
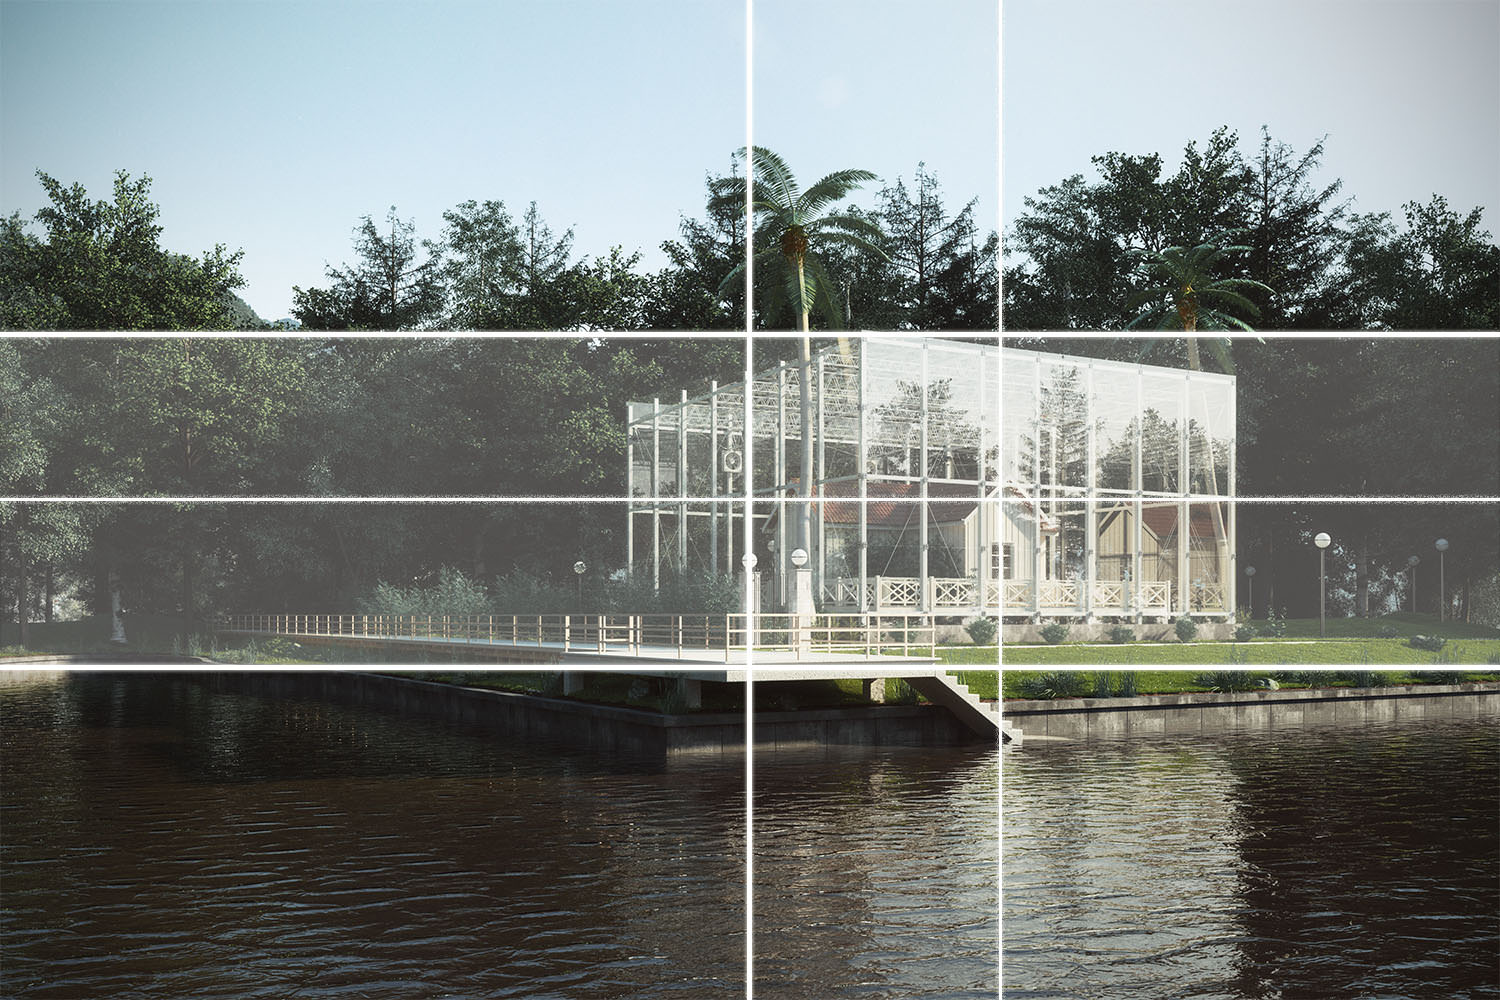
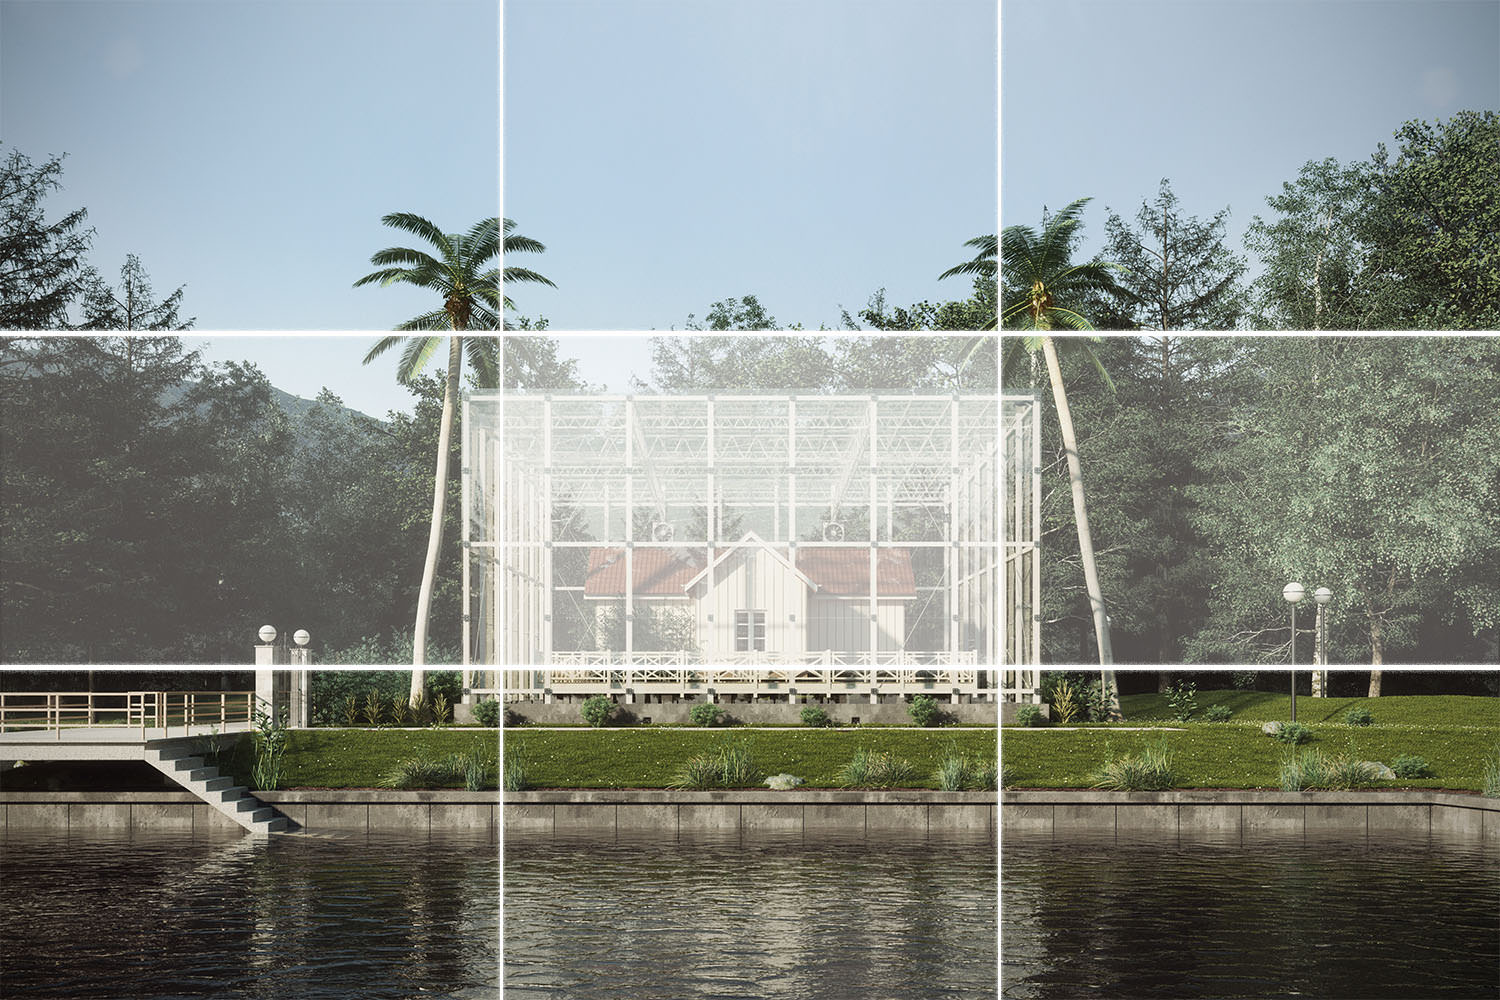
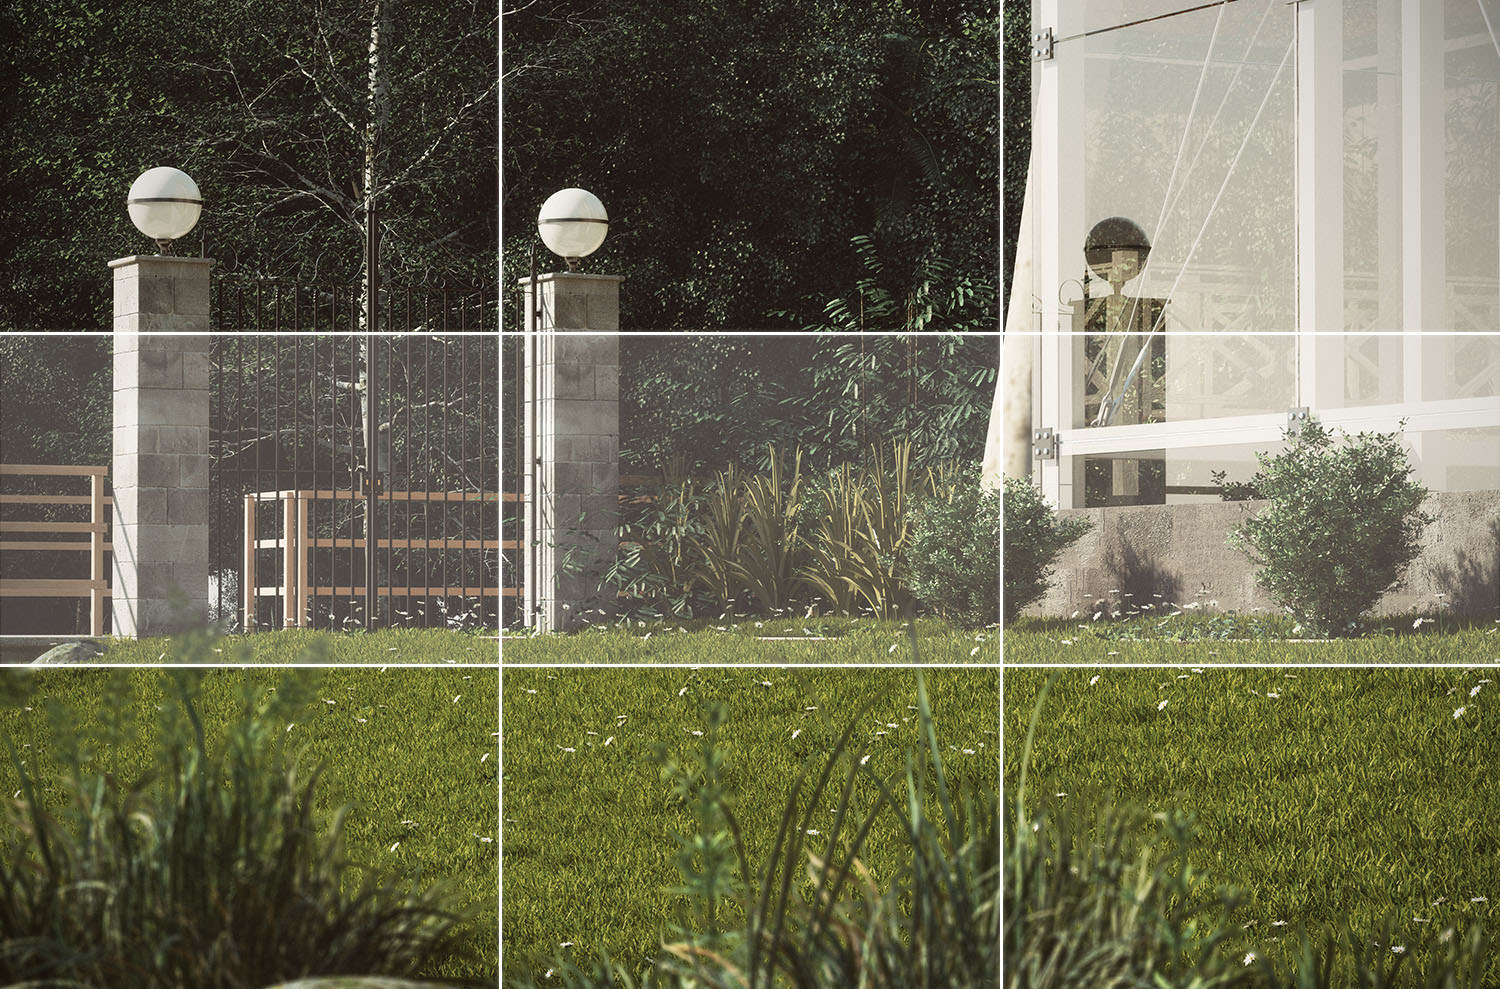
As always, framing is a fundamental aspect of an image composition, below you can see the process for framing the final images.
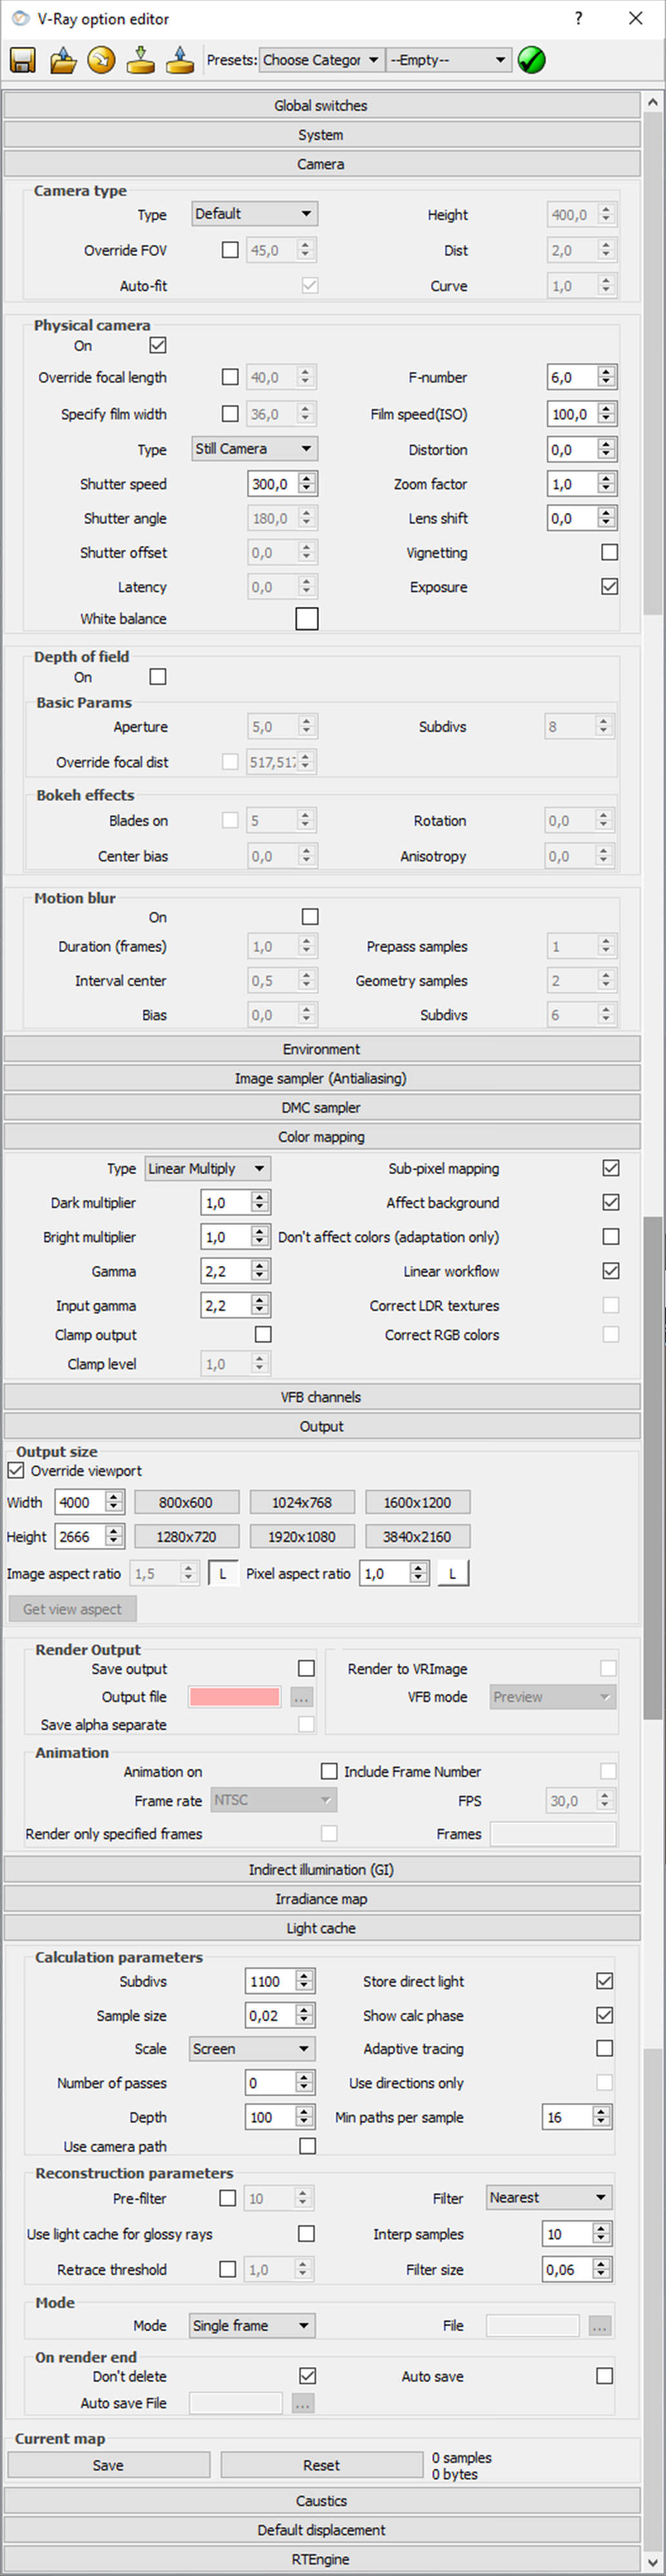
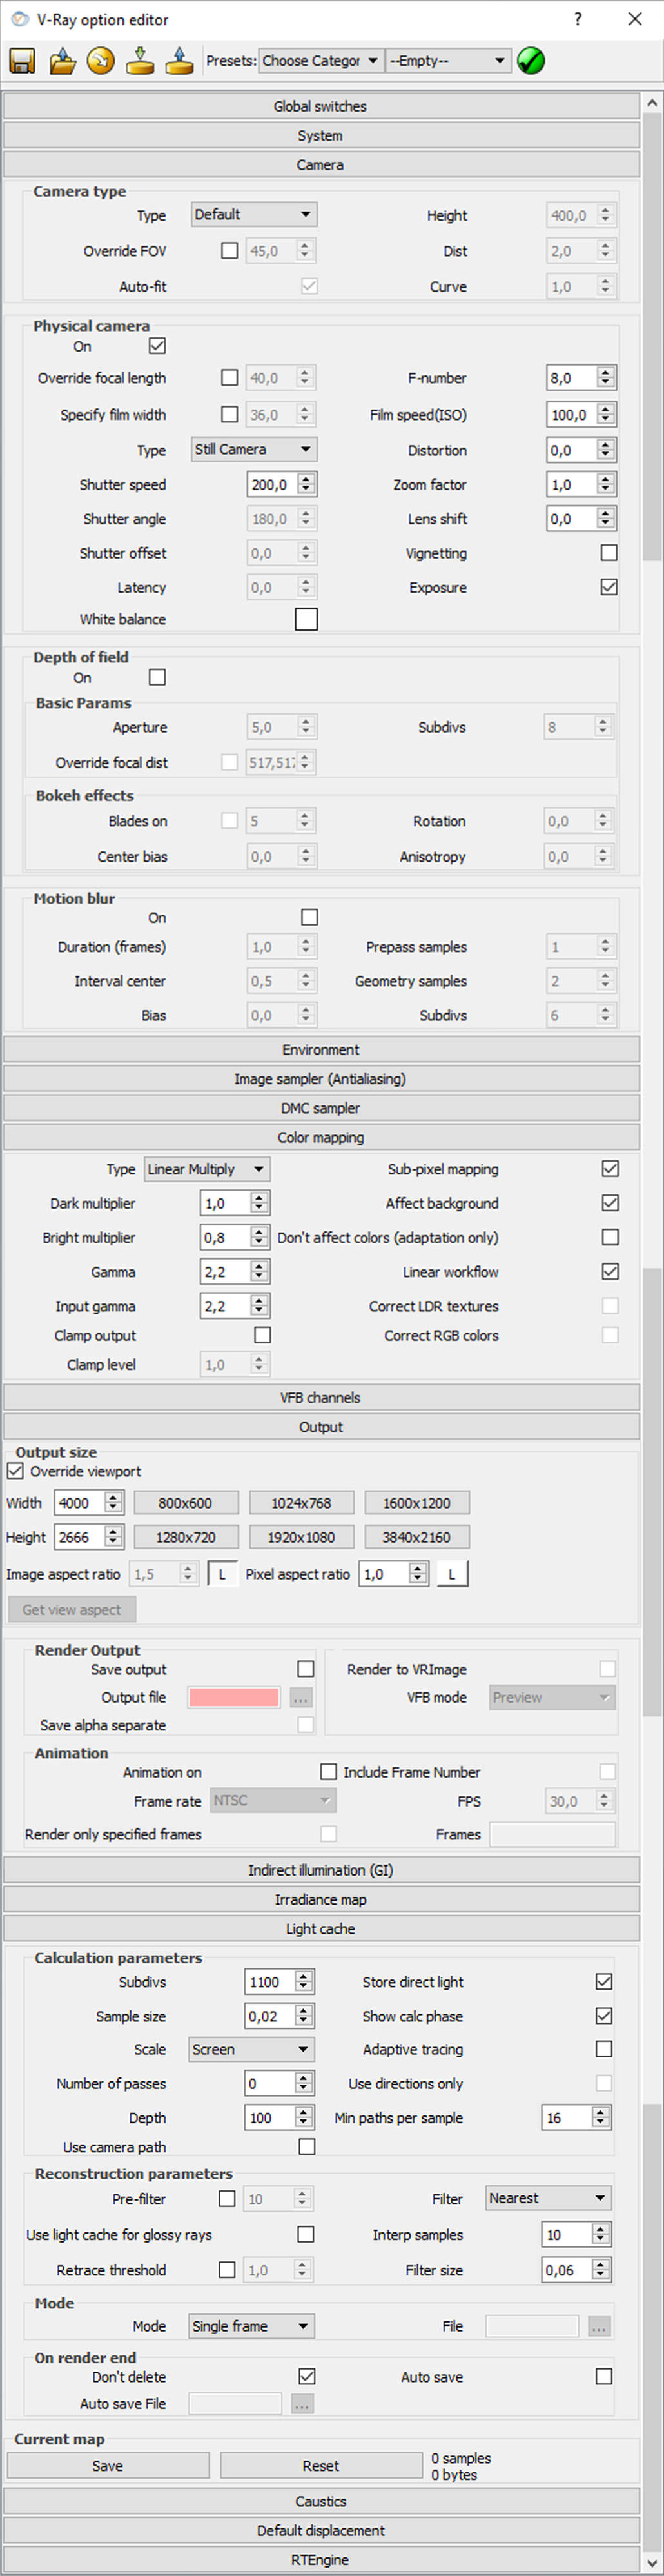
Rendering setup for daylight and dusk images.
Post-Production
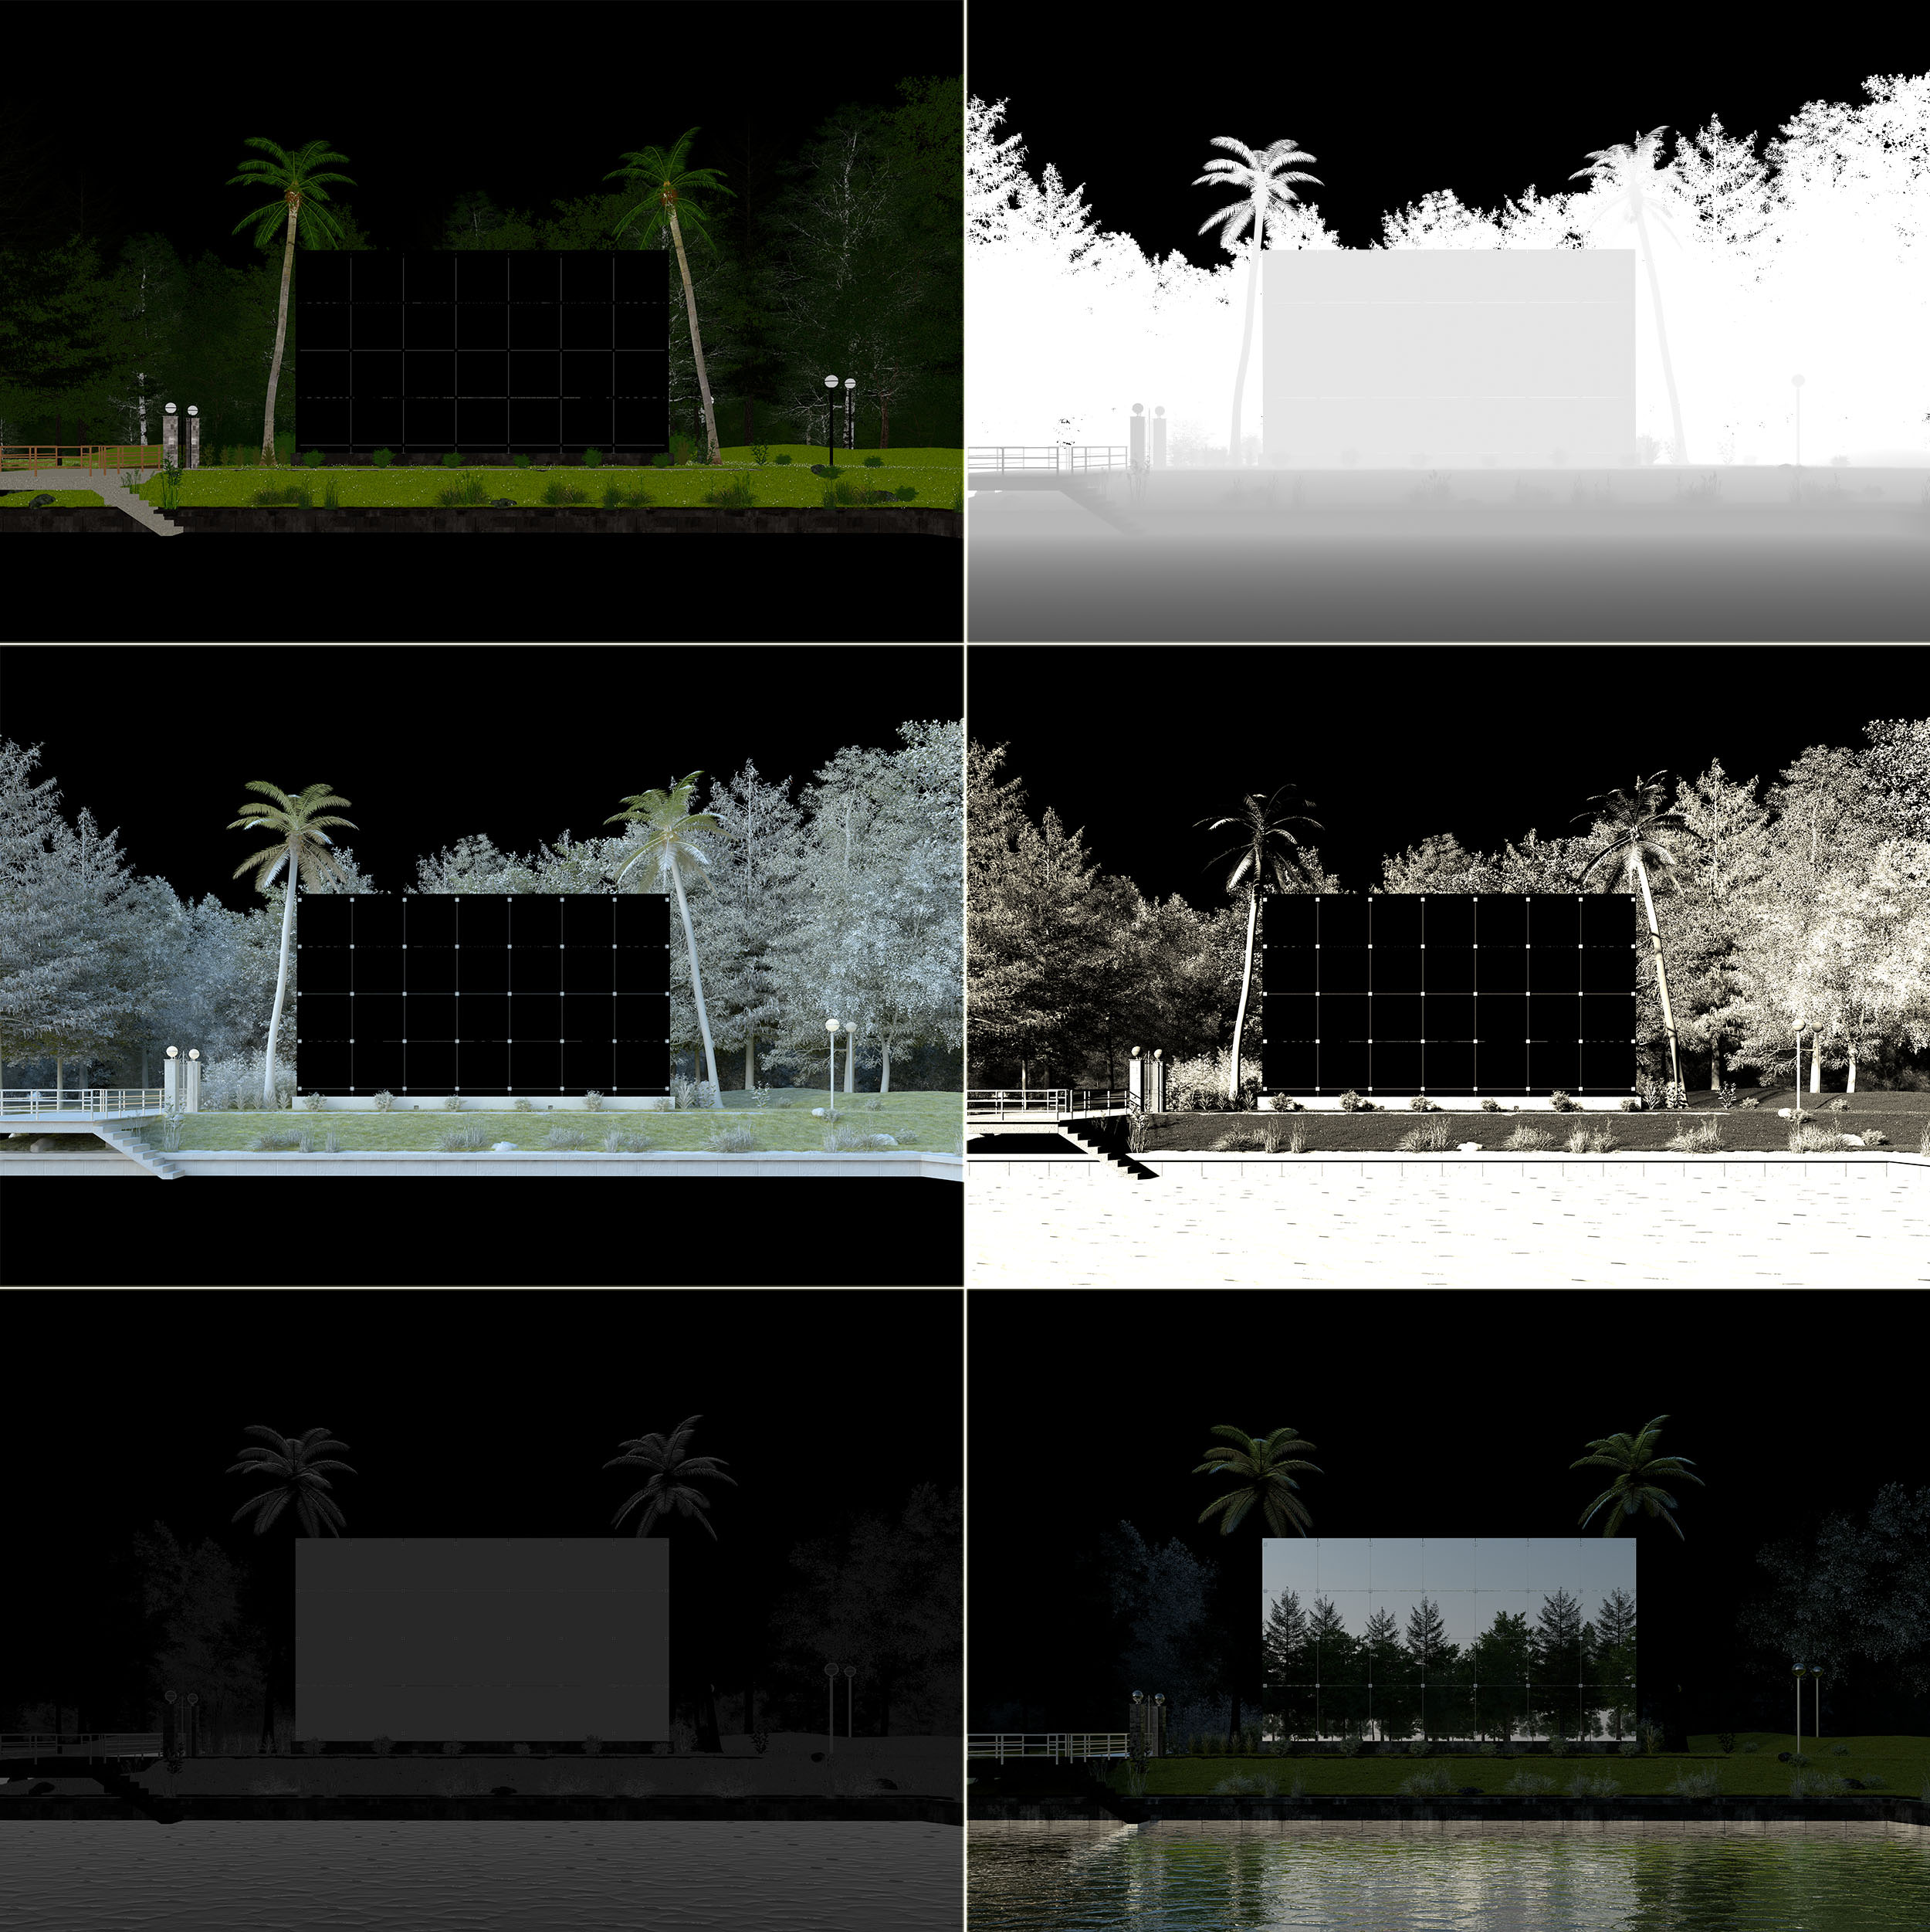
Stages of the Post Production :
1. Photoshop compositing (Screenshot layers).
2. Correcting rendering errors (RAW render).
3. Color correction (Comparison).
4. Levels and brightness (Comparison).
5. Color vision (Effects).
6. Photographic effects (Finishing image).


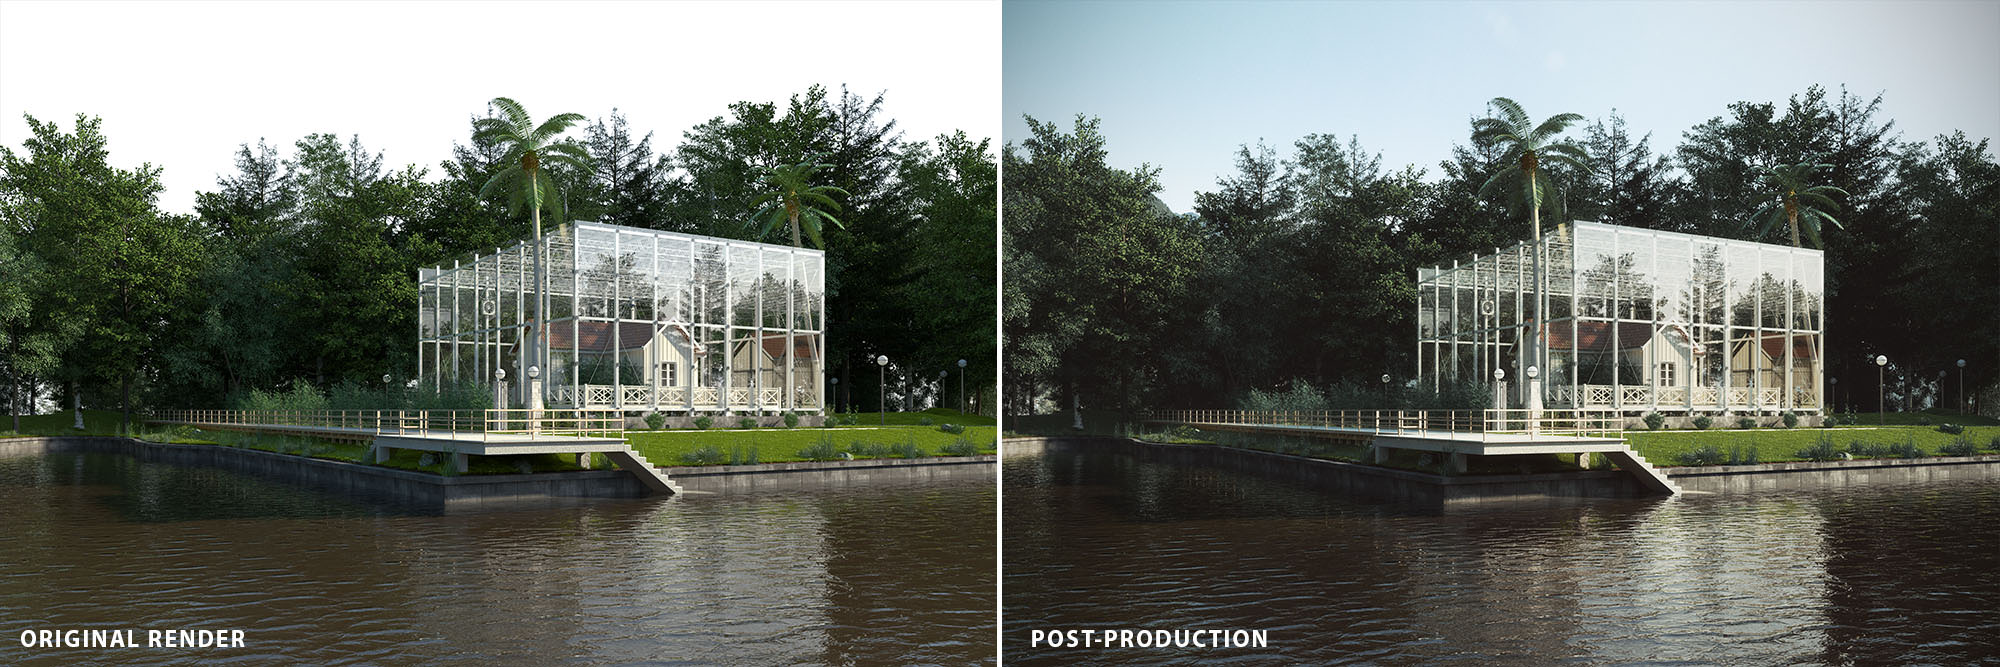
To give a vintage look to the image we used NIK software to apply film, dirt and vignette effects.


Before and after post-production
Finally, I would like to thank everyone in Lab Visualización Team that collaborated to make this project : Alex, David, Jessica, Francisco, and Esteban.
I will be happy to answer any further question you may have… just ask in the comment section below.

David Santos is a 3d Artist from Ecuador. He studied architecture for 5 years in Universidad San Francisco de Quito. He started using SketchUp since the beginning, and ArchViz has become his passion. He specializes in 3D visualization and have been working on his own since 2014, mostly on local projects.


Hi! Thanks for sharing, impressive work! At the stage of composing do you set up the scene’s composition in SketchUp before rendering or this is a part of post production? Do you use any kind of plug ins to control your camera in SketchUp?
Igor_Nesterov Hi Igor! Glad you like it, we set it up in SketchUp, we use Vray Tools Plug-In to frame the scene and with a simple image (Rule of thirds, divided in two, etc) we use as water mark to plan scene composition.
Great work, always excited to see photo-realistic renders produced with SketchUp. Keep it up!
A few questions:
– In Vray dome texture editor, under the UVW type you leave it at default UVWGenChannel. I always thought this has to be set to UVWEnvironment. Any explanation on your technique?
– Would you mind sharing antialiasing and Irradiance map settings? There doesn’t seem to be any noise in any of your render channels which kind of surprises me.
– And lastly, what were the render times and face count (it’s ok if you don’t remember such things)? I’m always struggling to make these exterior shots on SketchUp just for it’s limited capabilities on working with large polygon counts.
Once again, I’m truly amazed by the quality of these renders and hope to see more of these in the future. Good luck and thanks!
ltmartynas Hi, thanks a lot!! Glas you like it! We made a big effort! We push some limts thou.
– Yes! Totally, it has to be UVW GenEnvironment! That’s a mistake, we have to correct that screenshot.
– Yes! Sure, I attach the configuration. In this scene noise come from HDRi configuration, that’s why it was on 64 subdvs.
– SketchUp files are heavy it takes like 10-15 minutes to just open it. Are 350 mb aprx for each set, dusk scenes, daylight (Vray Sun) and closeups.
– Face count is 24 635 448 (24+ Million)
– Render times were approximately 10 – 12 hours each, @4000 px
We have some other projects in mind! Hopefully we can find some time to start working on it! Thank you for commenting!
DavidSantos Thank you for answering!
And I have to say… wow, 24M faces 😮 You must have a killer workstation to render such huge model. Anything above 1M crashes on my system.
Thanks for sharing additional info and other settings. Although they seem pretty low (only 4 max subdivs on image sampler) this seems to do the work for you and that’s great.
Hope to see more work from you soon!
Igor_Nesterov hi, for framing or composition: you can put any kind of grid in the style slot / watermarks… just create a grid (rule of thirds for example save as .png) you can turn it of whenever you want
Thanks for sharing David. Impressive work.
Would you care to elaborate on why you choose the Vray Material in some situations instead of Standard material? You wrote that it had something to do with what level of detail that was required regarding the wood in the scene. So do you choose Vray material when you need a high detailed texture? What is it that you can’t do with the standard material regarding level of detail?
Looking forward to seeing more stuff from you. Keep up the good work!
David, thanks again for another great tutorial! Being a SketchUp + VRay user myself, its very encouraging to see renderings of this level being produced from those programs (SketchUp specifically).
I had a few questions about your proxies. Where did you download them and how did you get them into SketchUp? Did you open them in a program like 3ds Max and export them as VRay Meshes? I would love to hear your workflow, as this is something I’ve recently been struggling with.
Once again, thank you and keep up the fantastic work!
MartinWahlberg1 Hi Martin! Vray Material we usually use when we want a detailed result, in fact you can get similar results with both materials but since a while we have been using Vray Materials to improve detailed shaders, I feel that are better optimized and preserve detail in a better way.
JackBlythe Thanks!! SketchUp it’s a powerful tool! You just have to unleash it’s power! 🙂
Proxies we use are often exported from a 3ds Max model, we export it as .vrmesh, it works perfect in SketchUp. Sources are many, Evermotion, VizPeople and 3DMentor, those are very detailed models and works exactly as you see them in the images. 3D Warehouse has also some good models if you search.
Thanks again for your comment!
DavidSantos MartinWahlberg1 Ok thanks for your answers. I’ll make some detailed testing myself to see if I come to the same conclusion. Thanks again!
Amazing work!!!, and great tutorial.
I had a question: how did you render those “clay images” that have edge lines? Every “making off” have 1 or 2, although, they use different programs.
Again, amazing job, and I am truly amazed by your work with SketchUP and V-Ray.
DavidSantos JackBlythe Absolutely in love with this piece of work. Is there any tutorial on how to use proxies like trees, shrubs, grass, etc. in Sketchup Vray? I am struggeling to find a source. Kind regards, Robin
what species of grass did you use near the water edge. Its sort of a big tall grass family???
David,
Amazing work, as always…really, just beautiful.
I was wondering if you could elaborate on your material workflow. Specifically, what steps do you go through to edit your original diffuse map to create reflection, bump, and displacement map? Do you have general rules or specific steps that you reference for creating each of these types of maps?
Amazing work as always especially when it is done with skp vray! i have a few questions by the way,
how do you do that clay render with blue color on specific materials? is it done only with override material?
when using dome light as a lighting and reflection, do u turn of the environment(GI and refl/refrac)? can you show us your environment tab??
why do only some vegetations have reflections while others have not? does having refl on all vegetations add a lot to render times as well?
once again i am very impressed with this making of and your workflow! keep up the good work David!
JanRealServantes I think he used a AO or clay render and then use SU layer>color by layer. Then put your subject for highlight on different layer and color this different. Then overlay the clay/AO render in any image editor
JanRealServantes
I made a quick example for you
https://www.dropbox.com/s/vot5djm33u7q4g2/color-by-layer-SU.png?raw=1
https://www.dropbox.com/s/ykw097f1c8axe5m/color-by-layer-SU_PS-overalay.png?raw=1
JanRealServantes Also for a cleaner effect turn of edges and profiles in the SU style panel. This way the objects are drawn in solid color with no edge lines.
JanRealServantes Hi! Thanks a lot for your words. The clay renders are made using a pure white color in the environment tab (GI and BG), no other light added and no Sun. Then in photoshop I mix the green part model with the complete scene with a Multiply mix. And of course Override material.
Nope, with the Dome Light active, Environment Tab is deactivated (GI and BG).
Yes, only vegetation that has an important scene impact has reflection, massive vegetation as trees in the background don’t because render times get higher.
Thanks a lot!! Tell me if you have any further question.
rombout JanRealServantes Yes! That’s it!
DavidSantos what species of grass did you use near the water edge. Its sort of a big tall grass family???
Effin’ Awesome