


Making of HOVER ‘3D Grid’ by Jamie Holmes
The 4th runner-up winning entry of the HOVER architectural visualization challenge was not the typical thing one would see in such events. Jamie went all out with his concept and Im very happy to publish the making of his 3D Grid Suburb scene. In this tutorial, Jamie describes his workflow using 3D Studio Max and Mental Ray as his main tools. I hope you’ll enjoy this article, learn from it and share your thoughts by commenting at the bottom of this tutorial page.
Jamie participated in the HOVER Challenge, winning 4th Runner Up Award for his entry. Jamie is director and co-founder of One to One Hundred Architectural Visualization Studio. Visit Jamie’s HOVER Challenge thread to follow as you read this tutorial
Concept
My concept stage for this competition was pretty quick as I wanted to get cracking with the modeling with no delay. Because Ronen had supplied some great Prefab parts I chose to use these but to place them in an unconventional way. I may have put myself at a disadvantage early on by using the prefab too explicitly meaning I did not alter the parts in any way, I simply rearranged them. So I felt I may have limited myself in terms of design.
I created a 3-dimensional grid that occupied these prefabricated units within its void in a non uniform manner. This would mean a series of complicated walkways and servicing in between would have to be implemented. By keeping the structure very minimal and having the prefab units seem quite solid I hoped to achieve a sense of HOVERING.
My vision was to create a residential building that was more open than the conventional closed in housing blocks we commonly see probably for practical reasons. I wanted to create a green 3-dimensional suburb if you will. There would be outdoor breakout spaces on the various levels.

The first thing I did was a quick hand drawn sketch which I quickly mocked up in 3dsmax (I used 3dsmax 2011 for this competition). I felt my concept was pretty basic but still had some uniqueness as I was tackling a larger building with various components. I felt that by massing it up in 3dsmax I could quickly understand how the different elements would fit together and see if I had enough negative space to create the Hover feeling I was after. I feel it is a lot easier to do this in 3D rather than 2D.

After doing this I realized I was on the path I wanted to head in. At this time I could have explored different options but I was very much into my first idea and didn’t want to get to bogged down in the design process which was secondary in this competition. However, given the exceptional work that was completed for the competition I possibly should have spent a little more time here.

Modeling
Building + Structure
Besides the initial mockup for the concept the first thing I modeled was the Units to be suspended in my ‘3D Grid Suburb’. I downloaded Ronens Model kit provided for the competition which had some great components. I basically used these unchanged – I added a little extra detail to the roofs only visible from above and a little detail on the interior such as the roller blinds and a vent at the base of the window joinery. I arranged the different Prefab components to make 2 versions of a 1 bedroom unit, 2 bedroom unit and a larger 3 bedroom unit. Each unit had a stair that was used for access from beneath the unit. I later made another version of each without the stair as this was not necessary on the upper levels of the building.

I modeled the units first so I could lay them out in the grid and set up some camera angles with only a white override material and a glass material. I rendered some quick shots from various angles to explore the grid I made.
I then took these renders in to Photoshop and roughly sketched over the top where I might place other elements such as vertical circulation and landscaping. During this process I had a play with a few basic light and color situations for the scheme – this never really amounted to anything. I had seen it done before and it looked like fun but it never really worked for me.

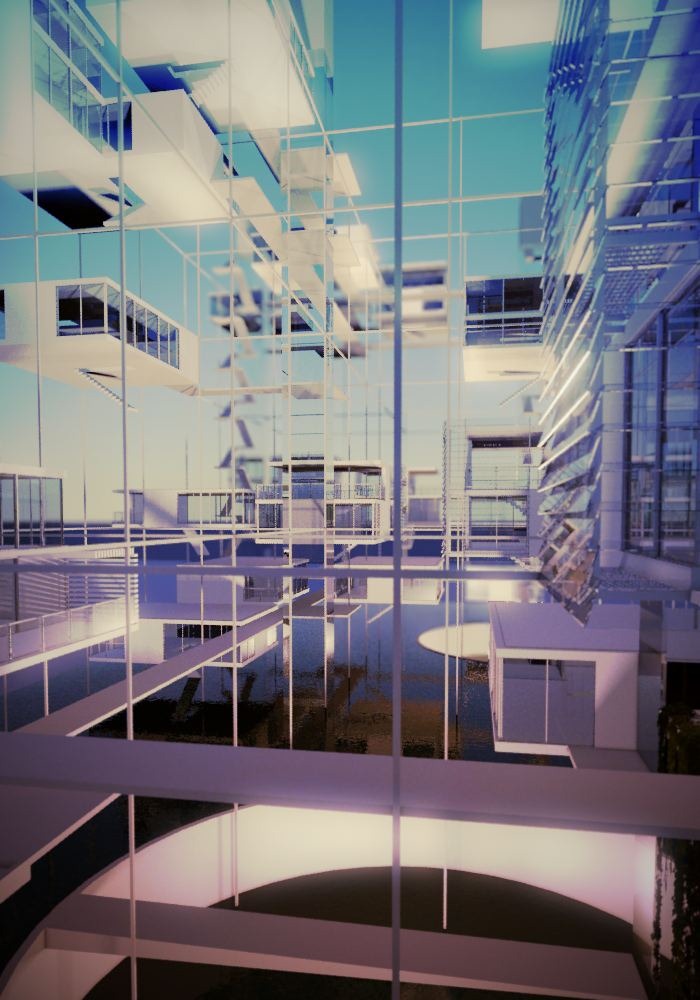
The next part of the model I focused on was the circulation – the lifts and the suspended walkways. I modeled the basic shape and layout for each level making sure they were offset enough to create too many solid parts to my potential compositions. I wanted to make sure I had enough negative space to express the hover feel so I made my lifts glass and the walkways to be constructed out of mesh with wire balustrading. I didn’t want to bombard my scene with too much chunky parts. Everything in the scene is straight forward polygon modeling. I used splines to create the wire balustrading and suspension wires and then gave them thickness.

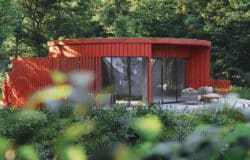
Site & Surroundings
I decided early on that my building would be situated in a small clearing surrounded by forest – I wanted to keep the landscaping fairly simple as the building had a lot going on. The ground is a simple plane in a circular shape with the outer edge raised to get a sunk in feeling. I used Forest Pack by iToo Software to create the forest. Forest Pack is very easy to use and has some very powerful features. iToo Software to create the forest. Forest Pack is very easy to use and has some very powerful features. Basically Forest Pack uses splines as boundaries to contain objects which then can be attached to the surface of another object.
I decided to go with one type of tree in the forest (a Pine) and use forest pack to add a hue variation to the color as well as rotation and scale. Again I wanted to keep the tree line very simple to avoid it competing with the architecture.


The grass that surrounds the base of the building was done using a technique that has a few tutorials floating around on the net but I will go through it again (I just wanted to make sure everyone knows that I didn’t come up with this technique!)

First I model a couple of blades of grass from a plane with a few subdivisions than add a Taper modifier bend modifier. It is usually a good idea to map the blades before you add the modifiers. At this point you could give the blades different material IDs to add more variation to the grass patch.
Once you have a few variations you then create a PF (Particle Flow) Source located in the [Geometry > Particle Systems] in the drop down menu. With the PF Source selected in the Modify tab you can open Particle View. This opens another window where we basically create a patch of grass by dispersing particles across a selected surface.
In my case I used a circular (cylinder converted to an editable poly and the bottom and sides loped off) plane as the position object.
You can see the PFlow parameters I used (Event 001) below.

A very brief description of the operators
-
Birth – The amount of particles / blades of grass. Make sure you set Emit Start and the Emit Stop to zero.
-
Position Object – The object in which the particles are dispersed across
-
Shape Instance – The object you are dispersing – in this case the blades of grass. You can also use groups in this part.
-
Scale – Applies random and other scales to the dispersed objects
-
Rotation – Applies random and other rotations to the dispersed objects
-
Display – How the particles are displayed. Can be geometry, dots etc.
You can play with these parameters to get the desired results for your grass patch. Once you do one it is very fast to do variations of grass patches – I did a shorter patch and a longer patch to make the grass look a little more wild in places.
Once you are happy with your grass patch you need to turn it into a mesh. To do this you create a Mesher object found in the [Geometry > Compound Objects] in the drop down menu. simply click and drag in the view port to create – size does not matter. Once created in the Modify tab under Pick object select the PF Source – This will create a Mesh of the PF Source – You can then turn this into an editable poly. You will also need to add any material you created for your grass to the new Mesher object.
Having created a couple of variations of grass patches I then used iToo Software Forest Pack to scatter the grass in their larger clumps to create an overgrown meadow or flood plane in which the architecture was situated. Like the Pine forest I used Forest pack to rotate, scale and add a random hue change across the grass material. Forest Pack also has a great feature where you create clusters of the objects you are scattering.
The Ivy
Nothing fancy here, I just used the Ivy Generator program for this. I have a screenshot of the ivy settings below.

This little piece of software is actually very good. It takes a little time to get use to but basically you export your model you want the ivy to grow on from 3dsmax as a OBJ file set to triangles (not Quads). You then import that file into Ivy generator then double-click a spot on the model and then hit grow. The ivy magically grows and then you hit birth to see the actual mesh. It does take a little time playing with the parameters to get the Ivy looking how you want it to. Once it does look how you want it to then export back to 3dsmax.
You can do the same thing, and probably better, with the 3dmax integrated gw::ivy script
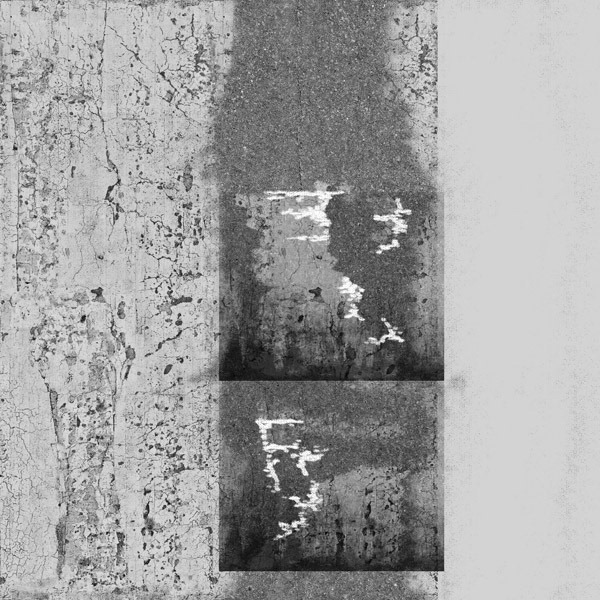
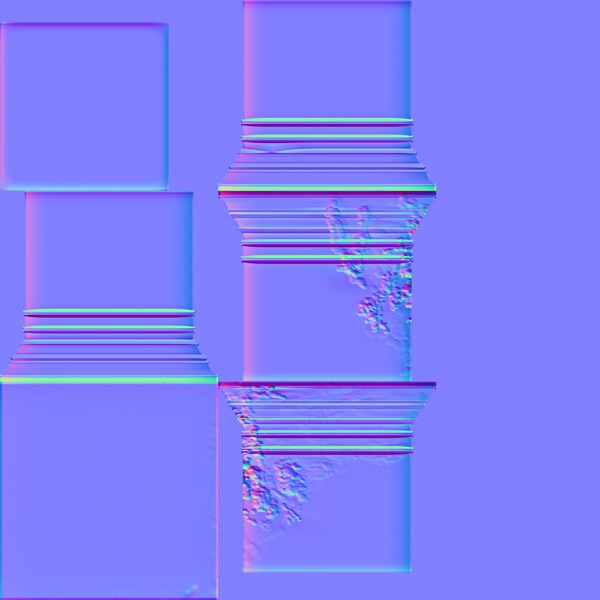
Ruins
The Ruins model was a basic building corner detail modeled in 3dsmax and then exported into ZBrush where I hacked at a bit to give it a beaten feel so it looked old and like ‘Ruins’. This part of my scheme was added quite late in the piece where I felt and along with comments in the forum that I was heading for a post apocalyptic setting. A new world was created out of the rumble of the old. It was quite token but I liked it.


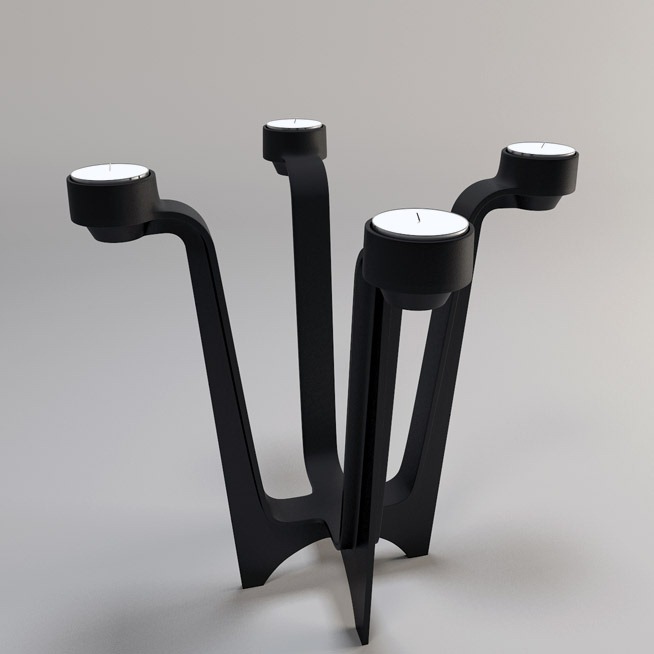
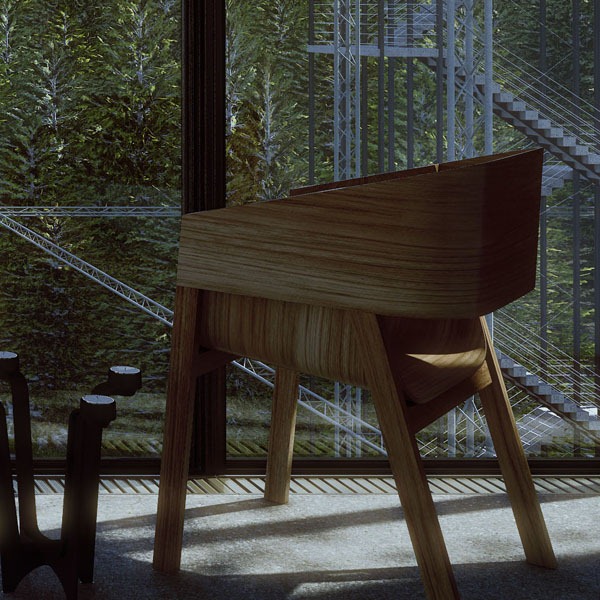
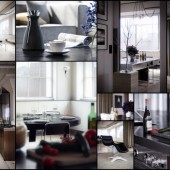
Furniture
Because my entries where exterior and on a large-scale I didn’t use many props or furniture. I wanted to use simple and ‘hard’ models to fit with the overall concept. My favorite prop used was the Crown Candelabra by Tom Dixon (only seen in an extra image I produced not for consideration in the competition) I modeled the candelabra in 3dsmax.

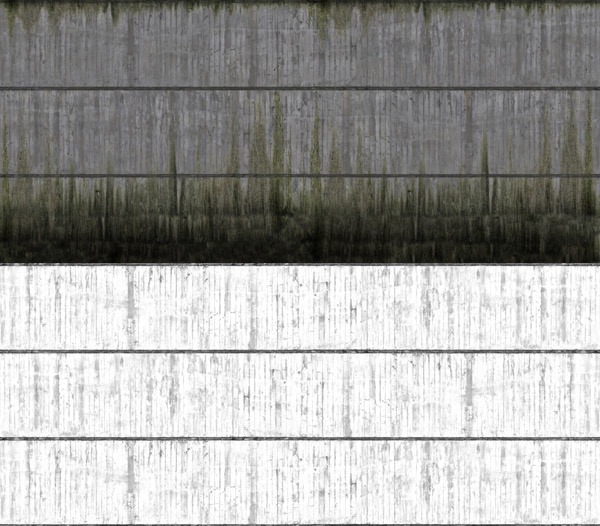
Texturing
I chose the architecture in my design to have weight so concrete was a good place to start – it seemed right to emphasize the hovering feeling with these Prefab units. Concrete maps represented most of the materials I constructed for the competition – and when I say constructed I mean altered. My starting point for the concrete maps was the Arroway Concrete textures pack. Arroway have great textures and these concrete textures are no exception. I edited the maps in Photoshop – I added a dirt algae green edge where water may have been and rust in places. I avoided using too much reflection on the concrete as this usually gives a new or recently laid look – I wanted my concrete to look a little rough around the edges.
Concrete Shuttering

Ruins – Diffuse, Normal & Bump

Allthe shaders in my scene were done using the Arch & Design shader. I like the freedom you have with this shader and I don’t really use any others. The best feature of the this shader is the rounded corners special effect. this takes a lot of the harshness away from ‘boxy’ models without having to add more geometry sending your poly count off the charts. You can create almost any material with this shader. Enough said.

Lighting
I used the standard Daylight system in 3ds max with MR Sun & MR Sky because I was using the Mental Ray render engine. This is part of my standard workflow when I am doing exterior renders using Mental Ray. It is easy to use but it limits the amount options you have when using it but it works for me. The only other light I used was for the exterior shot with the ruins in front. I used an Omni set to only include the ruins to add a highlight on the left-hand face. Although not all correct I felt it was needed to emphasize the shape and pick the destruction of the model which I went to great lengths to create.
I definitely would have liked to try some other lighting scenarios but my computer would not yield render times I could work with it – once again technology has beaten me down.
Rendering
Rendering Settings below

Not really much to show here – it’s all pretty straight forward but some note worthy render settings for this scene are
-
I used BSP2 for the raytrace acceleration. It seemed to work better with the scene poly count of 5,000,000 plus the trees and grass.
-
Sample filter was Lanczos to get a crisper result.
-
No GI, just Final Gather set at medium with the Interpolate over num. FG Points raised to 200.
I am using a Core2Quad with 8GB ram. It could be time to upgrade! I can’t remember exactly what the render time was but it was somewhere between 15 and 20 hours for a 4000px x 2800px image.
Post Work
All the post work for my entry was made in Photoshop – I didn’t use any plugins which is unusual for me. All I did was use a few color correction techniques that I learnt from a tutorial by Viktor Fretyan. I duplicated the raw render and beefed up the contrast using exposure in PS and made sure the areas where the sun was hitting were well exposed. I used Color balance to add warmth to the darker tones and a cooler tone to the mid-tones. The highlights remained untouched. I then blended this layer using Screen to the raw render and reduced the opacity till I was happy.
I guess the other major thing was that the Sky was added in Photoshop as well. I did actually render the image with the sky I used in the final image. However the sky renders out quite flat from 3dsmax and needed to be replaced.
I also added some scratches and some rust stains to add some more grit to the image. The blending mode for these layers was Hard Light. The glow of the sunlight was also emphasized in PS. Basically I selected the brightest parts of the image and copied to a new layer and added a glow layer style. The blending mode for this layer was Screen.
Raw Render

After Postwork

Two Cents
I really enjoyed this competition, both working on my entry and seeing what others were doing. Most of the winners were among my favorites. I hope I was able to share some useful information on how I achieved my final results. Over the last couple of years I haven’t noticed too many Mental Ray renders and it is pretty clear that VRay seems to be the renderer of choice. Since finishing this competition I too have started to use VRay and I am pleasantly surprised at how fast it can produce great results. Anyways I am ranting. I am, however looking forward to the next one.
Thanks Ronen, Bertrand and Zoran.
Jamie’s HOVER Challenge thread
You are welcome to comment on this article and ask questions using the comment box below!


You put in so much thought into your design, and your postproduction skills are very good! Good job!
Great entry and thank’s for the tutorial! I was also happy to see Mental Ray represented!
excellent tutorial, you given more idea about rendering and lighting.
how to run this script with max..?”gw::ivy script”,
extention (gw_ivy.dlo) not supporting.. please help me.
very nice