


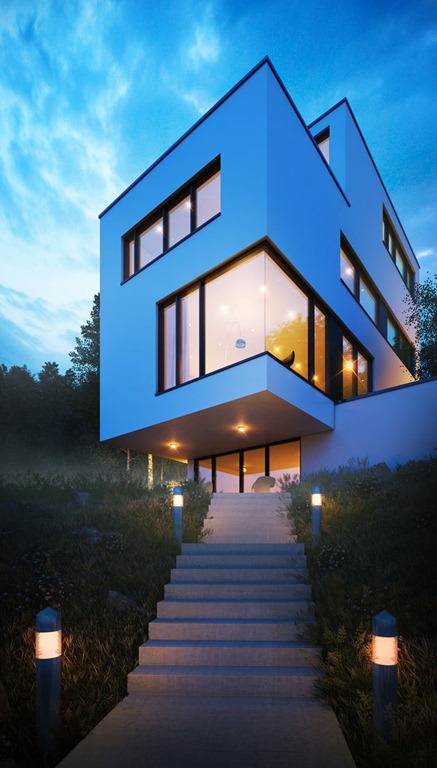
Making of House 2P
Mark La Frenais did a great dusk visualization of House 2P in Zagreb that was designed by SANGRAD + AVP Arhitekti. Done as a personal project, he based it on a day view photo but went all dusk with it and got a great result. He kindly shares with us a glimpse into the making of this scene here. Enjoy!

Author: Mark La Frenais
Mark La Frenais is an experienced 3d visualization artists that worked at Designhive, Glowfrog, Vyonyx, MARIS Interiors and currently works at Model Works Media in London, UK.
Introduction
My name is Mark La Frenais and I’m a 3D Artist working at Model Works Media in London. I have worked at a number of visualization and design companies over the years including Glowfrog, F10 Studios and Vyonyx. I feel privileged to have worked and still work with some of the best artists in the industry.
This Image of House 2P by SANGRAD + AVP Arhitekti is a personal project. I was browsing Archdaily for a few minutes with my morning coffee when I came across the House 2P project by SANGRAD + AVP Arhitekti and something appealed to me about the house. I can’t put my finger on it… maybe its elegant proportions or quirky angles, or perhaps that it would only take 5 minutes to model.
This Image is very simple and uses a straightforward workflow – modeling and texturing in 3ds max, lighting and rendering with V-Ray and Post Production with Photoshop.
Modeling / Texturing
The modeling only took an hour or two, thanks to it being (from this view anyway) basically a box, I saved as much reference photography for the house as possible, so the process will be as smooth and correct as can be.
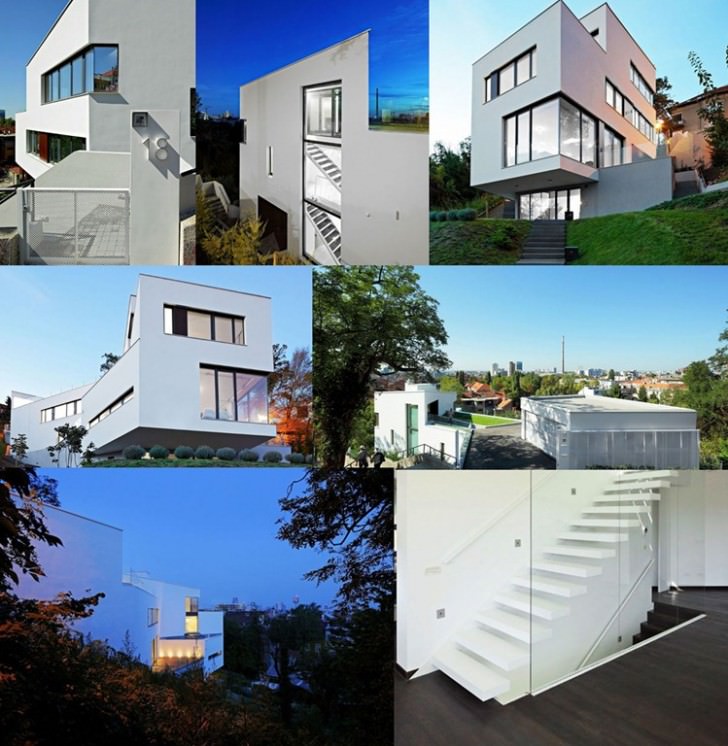
One of the photos was a front elevation, which I brought in to max and traced over. I then used 3dsmax’s camera match utility to align it to a photo close to the angle I preferred and modeled the remaining sides.
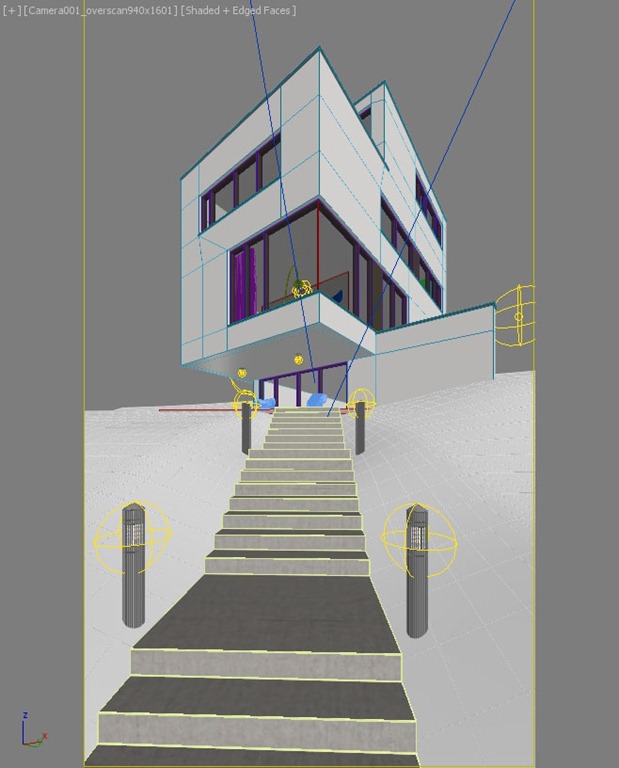
the landscape is also very simple – a plane which I converted to an editable poly and deformed to a slope.
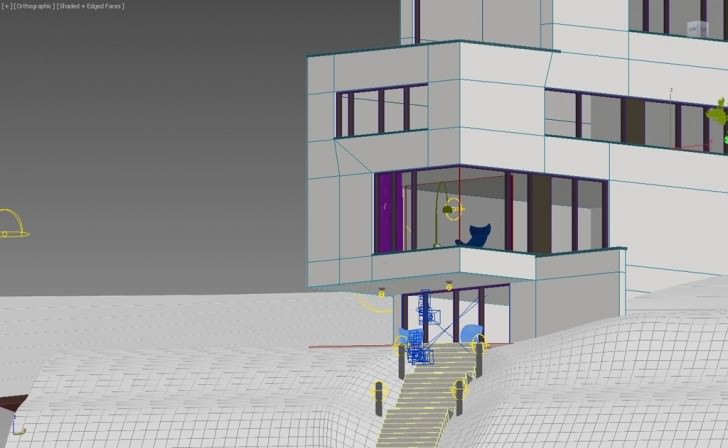
The houses’ materials are very simple, only really white stucco and glass. The white render is a basic V-Ray material with a bit of reflection to it with a low glossiness and a subtle concrete texture.
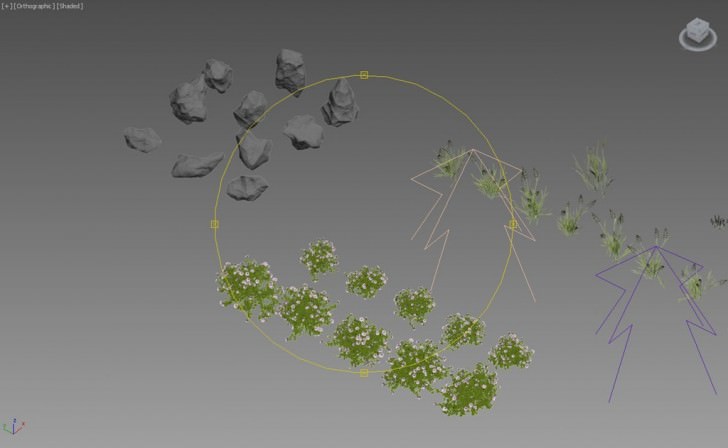
The fun part of the image was the scattering of the grass and vegetation. I was recently introduced to MultiScatter and I played for far longer than necessary fine tuning the grass, rocks, trees and flowers. It is a brilliant plugin and great fun to play with, it’s very intuitive and produced great results with low render times.
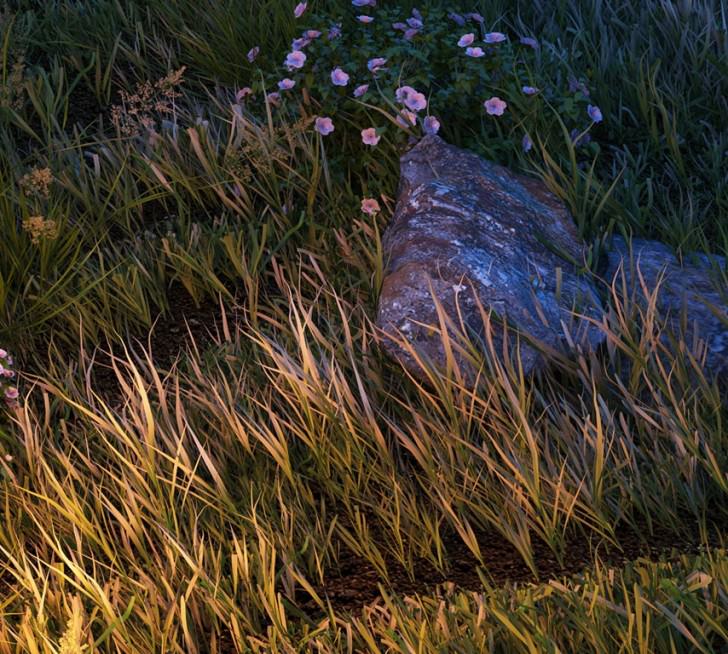
Sometimes I wonder how I survived for so long without a scattering plugin. The models were mostly content from iCube’s alpine and grass libraries.
Composition
Since I camera matched the image I already had a good starting point for the camera, however I felt it could be better. Lowering the camera and widening the field of view made it much more dynamic by really enhancing the angles at the top of the house.
Lighting
The scene is primarily lit with a V-Ray Dome Light using Peter Guthrie’s classic 2003 dusk blue HDRi. I generally leave the multiplier on 1 and adjust the exposure level in the camera to achieve the desired light levels. A more in-depth tutorial can be found on Peter’s very instructive blog or in Ronen’s post – HDR Image Based Lighting 3D Scene Setup.
HDR Image Based Lighting 3D Scene Setup
This short video is a follow-up on a comment made by alex_starc in the 10 Free HDRI Spherical Skies Maps post. He had issues with the sky being too dark in the render so I just recorded a short session of how I setup my scene with Image Based Lighting (IBL) using and HDRI map. Hope this helps.
I used V-Ray sphere lights for the interior and the exterior lights and used a nice warm color to contrast with the cool tones of the sky.

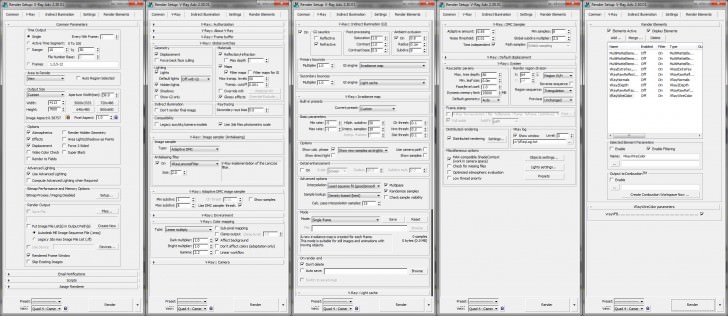
Rendering
V-Ray is my general ‘weapon of choice’ for rendering. I try not to spend ages twiddling every ‘knob and dial’ and I probably could get faster render times and quality if I really honed the settings, but I wanted to get it in to Photoshop where the fun generally starts and not lose interest tweaking settings. It’s a fairly straight forward IR + LC set up. One thing I do like is render elements I get as many out as possible – just in case!
Post Production
This is usually the most interesting stage of a project for me. Having worked at Vyonyx I realized that absolute anything is possible in Photoshop… Anything! You can work with good render or a bad render or even NO render!
Personally, I like a good base render to start with but sometimes that isn’t always possible.
For exteriors, the first thing I do is replace the sky. I used the back plates supplied with the HDRi and looked at interesting cloud variations and patterns, one thing that is always important is making sure that the perspective on the clouds matches the perspective on the image and the sky usually has to be distorted and warped in to place.
Composting photography… whether people, trees or skies into a CGI always means a bit of correction. One wrongly lit or out of perspective element can really let an image down completely.
These are the various channels outputted from V-Ray…
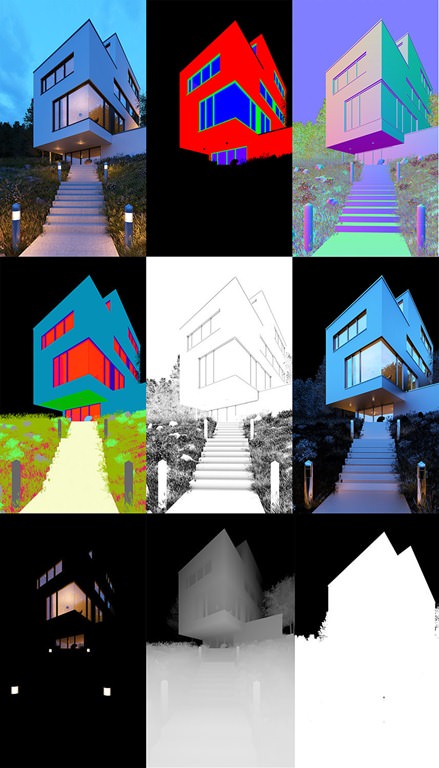
The next thing I did to is add the ambient occlusion pass on a multiplier layer as this really helps define all the nook’s and cranny’s of the model and adds a nice bit of contrast. It particularly helped add weight to the grass.
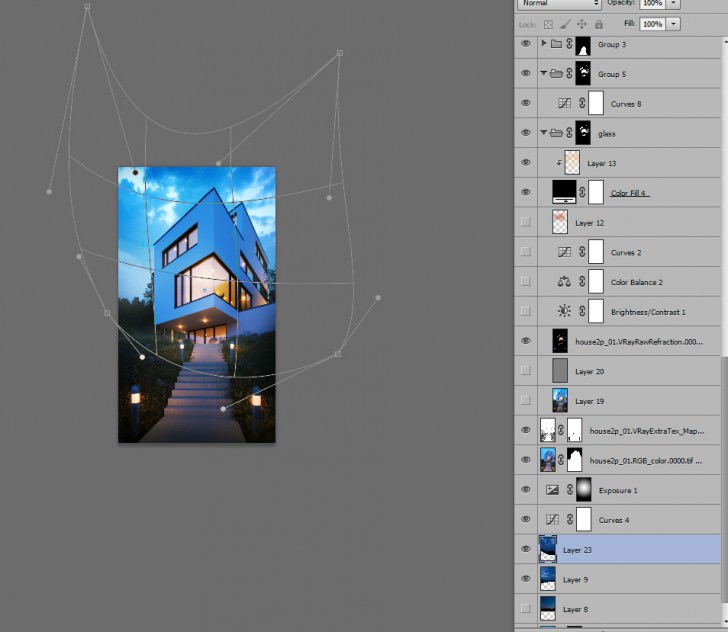
Since a large percentage of most modern buildings is glass it is usually worth spending time on this aspect. I had a channel for the glass and created a new folder, with the glass masked off, into which I added the refraction pass with some slight opacity. This is because at night you can see inside a building with the lights on and I wanted to emphasize that point.
It is worth modelling double glazing, like Peter Guthrie shows us in many of his works, as this added a nice subtle double reflection. I also created a new layer set to vivid and using a soft brush painted in some warm light with color sampled from the render… again, to enhance the feeling of a warm interior.
The next thing I like to do it try and give my images a feeling of depth, there is always a bit of atmosphere between the camera and subject playing it up can help add mood and drama. Using the z depth pass as a mask I created a new layer and started brushing on a bit of fog initially to try to push the trees back at bit, but I liked the effect of a cool night with the fog rolling in so went a little heavier with it.
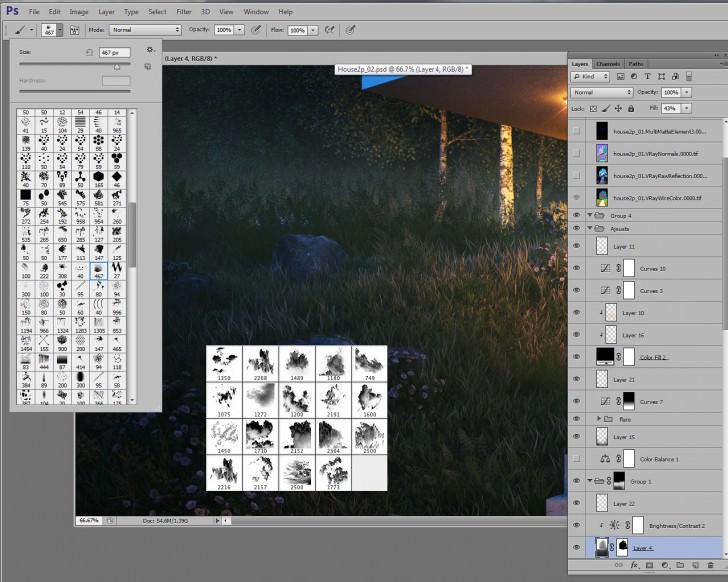
I made custom brush for the fog. There is a great tutorial about that at the Vyonyx website – Tutorial 02 : Painting Realistic Clouds in Photoshop.
Once all the elements were in, I added a few adjustment layers. For color correction I used curves and color balance along with hue and saturation. this helped tie the layers of the image together and makes for a more tonally unified image.
I also created a black fill layer and set it to color dodge and a layer on top of that using the black fill as a clipping mask and paint in more light and as a final flourish added a bit of twinkle lens flares.
I made the lens flares in video post but you can find them anywhere CGTextures, Flickr, Gobotree and Shutterstock are great resource for photography.
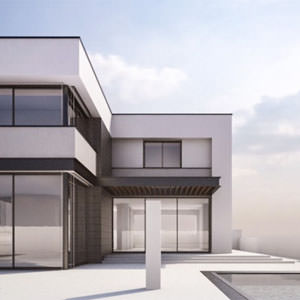
So this is it… this is the final shot!
Thanks for reading!
fantastic !